
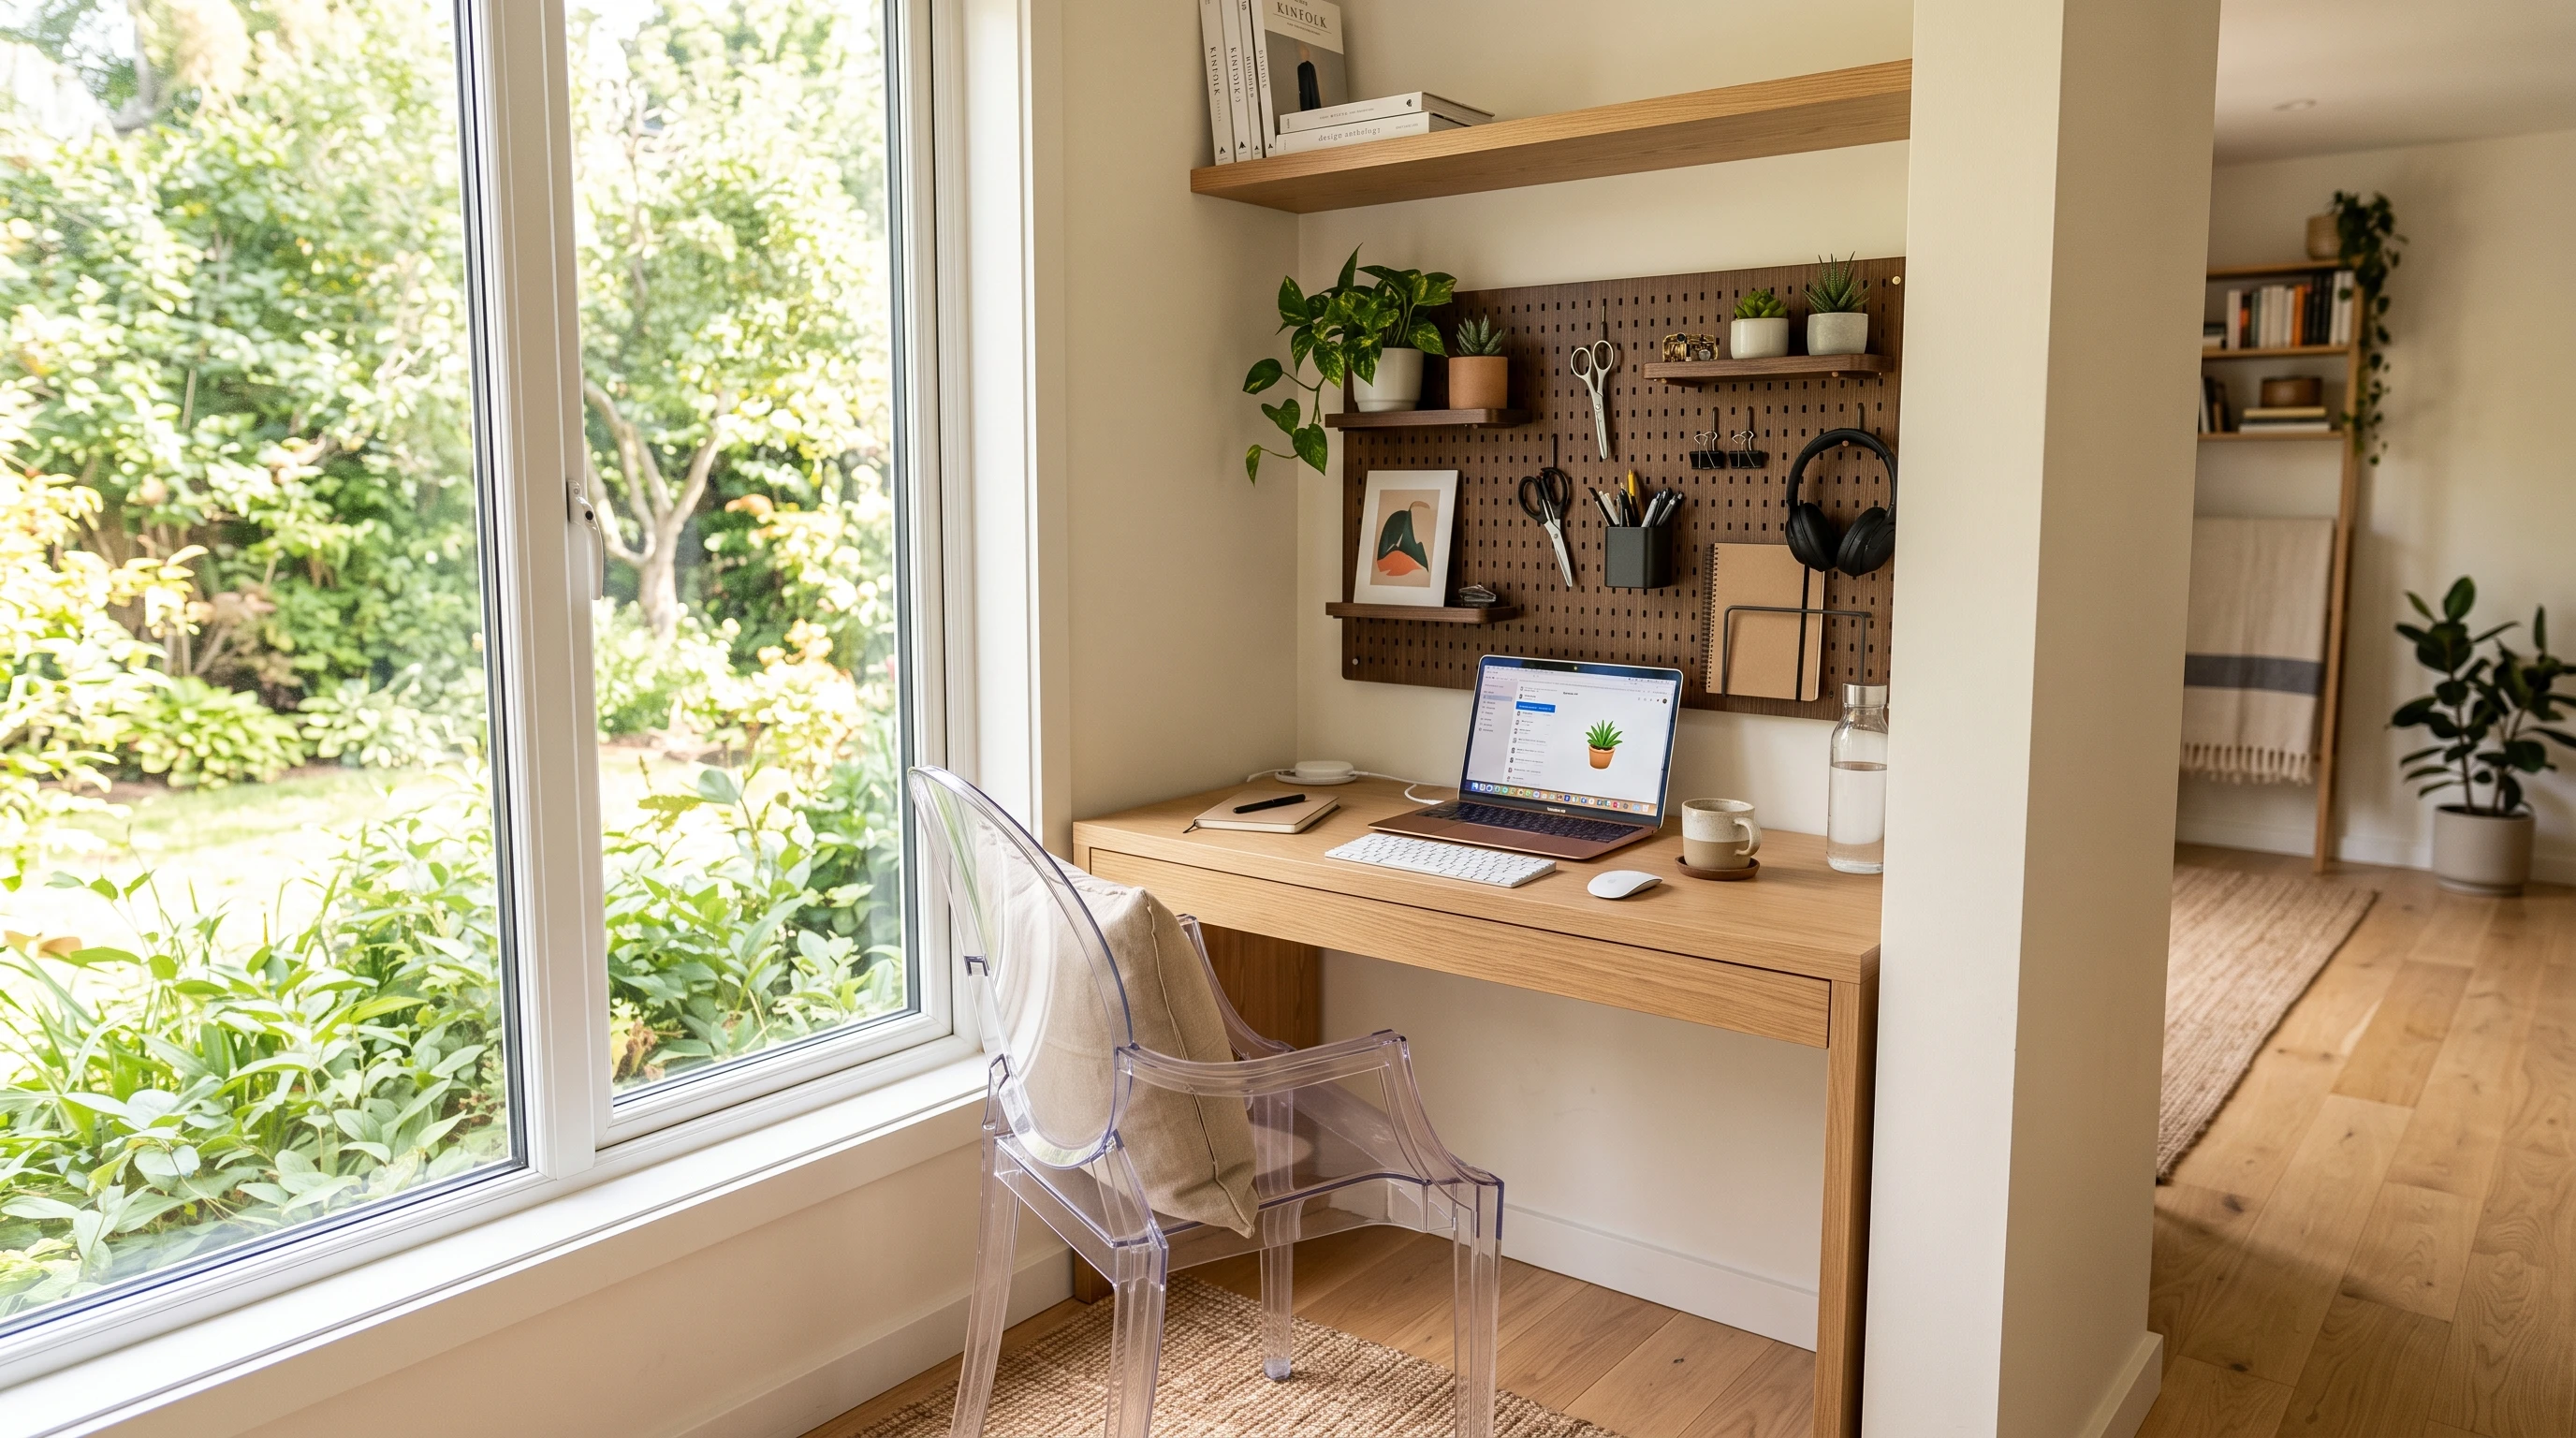
Working from home has become a permanent lifestyle for millions, but finding the space for a dedicated home office can feel impossible if you live in a small apartment or a packed house. When your dining table becomes your desk, the boundary between your professional life and your personal relaxation completely disappears. This leads to constant visual clutter, a lack of focus, and inevitable burnout. You need a dedicated workspace to signal to your brain that it is time to work, but you shouldn't have to sacrifice a massive portion of your living area to get it.
Welcome to Vindy Space! We believe that you do not need an entire spare bedroom to build a highly productive, incredibly aesthetic workspace. The secret to small-space office design is utilizing vertical real estate, multi-functional furniture, and clever visual tricks that make a desk blend seamlessly into your home’s existing decor when you clock out. Whether you have an empty closet, a blank hallway wall, or just a tiny corner in your living room, here is your ultimate guide to 7 brilliant ideas to create a highly productive home office in a small space.
Table of Contents
1. The "Cloffice" (Closet Office) Transformation
Wall-to-Wall Desktops | Bold Accent Interiors
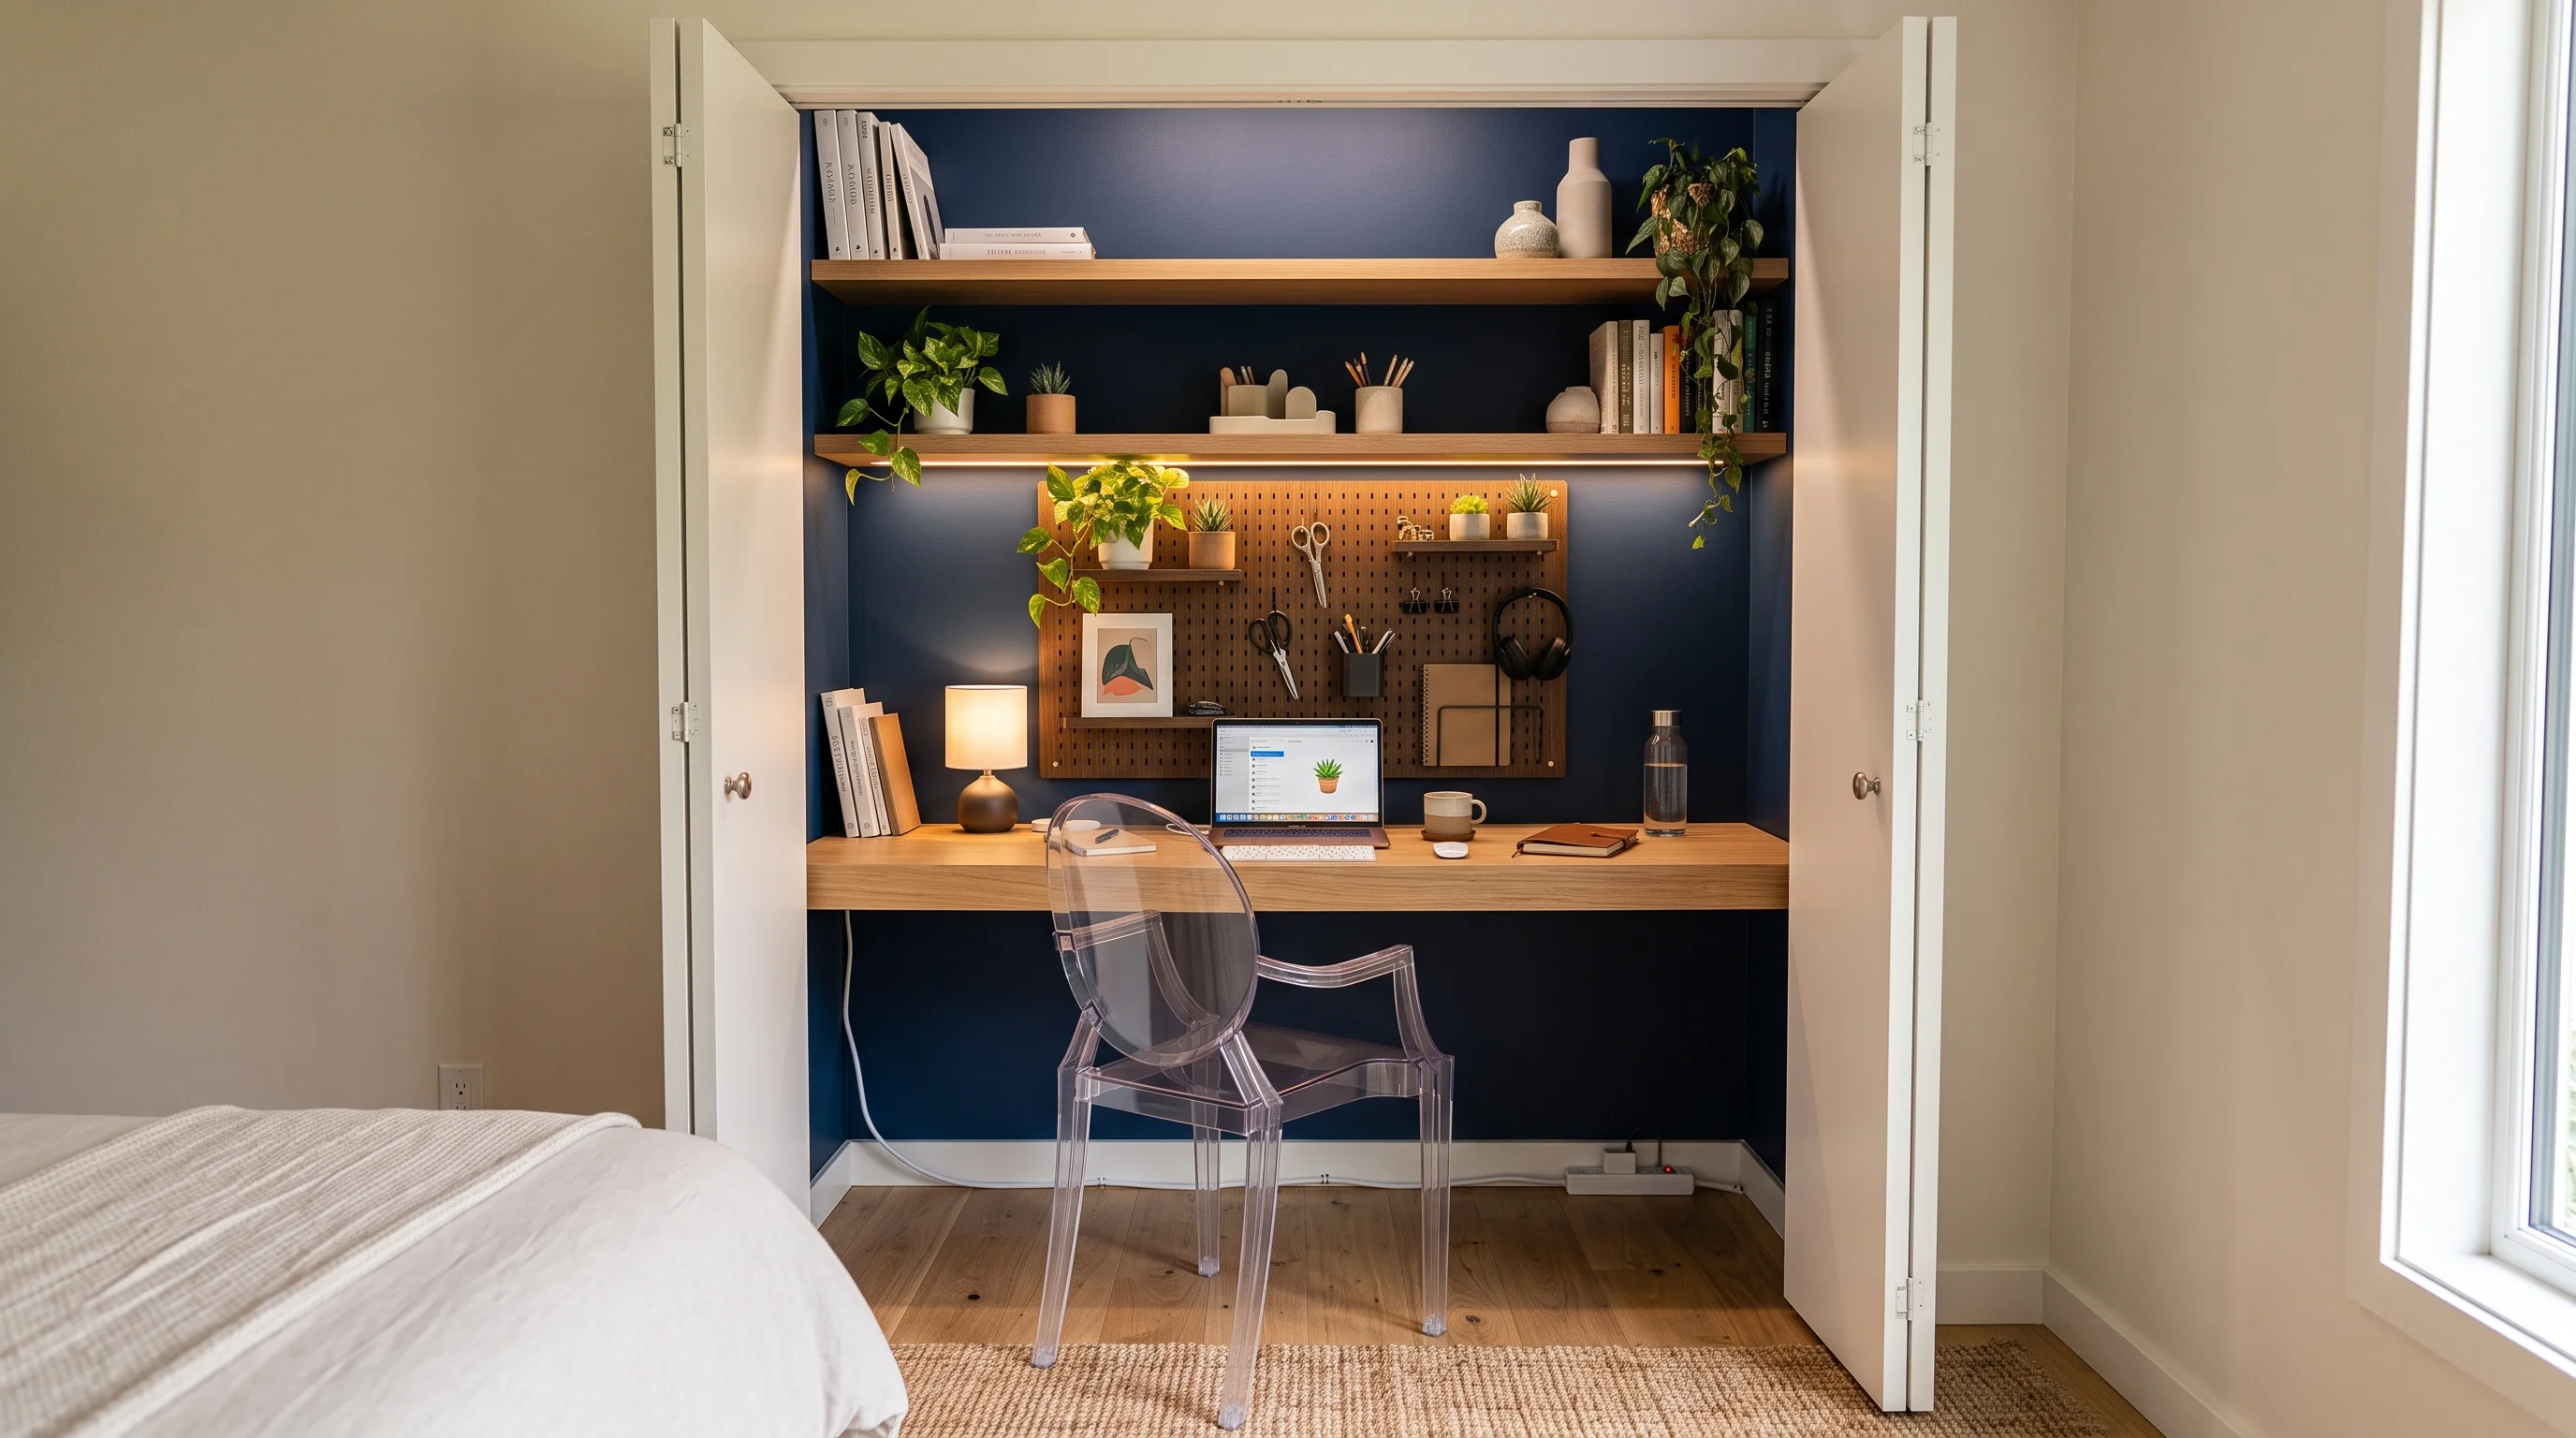
- Why it Works: If you have a spare, underutilized closet in your hallway or guest room, you are sitting on the ultimate small-space home office goldmine. It utilizes completely wasted architectural space without eating up a single inch of your actual room footprint. Best of all, at the end of the workday, you can simply close the closet doors, physically and visually shutting away your work life.
- How to Style: Create a stunning, highly organized micro-office built directly into a standard closet. The desk spans wall-to-wall, with floating shelves above for storage and decor. Paint the inside of the closet a deep, contrasting accent color or apply a bold peel-and-stick wallpaper to visually separate it from the rest of the room.
📝 Quick Steps: Remove the existing hanging rods and lower shelves. Paint the interior or apply peel-and-stick wallpaper. Mount a thick piece of finished plywood wall-to-wall as your desktop. Install sturdy floating shelves above the desk for storage.
🛠️ Tools & Materials: Thick finished plywood, heavy-duty L-brackets, peel-and-stick wallpaper. Circular saw, drill, stud finder, level.
🧽 Maintenance: Wipe down the wooden desktop weekly. Keep the doors open during the day to ensure proper airflow around your electronics.
⚠️ Safety & Building Codes: Ensure the heavy wooden desktop is screwed directly into the structural wall studs on all three sides. Drywall anchors will fail under the weight of a person leaning on the desk.
💡 Contractor's Secret: Make sure to route a heavy-duty extension cord cleanly along the baseboards into the closet to power your monitor and laptop charger!
2. The Floating "Murphy" Fold-Down Desk
Wall-Mounted Cabinets | Hidden Laptop Workstations
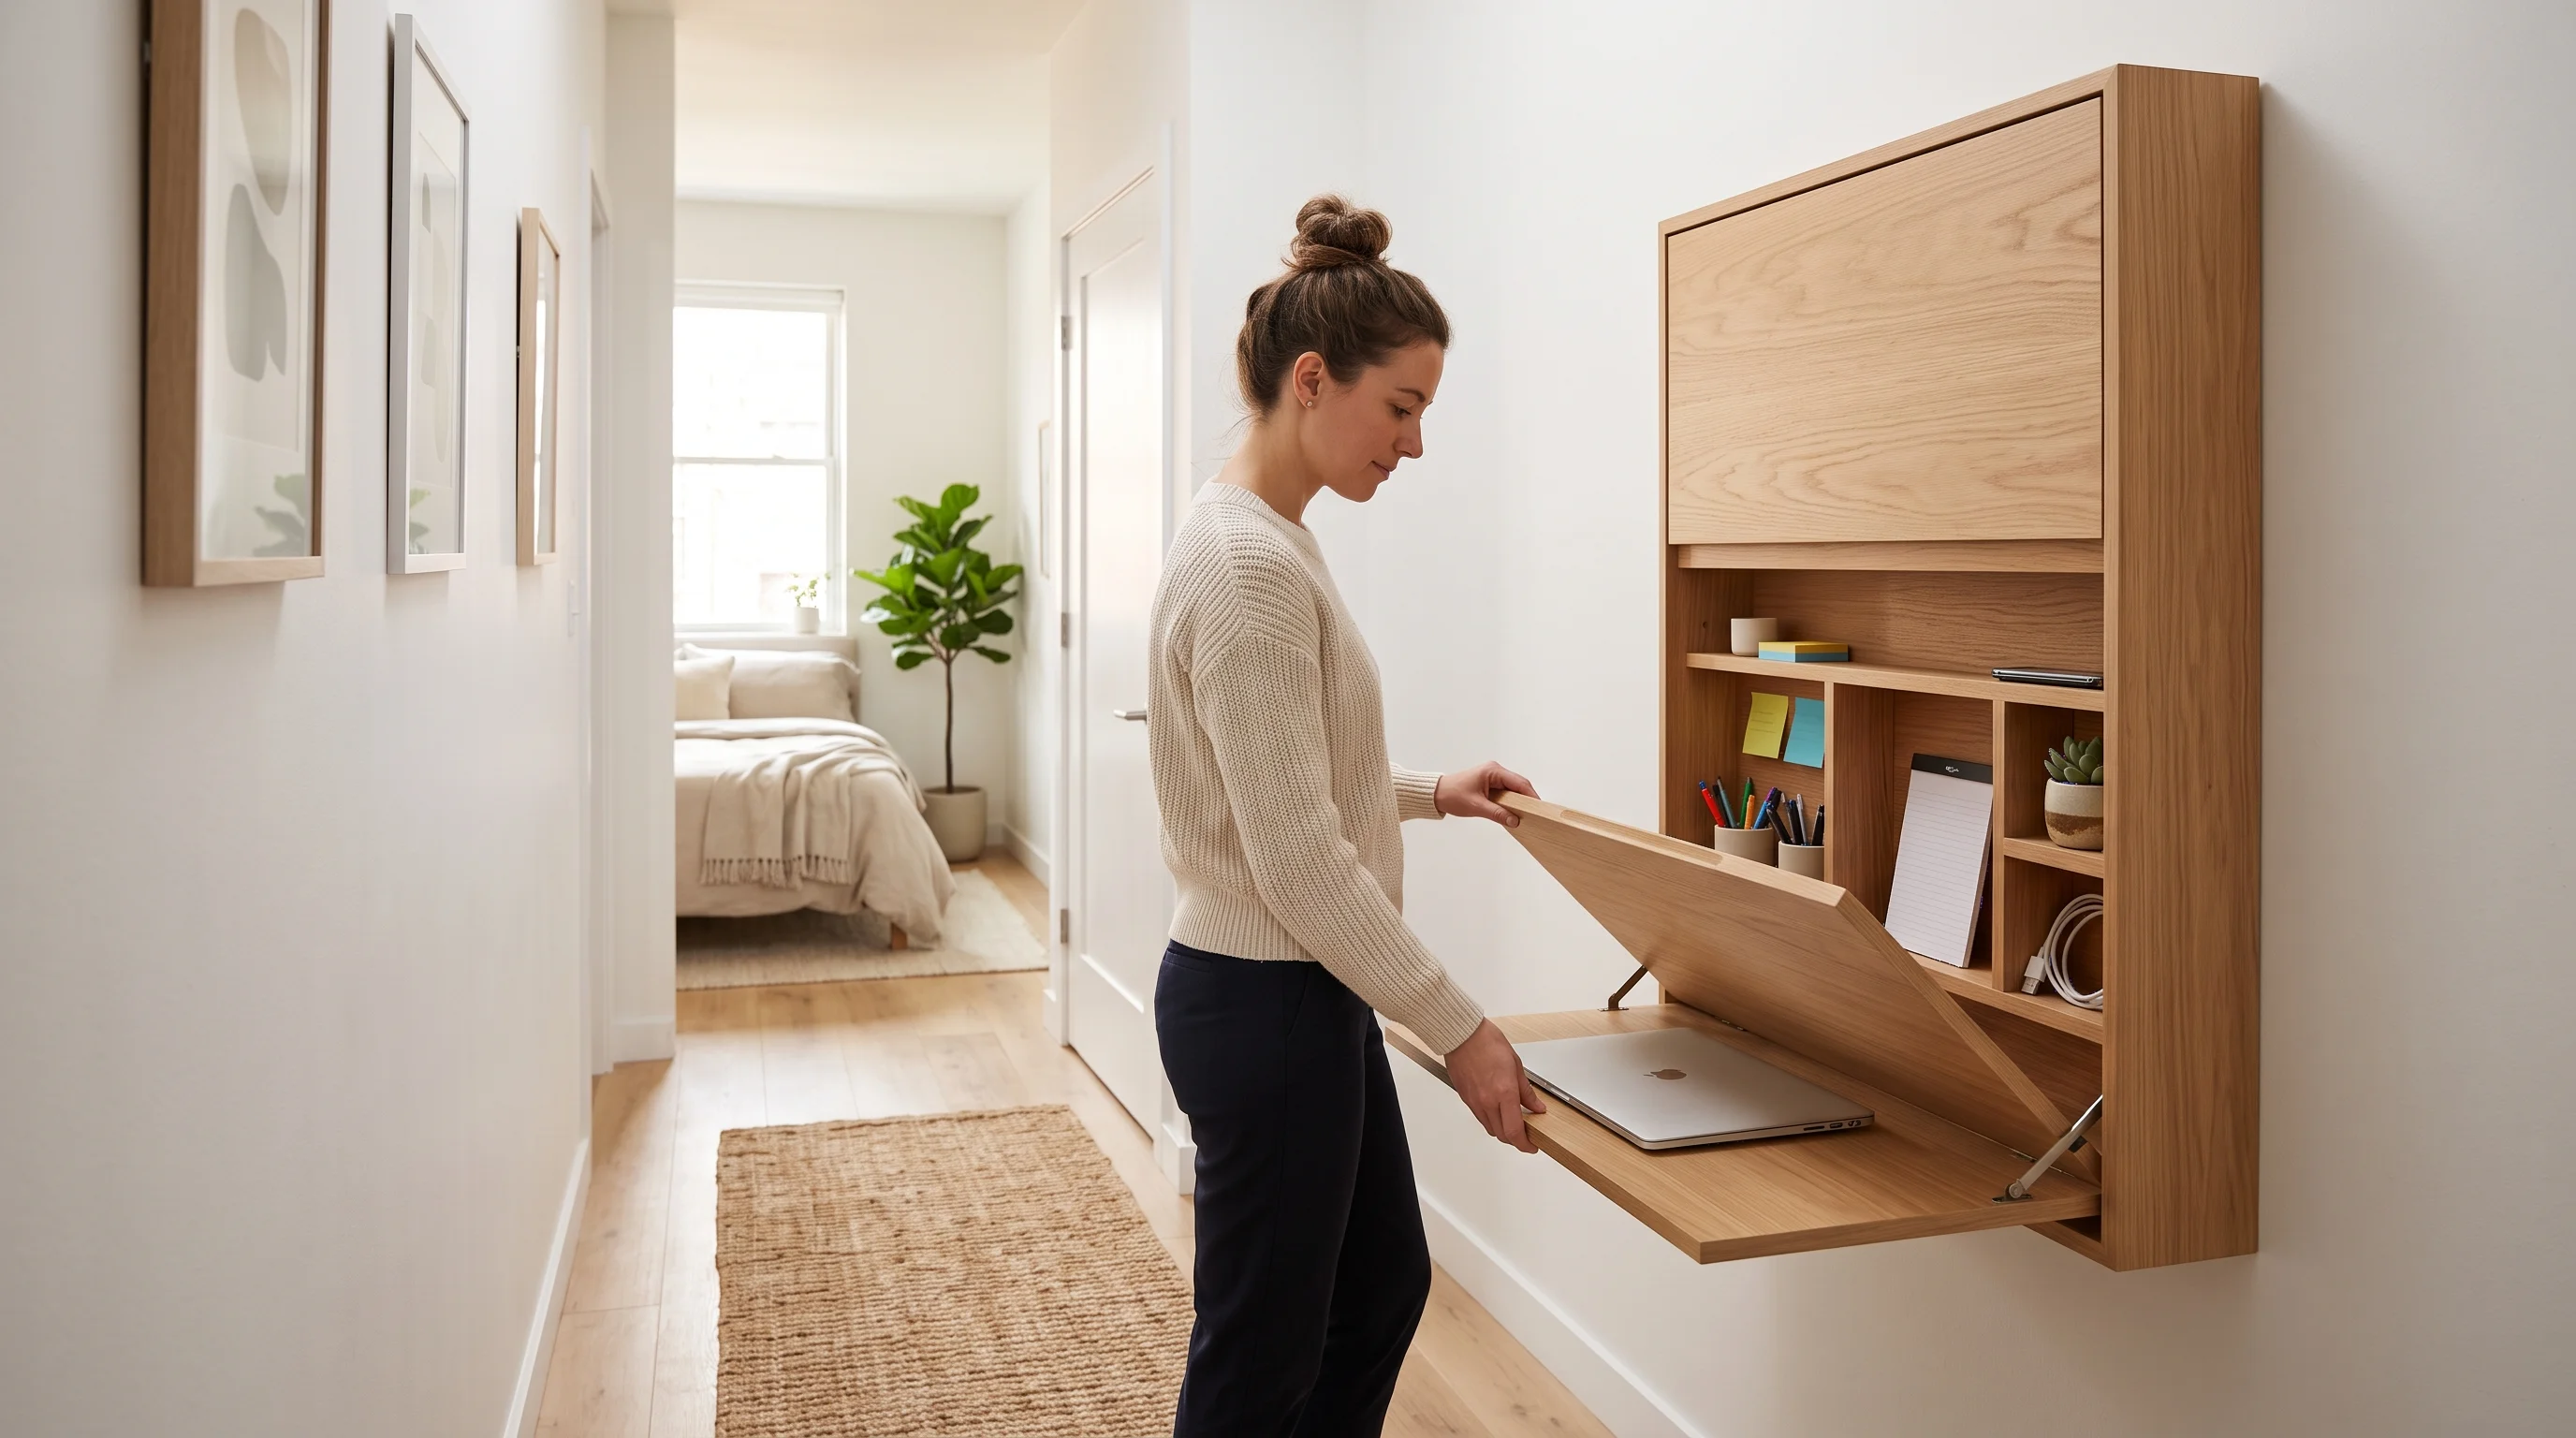
- Why it Works: If you absolutely do not have the floor space to leave a desk out permanently (like in a narrow hallway or a tiny bedroom), you need a desk that disappears on command. It requires absolutely zero floor space when folded up. It maintains the wide, open walkways of your home during the evening, but provides a dedicated, ergonomic work surface during the day.
- How to Style: Install a sleek, minimal wooden box mounted on the wall that looks like a shallow cabinet. Unlatch it, and the front drops down to become a sturdy, highly functional laptop desk. Look for a fold-down desk that features small built-in cubbies on the back wall to store pens and chargers.
📝 Quick Steps: Purchase a pre-made Murphy desk online. Use a stud finder to locate the structural beams in your wall. Mark the exact height (usually 29 to 30 inches from the floor for a standard desk). Mount the unit securely into the wall studs using heavy-duty screws.
🛠️ Tools & Materials: Wall-mounted fold-down Murphy desk. Cordless drill, level, stud finder, heavy-duty wall screws.
🧽 Maintenance: Check the hinges and locking latches periodically to ensure they remain tight and secure over time.
⚠️ Safety & Building Codes: You MUST secure a fold-down desk into wooden wall studs. If mounted only into drywall, the entire unit will rip out of the wall the moment you rest your arms on the open desk.
💡 Designer's Advice: Look for a fold-down desk that features small built-in cubbies on the back wall. This allows you to store your pens, sticky notes, and chargers inside the unit even when it is folded shut!
3. The Invisible Acrylic "Ghost" Chair
Transparent Ergonomics | Visually Weightless Seating
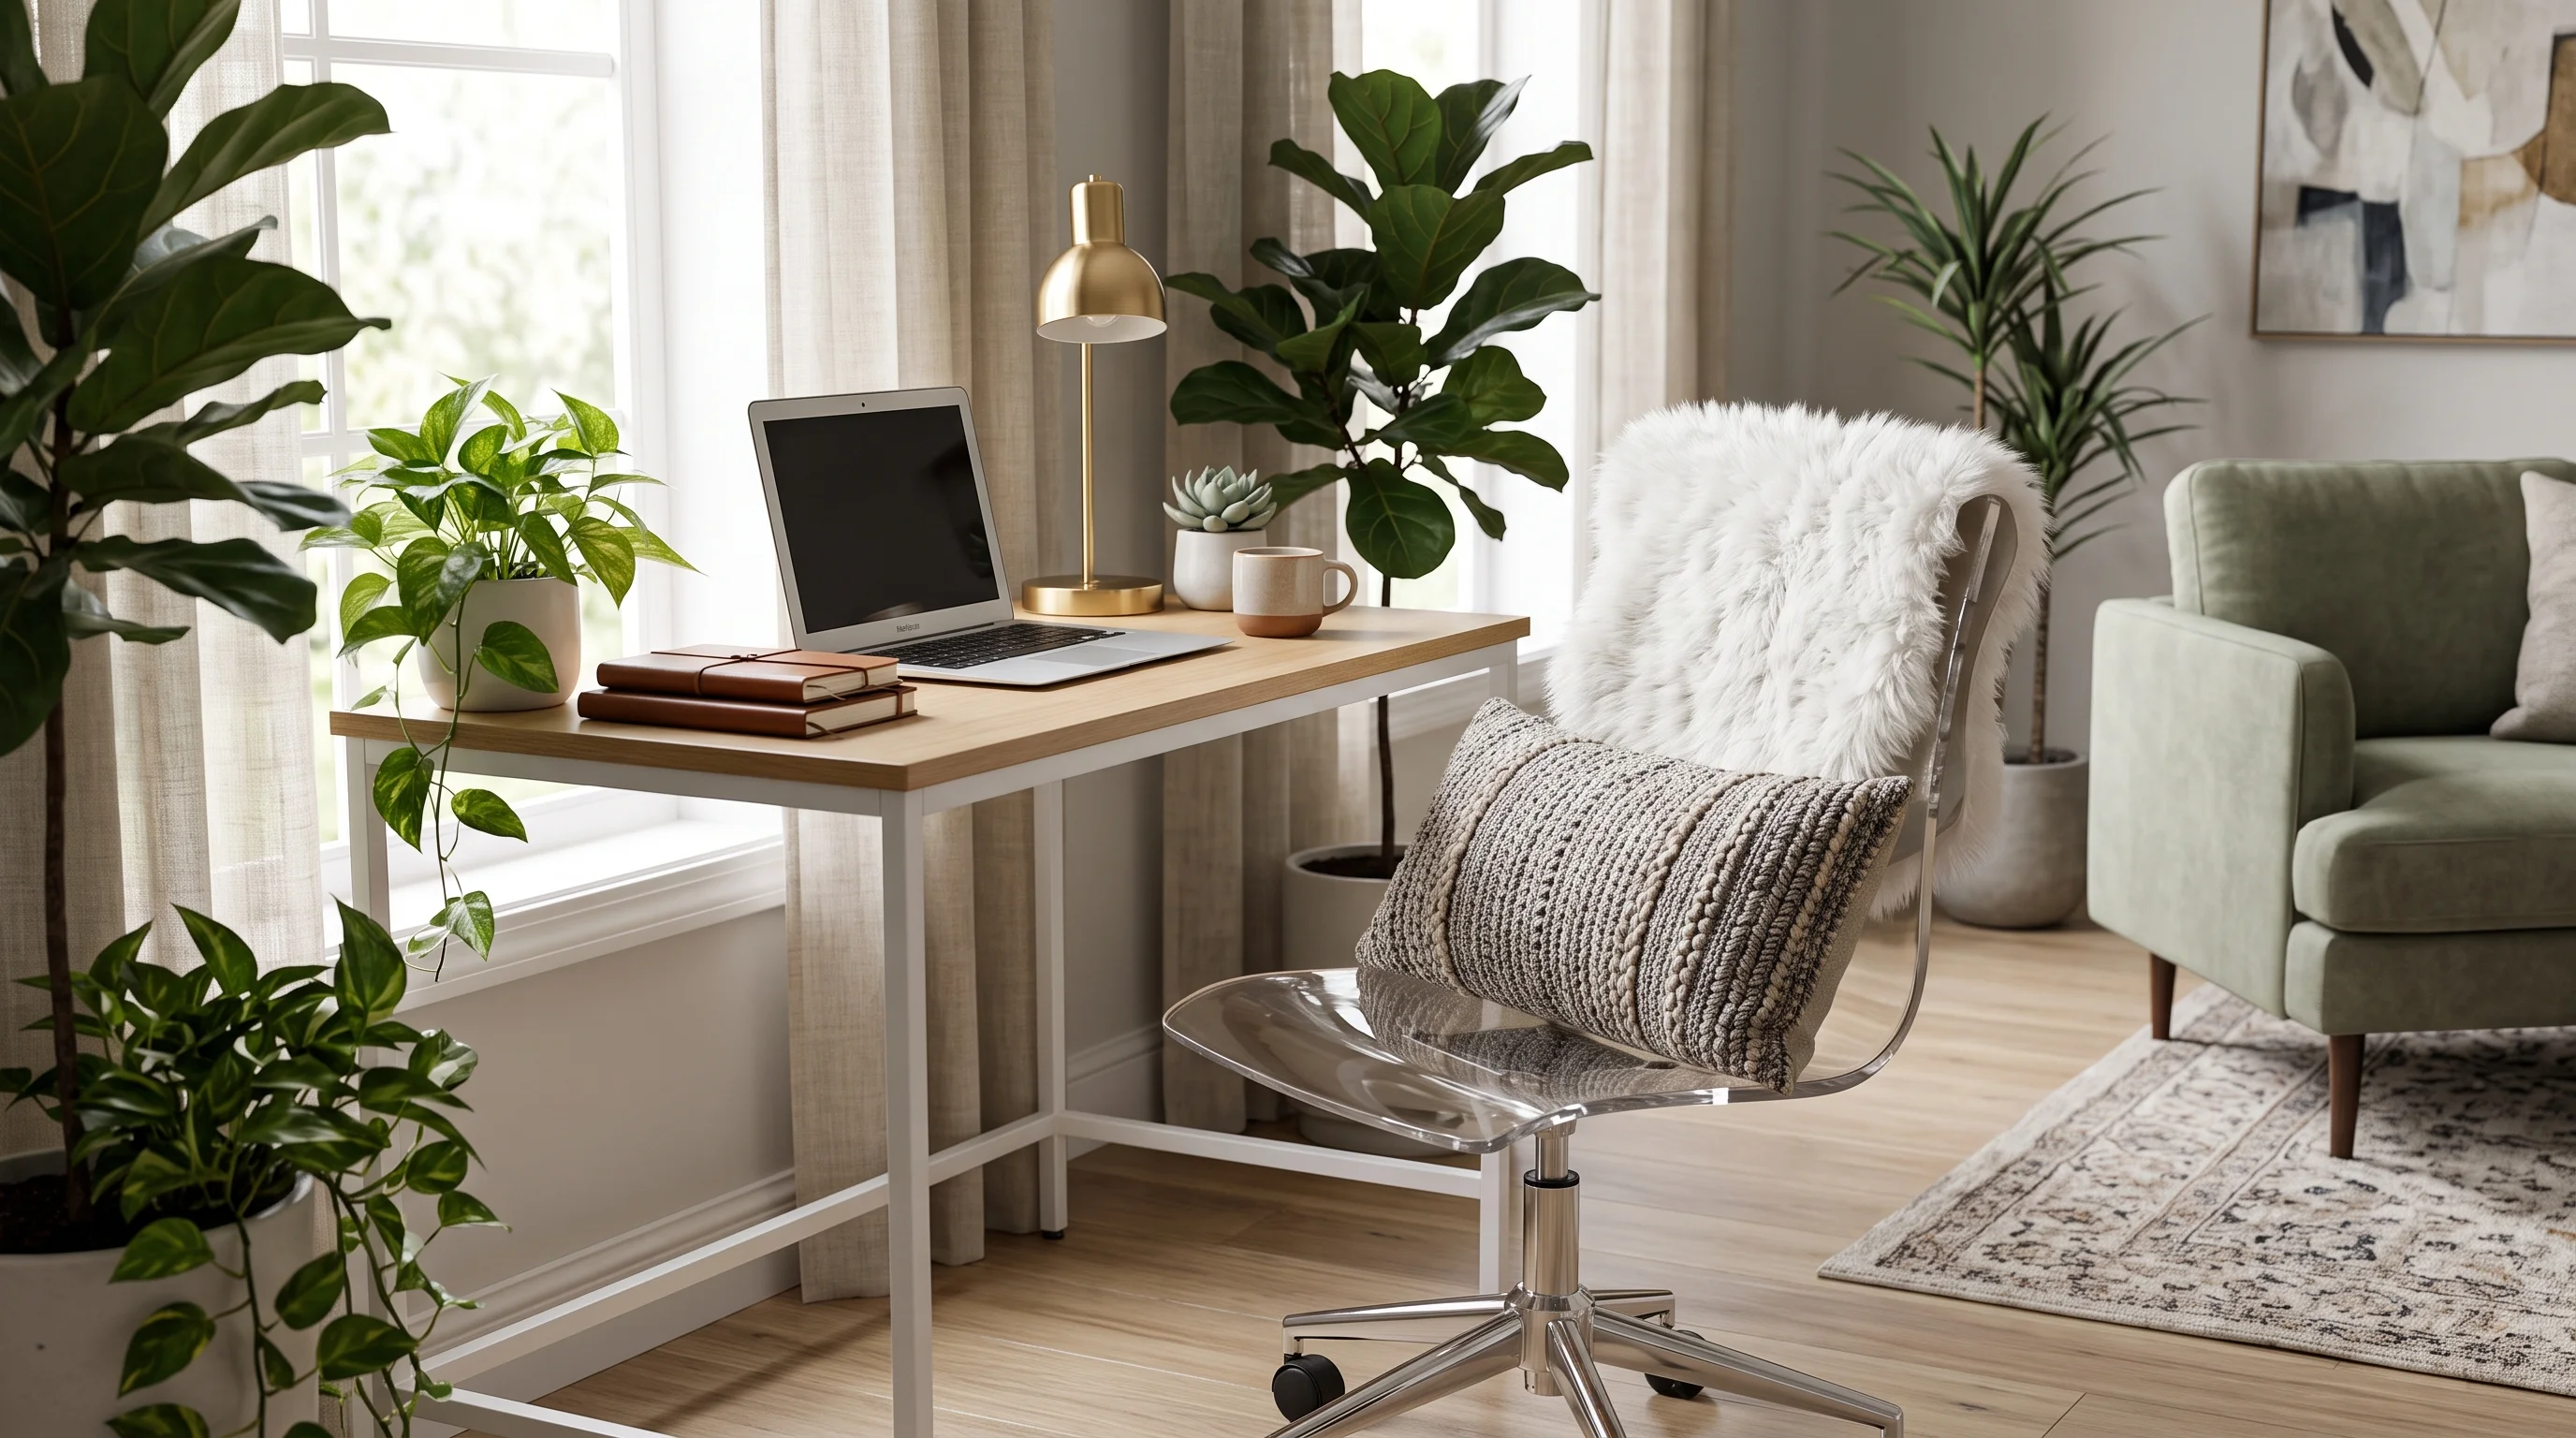
- Why it Works: Office chairs are notoriously bulky, ugly, and heavily padded, visually dominating small spaces and making a room feel cramped and corporate. Because light passes straight through the clear acrylic, the chair carries absolutely zero visual weight. It provides the necessary back support you need for a workday without interrupting the visual flow of your bedroom or living room decor.
- How to Style: Tuck a sleek, completely transparent acrylic chair (often called a Ghost Chair) neatly under your workspace. Pair a clear acrylic chair with a minimalist white or light wood desk.
📝 Quick Steps: Remove your bulky, dark office chair. Assemble and place your new clear acrylic ghost chair. Drape a faux-sheepskin throw rug over the back or add a highly textured lumbar pillow for an 8-hour shift.
🛠️ Tools & Materials: Clear acrylic Ghost Chair. Faux-sheepskin throw, ergonomic lumbar pillow.
🧽 Maintenance: Wipe the acrylic gently with a specialized plastic cleaner and a microfiber cloth. Never use harsh glass cleaners or paper towels, which will permanently scratch and cloud the surface.
⚠️ Safety & Building Codes: Ensure the acrylic chair is rated for the correct weight capacity, as cheaper models can crack under heavy, continuous pressure.
💡 Expert Tip: If you work long hours, look for an acrylic chair that has a pneumatic lift base (wheels and height adjustment) rather than standard static legs for better ergonomics!
4. Vertical Pegboard Command Centers
Modular Wall Organization | Hanging Office Supplies
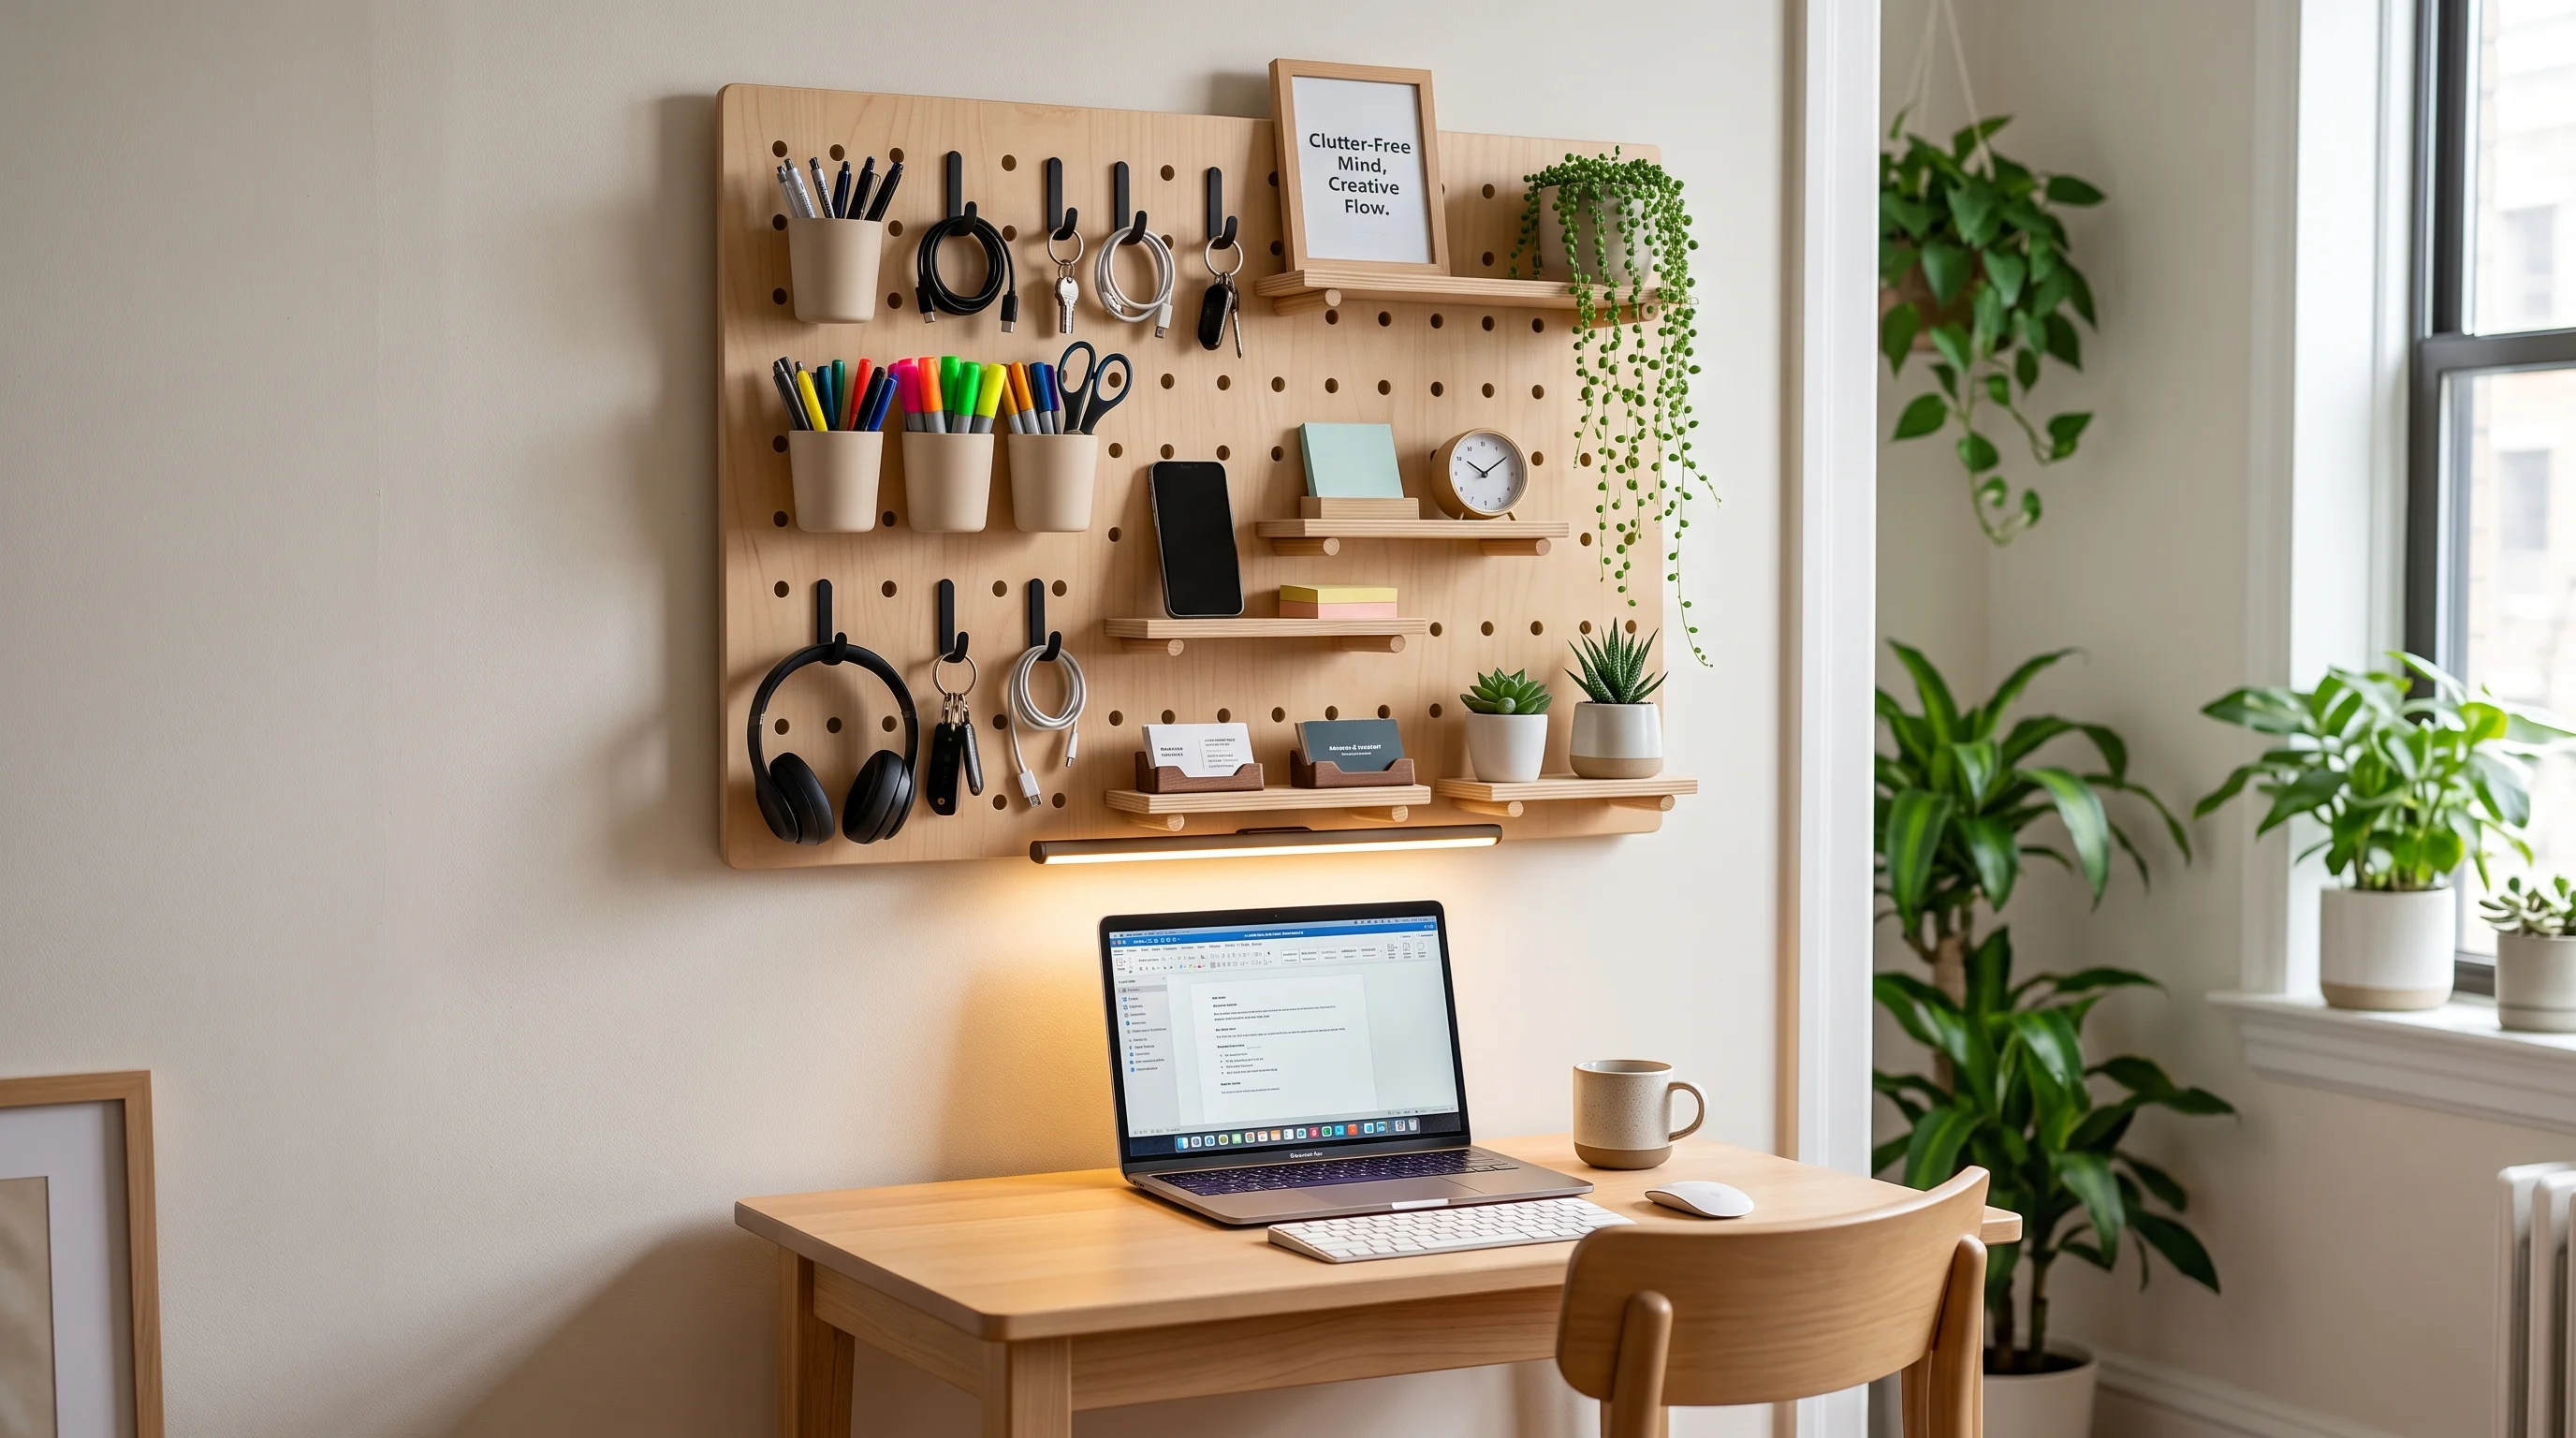
- Why it Works: A small desk gets cluttered instantly. If your laptop, coffee cup, notebooks, and pens are all competing for a 30-inch surface, you will feel stressed and disorganized. You must move your supplies to the wall. It completely clears your horizontal desktop, giving you maximum space to type and work. It also acts as a visual anchor, making a tiny desk pushed against a wall feel like a highly intentional, built-in workstation.
- How to Style: Mount a beautifully organized, natural wood or matte black pegboard directly above your desk, featuring custom hooks, tiny shelves, and hanging cups for all your office supplies.
📝 Quick Steps: Buy a modular pegboard (like an IKEA Skadis) or a wooden equivalent. Mount the board securely to the drywall using the provided spacers. Customize the layout with hanging cups for pens, small trays for your phone, and hooks for headphones.
🛠️ Tools & Materials: IKEA Skadis pegboard or custom wooden pegboard, modular hooks, trays, and cups. Drill, drywall anchors, level.
🧽 Maintenance: Dust the small shelves and cups weekly. Reorganize the layout easily whenever your workflow needs change.
⚠️ Safety & Building Codes: Use appropriate drywall anchors if mounting into hollow drywall to prevent the pegboard from pulling loose under the weight of heavier items.
💡 Stylist's Secret: Add a small trailing plant (like a String of Pearls) to one of the upper pegboard shelves to bring a calming, biophilic element into your work zone!
5. Floating Monitor Arms
Mechanical Desk Mounts | Zero-Footprint Screens

- Why it Works: The base of a standard computer monitor is massive, often eating up the entire back half of a small desk. A floating arm reclaims 100% of the surface area beneath your screen. It also provides incredible ergonomic benefits, allowing you to pull the screen closer, tilt it, or push it completely out of the way when you need to write in a notebook.
- How to Style: Make your computer monitor appear to magically hover in mid-air above your desk, held by a sleek, mechanical metal arm clamped to the very back edge of the table.
📝 Quick Steps: Purchase a VESA-compatible monitor desk mount. Clamp the heavy-duty base tightly to the back edge of your desk. Attach the VESA plate to the back of your monitor and slide it onto the arm. Route the HDMI and power cables down through the arm's hidden cable management channels.
🛠️ Tools & Materials: Mechanical VESA-compatible monitor arm (gas spring), Allen wrenches (usually included). Velcro cable ties.
🧽 Maintenance: Adjust the gas spring tension occasionally if the monitor begins to slowly sink or droop over time.
⚠️ Safety & Building Codes: Ensure your desk top is thick and solid enough (at least 1 inch thick) to support the massive clamping pressure of the mount. Do not clamp to thin glass desks.
💡 Pro Tip: Buy a "dual" arm mount and use one arm for your monitor and the other for a floating laptop tray. This gives you a dual-screen setup with absolutely zero footprint on the desk!
6. Wall-Mounted Task Lighting (Sconces)
Articulating Swing Arms | Plug-In Focused Lighting
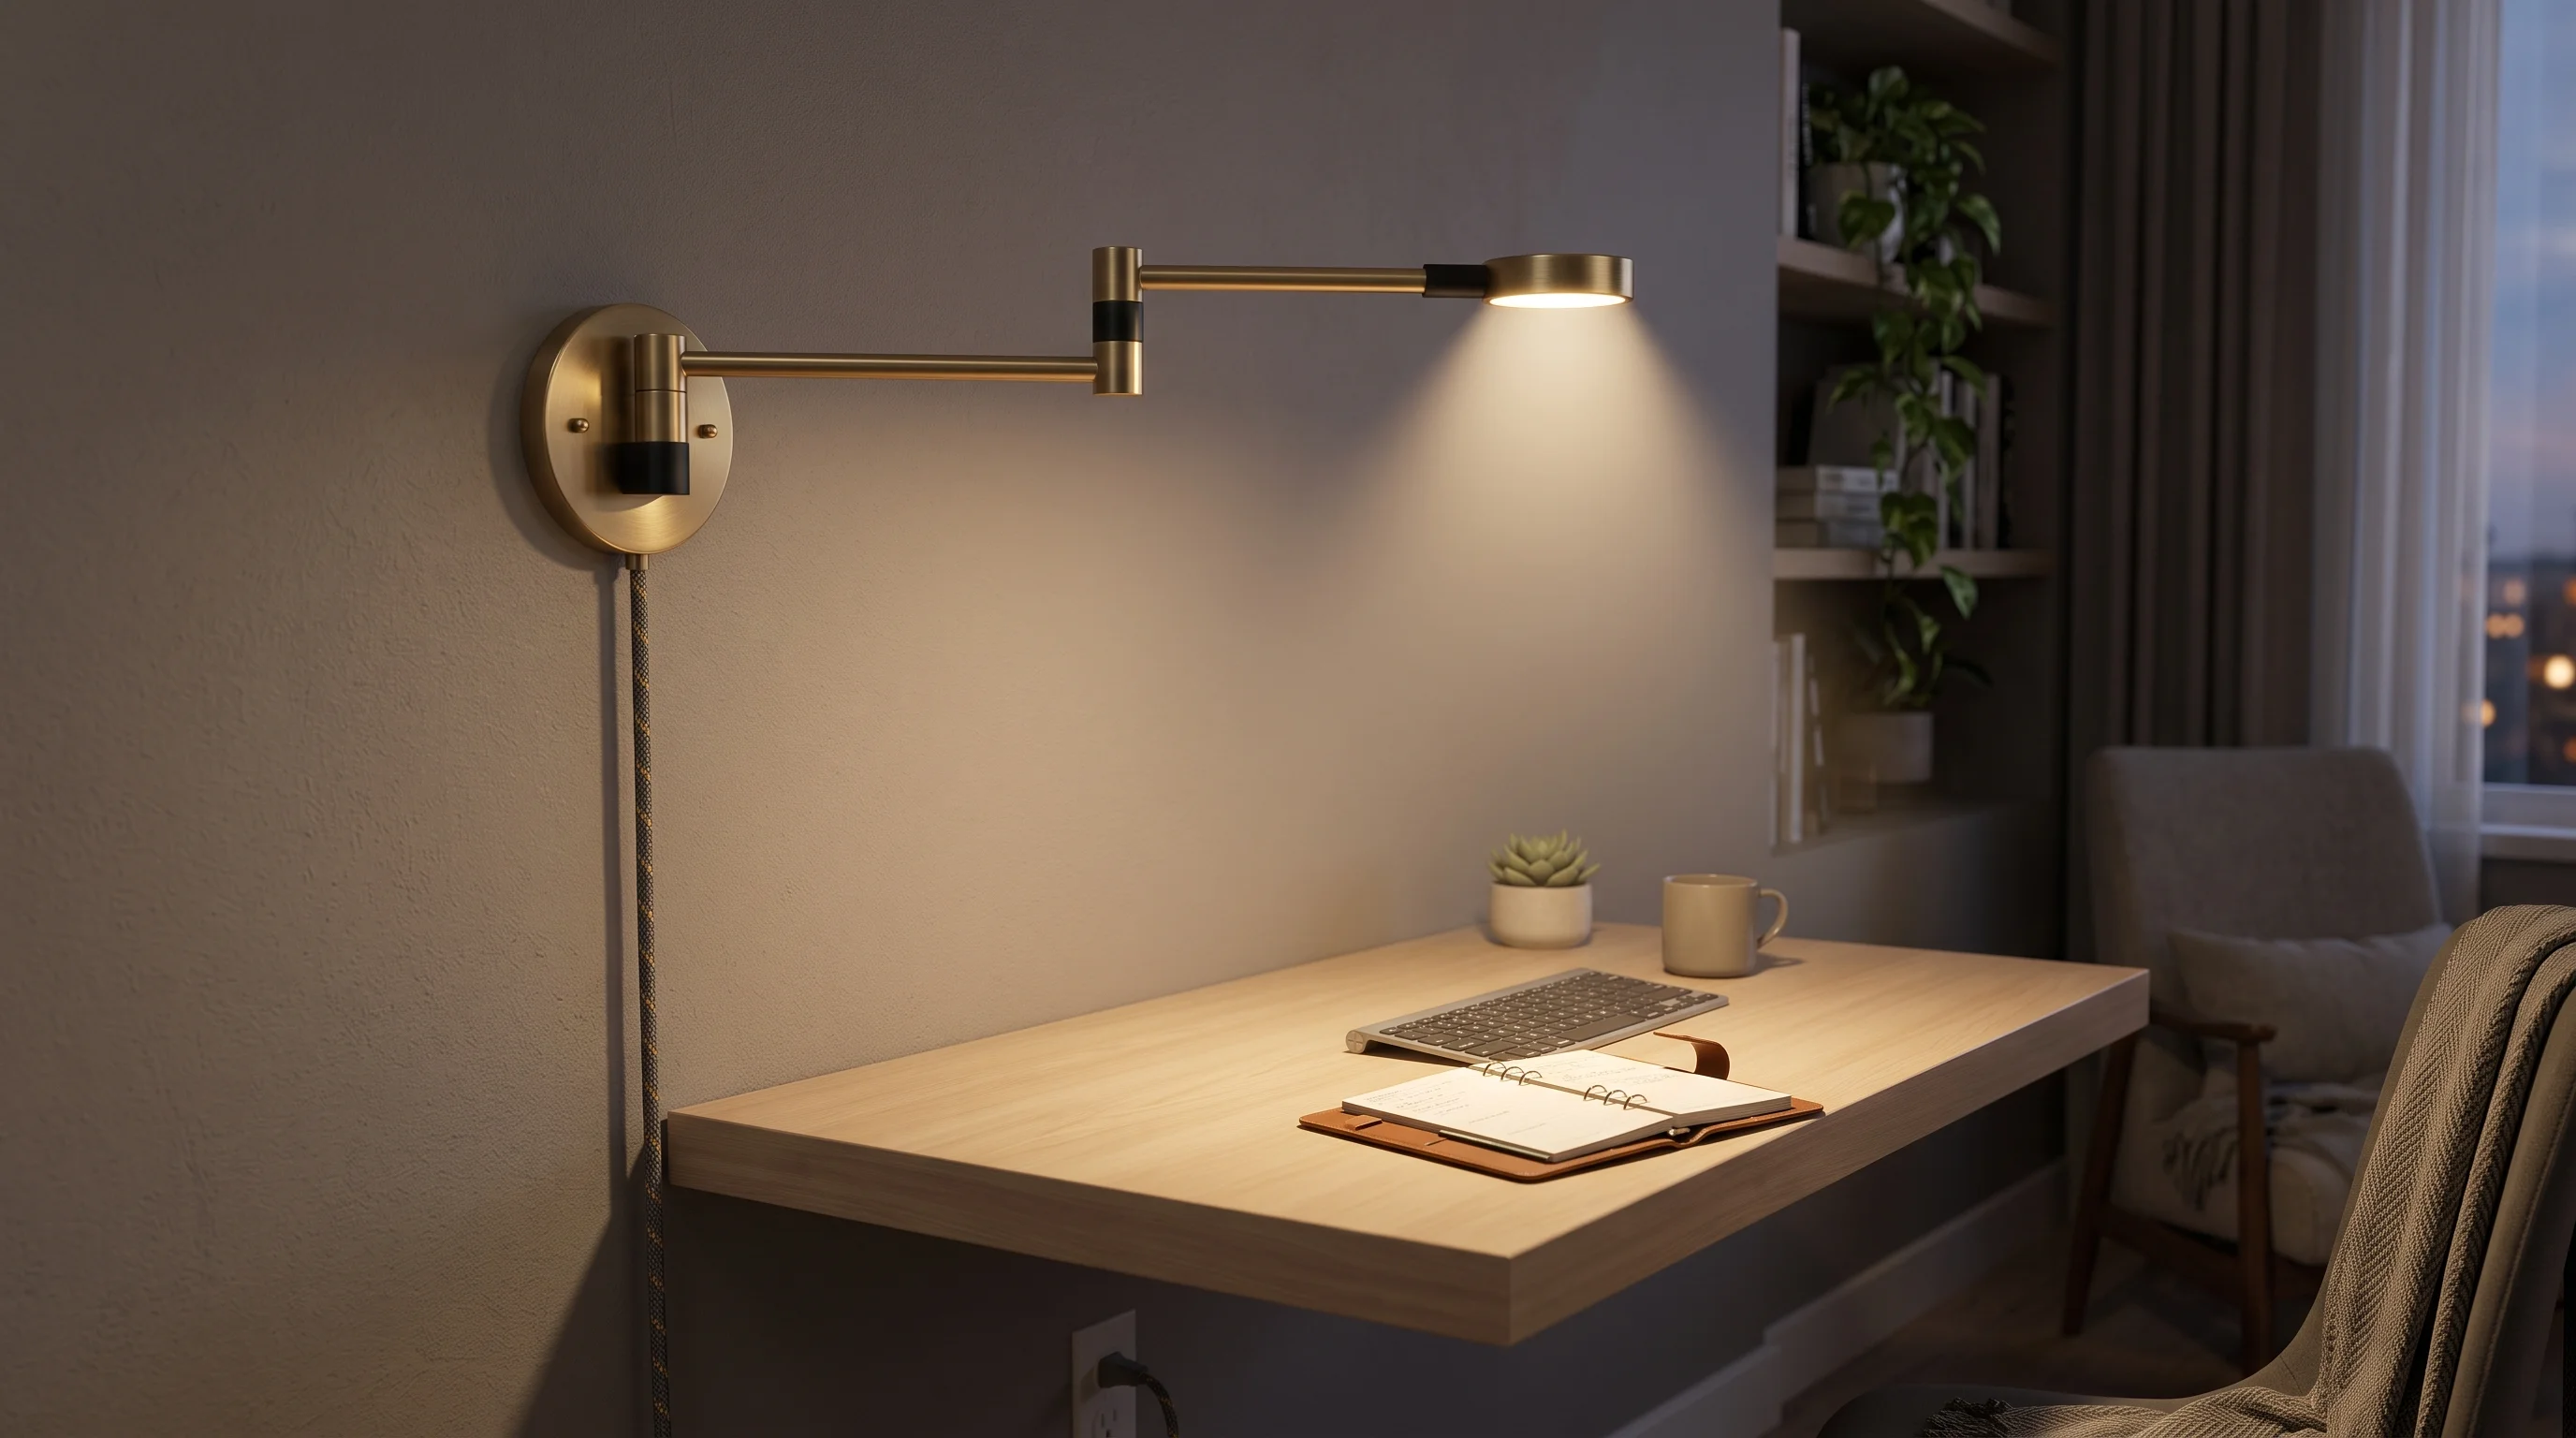
- Why it Works: Traditional desk lamps are bulky, the bases take up valuable space, and the cords add unnecessary visual clutter to a small workstation. A wall sconce completely removes the lamp from your desk, saving space and eliminating cord chaos. The swing arm allows you to pull the light down over your keyboard when working, and push it flat against the wall when you are done.
- How to Style: Mount a sleek, modern brass or matte black wall sconce with an articulating (swing) arm directly to the wall above your desk, providing focused, warm task lighting.
📝 Quick Steps: You do not need to hire an electrician. Buy a "plug-in" wall sconce. Mount the base plate securely to the wall above the center of your desk. Drop the stylish, fabric-wrapped cord down directly behind the desk to a standard outlet.
🛠️ Tools & Materials: Matte black or brass plug-in swing-arm wall sconce, smart LED bulb. Screwdriver, drill, wall anchors.
🧽 Maintenance: Dust the metal shade and arm weekly.
⚠️ Safety & Building Codes: Keep the hot bulb away from any fabric notice boards or hanging paper documents on your pegboard to prevent a fire hazard.
💡 Designer's Advice: Use a smart LED bulb in your sconce. You can set it to a bright, cool "daylight" white (5000K) for focus during the day, and shift it to a warm, cozy orange (2700K) to relax your eyes in the evening!
7. The "Behind-the-Sofa" Console Desk
Narrow Freestanding Desks | Multi-Purpose Living Zones
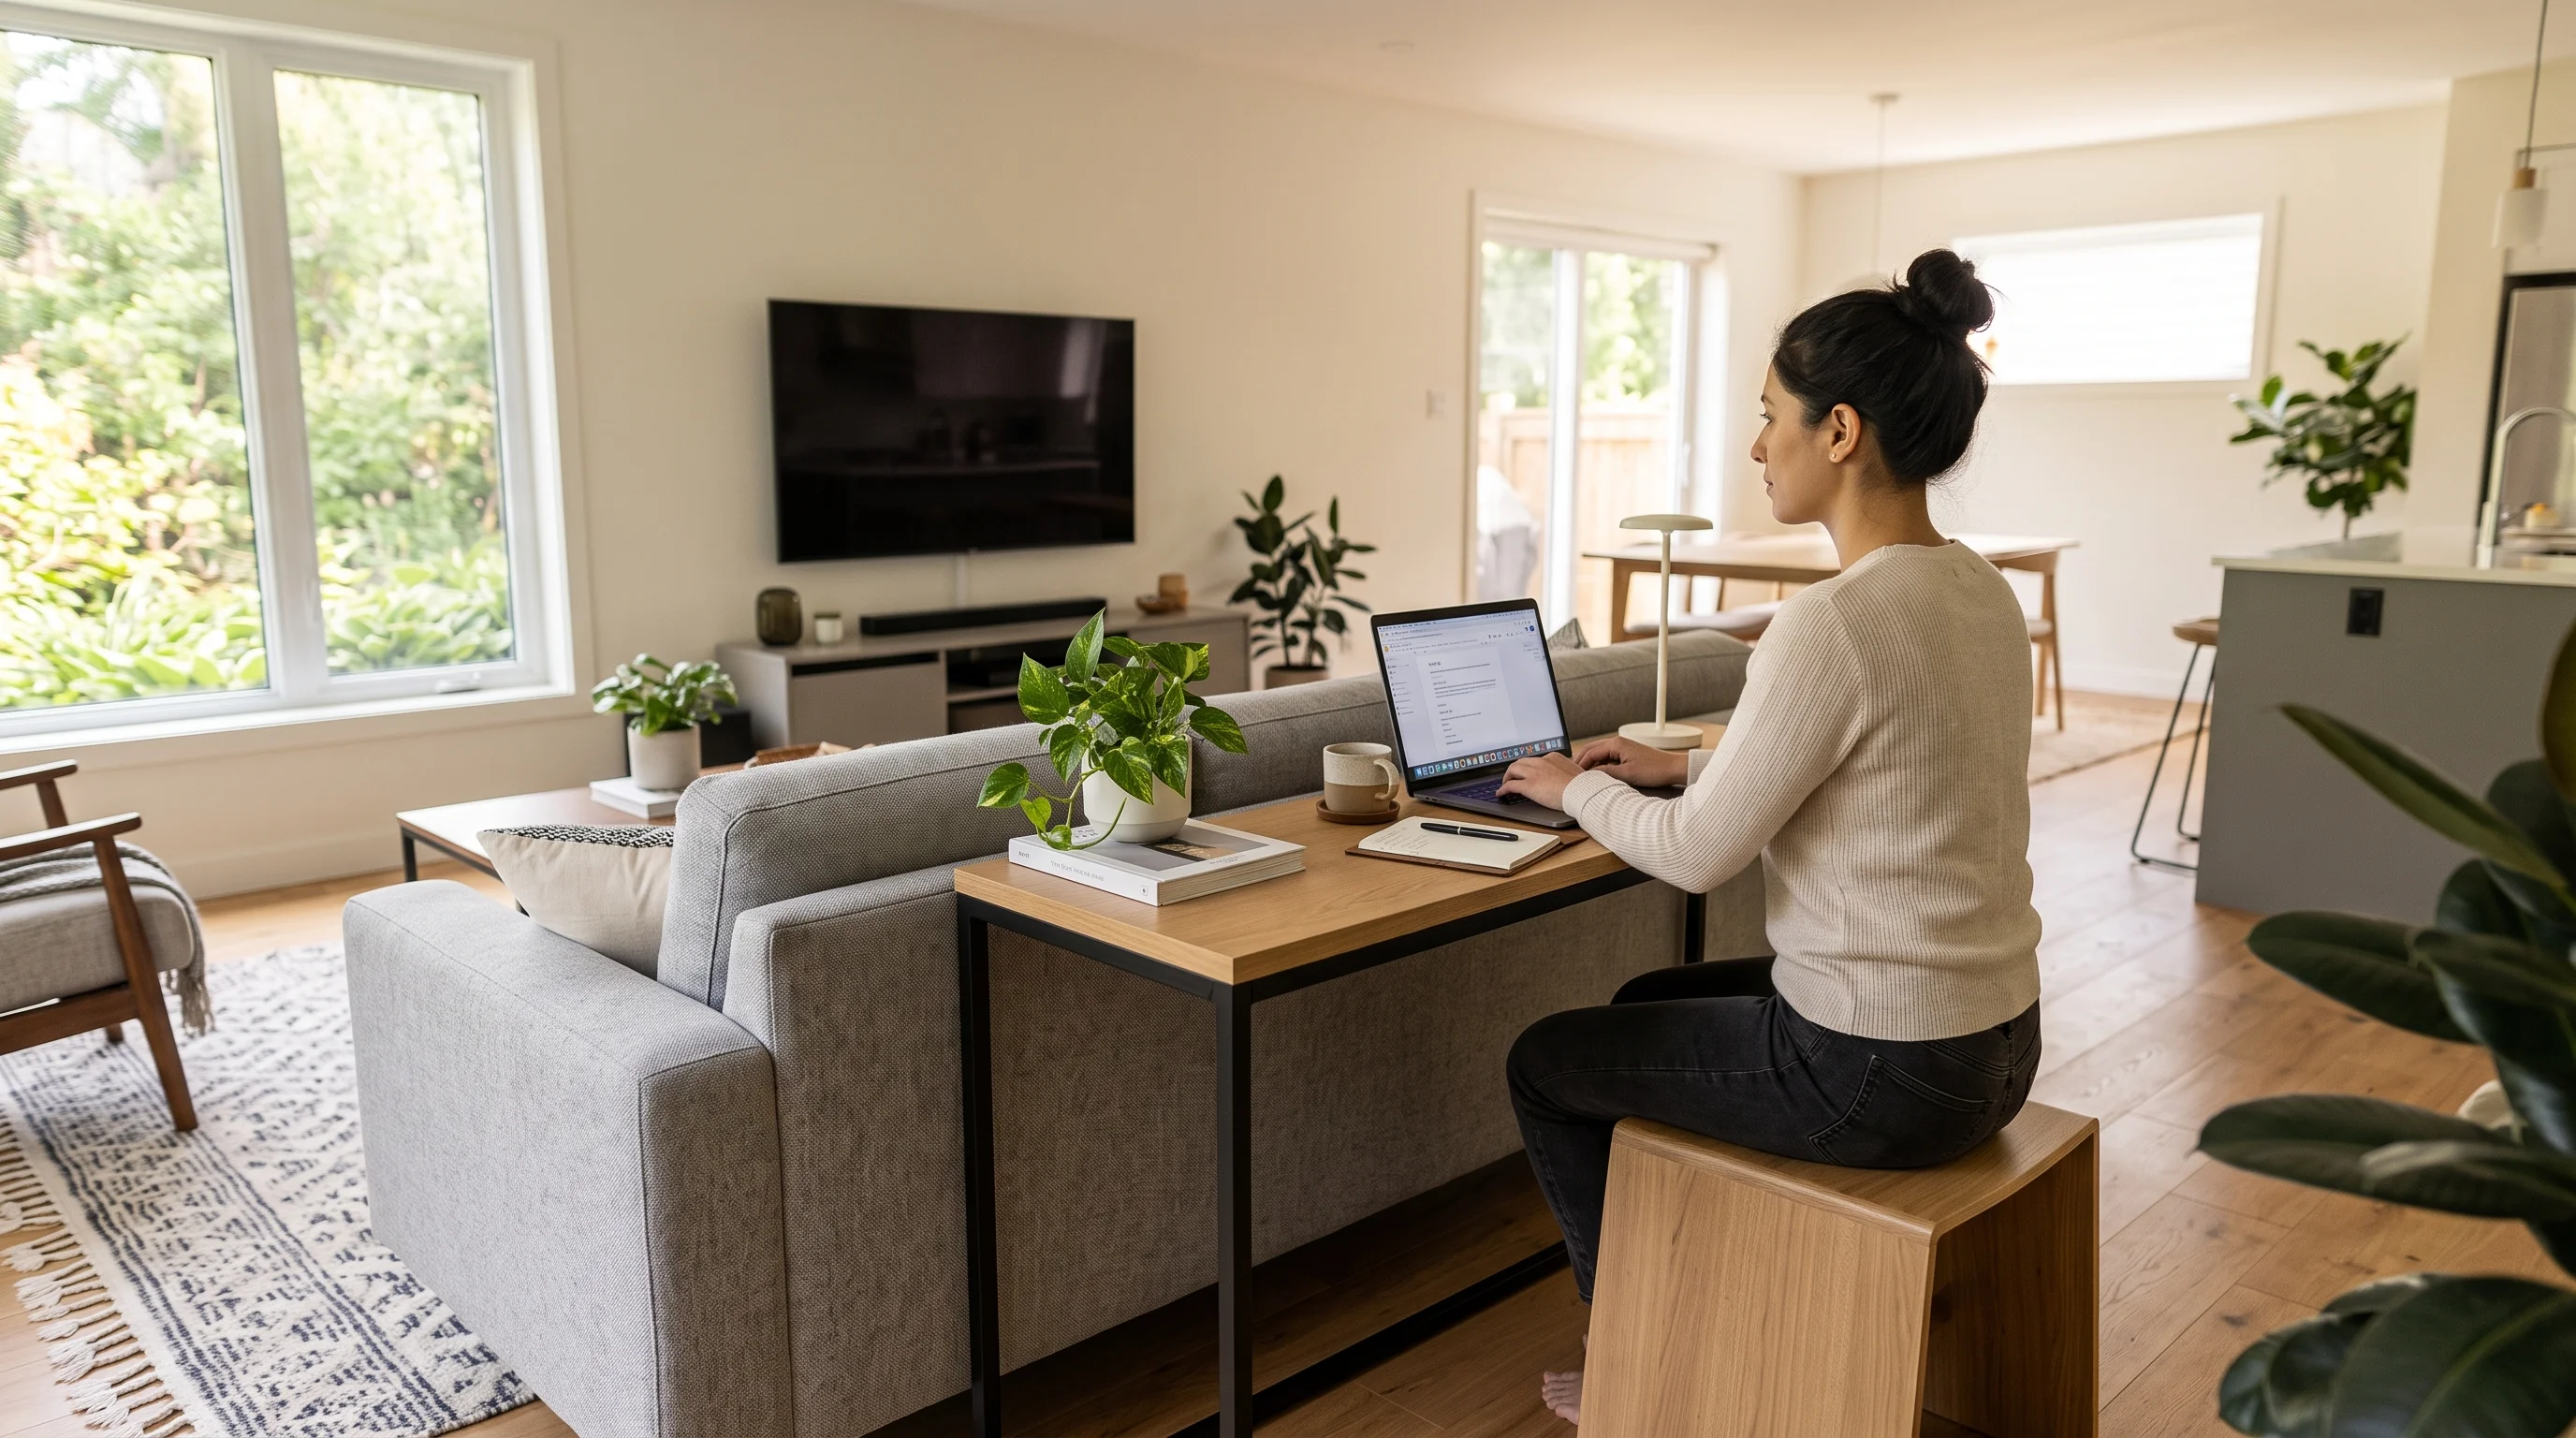
- Why it Works: If you have an open-plan living room, you might not have a spare wall to push a desk against. Placing a desk behind the sofa uses the dead space in the middle of the room. From the front of the sofa, the desk is completely hidden. It allows you to face outward into the room (or toward the TV) rather than staring blankly at a wall while you work.
- How to Style: Position a narrow, stylish console table directly behind the back of your freestanding living room sofa, doubling perfectly as a discreet workstation. Pair it with a low-profile chair that tucks completely under the desk when not in use.
📝 Quick Steps: Measure the height of the back of your sofa. Purchase a narrow console desk that is the exact same height or slightly lower (usually around 30 inches). Push the desk flush against the back of the sofa. Keep the styling on this desk incredibly minimal.
🛠️ Tools & Materials: Narrow console table/desk (maximum 18-20 inches deep), low-profile stool or chair.
🧽 Maintenance: Keep the surface meticulously clean and completely free of paper clutter, as this desk sits right in the middle of your living space.
⚠️ Safety & Building Codes: Ensure any laptop charging cords are safely taped or tucked under a rug so people walking behind the sofa do not trip.
💡 Stylist's Secret: When your laptop is put away, place a stack of coffee table books and a vase on top so it seamlessly transitions back into a decorative living room console!
Bonus Upgrades
- Vertical Laptop Docks: If you use an external monitor, buy a vertical stand for your closed laptop. It holds the laptop upright like a book, saving massive amounts of horizontal desk space.
- The "C-Table" Office Hack: If you absolutely have zero room for a desk, invest in a high-quality C-table that slides perfectly under your living room sofa, transforming your couch into an ergonomic typing station instantly.
Quick Reference Cheat Sheet
| Feature | Best For | Estimated Cost | Professional Needed? |
|---|---|---|---|
| The Cloffice | Using wasted closet space | $100 - $300 | No |
| Murphy Desk | Narrow hallways & zero footprints | $50 - $150 | No |
| Ghost Chair | Keeping the room visually open | $60 - $150 | No |
| Pegboards | Clearing desktop clutter | $30 - $60 | No |
| Console Desk | Open-plan living rooms | $150 - $400 | No |
Frequently Asked Questions (FAQ)
Q: What is the minimum depth needed for a functional home office desk?
A: If you only use a laptop, you can comfortably work on a desk as shallow as 18 inches. If you use a large external monitor and a separate keyboard, aim for a minimum depth of 22 to 24 inches so you don't strain your eyes.
Q: How do I separate my work space from my relaxing space in the same room?
A: Use "zonal definition." Place a small, distinct area rug exclusively under your desk and chair. Alternatively, paint a stylish "color block" (like an arch or a wide vertical stripe) on the wall directly behind the desk to visually frame it as a separate room.
Q: Can I put a desk in front of a window?
A: Yes, it is incredible for your mental health and provides great natural lighting for video calls! However, make sure you have a heavy curtain or blinds to block direct, blinding sunlight during peak hours, and ensure your monitor screen is bright enough to combat the glare.
Final Thoughts
Creating a productive home office in a small space is completely possible when you stop relying on traditional, bulky corporate furniture. By thinking vertically with pegboards and wall sconces, utilizing clever optical illusions like acrylic chairs, or claiming underutilized space with a brilliant closet conversion, you can build a workstation that inspires focus. Your home should remain your sanctuary, and your desk should seamlessly blend into your aesthetic. Pick a weekend, grab a measuring tape, and get ready to transform that awkward corner into your highly productive, beautiful new Vindy Space!
Read Next on Vindy Space:
*When you purchase through links on our site, we may earn an affiliate commission.*
Author: Vindy P.