
The bedroom is arguably the most important room in your entire home. It is your ultimate sanctuary, a place dedicated to rest, recovery, and absolute peace. However, when you are dealing with a small footprint, designing this space can feel like an impossible compromise. You want the room to feel expansive, airy, and large enough to breathe in, but you also want it to feel deeply cozy, warm, and inviting. Most homeowners mistakenly believe that these two concepts are mutually exclusive—that a "big" room feels cold, and a "cozy" room must feel cramped.
Welcome to Vindy Space! We are here to prove that you do not need massive square footage to achieve a luxurious, hotel-like bedroom experience. In fact, small bedrooms hold the unique potential to become the most comforting rooms in a house when designed with intention. By utilizing advanced color theory, clever optical illusions, and strategic furniture placement, you can completely manipulate how the human eye perceives the dimensions of your space. Whether you are living in a tight city apartment or just want to upgrade a small guest room, we have curated the ultimate design playbook. Prepare to rethink everything you know about compact design. Here are 9 incredibly easy, highly creative ways to make a small bedroom look both massively bigger and endlessly cozier.
Table of Contents
- 1. The "Color Drenching" Technique
- 2. Low-Profile "Platform" Architecture
- 3. The "Hotel-Style" Extended Headboard
- 4. Floating Asymmetrical Nightstands
- 5. Wall-Mounted "Hardwired-Look" Sconces
- 6. Smoked or Antiqued Mirrored Wardrobes
- 7. High-Mounted Wrap-Around Drapery
- 8. Monochromatic Texture Layering
- 9. Hidden Perimeter Ambient Lighting
1. The "Color Drenching" Technique
Monochromatic Immersion | Seamless Visual Boundaries

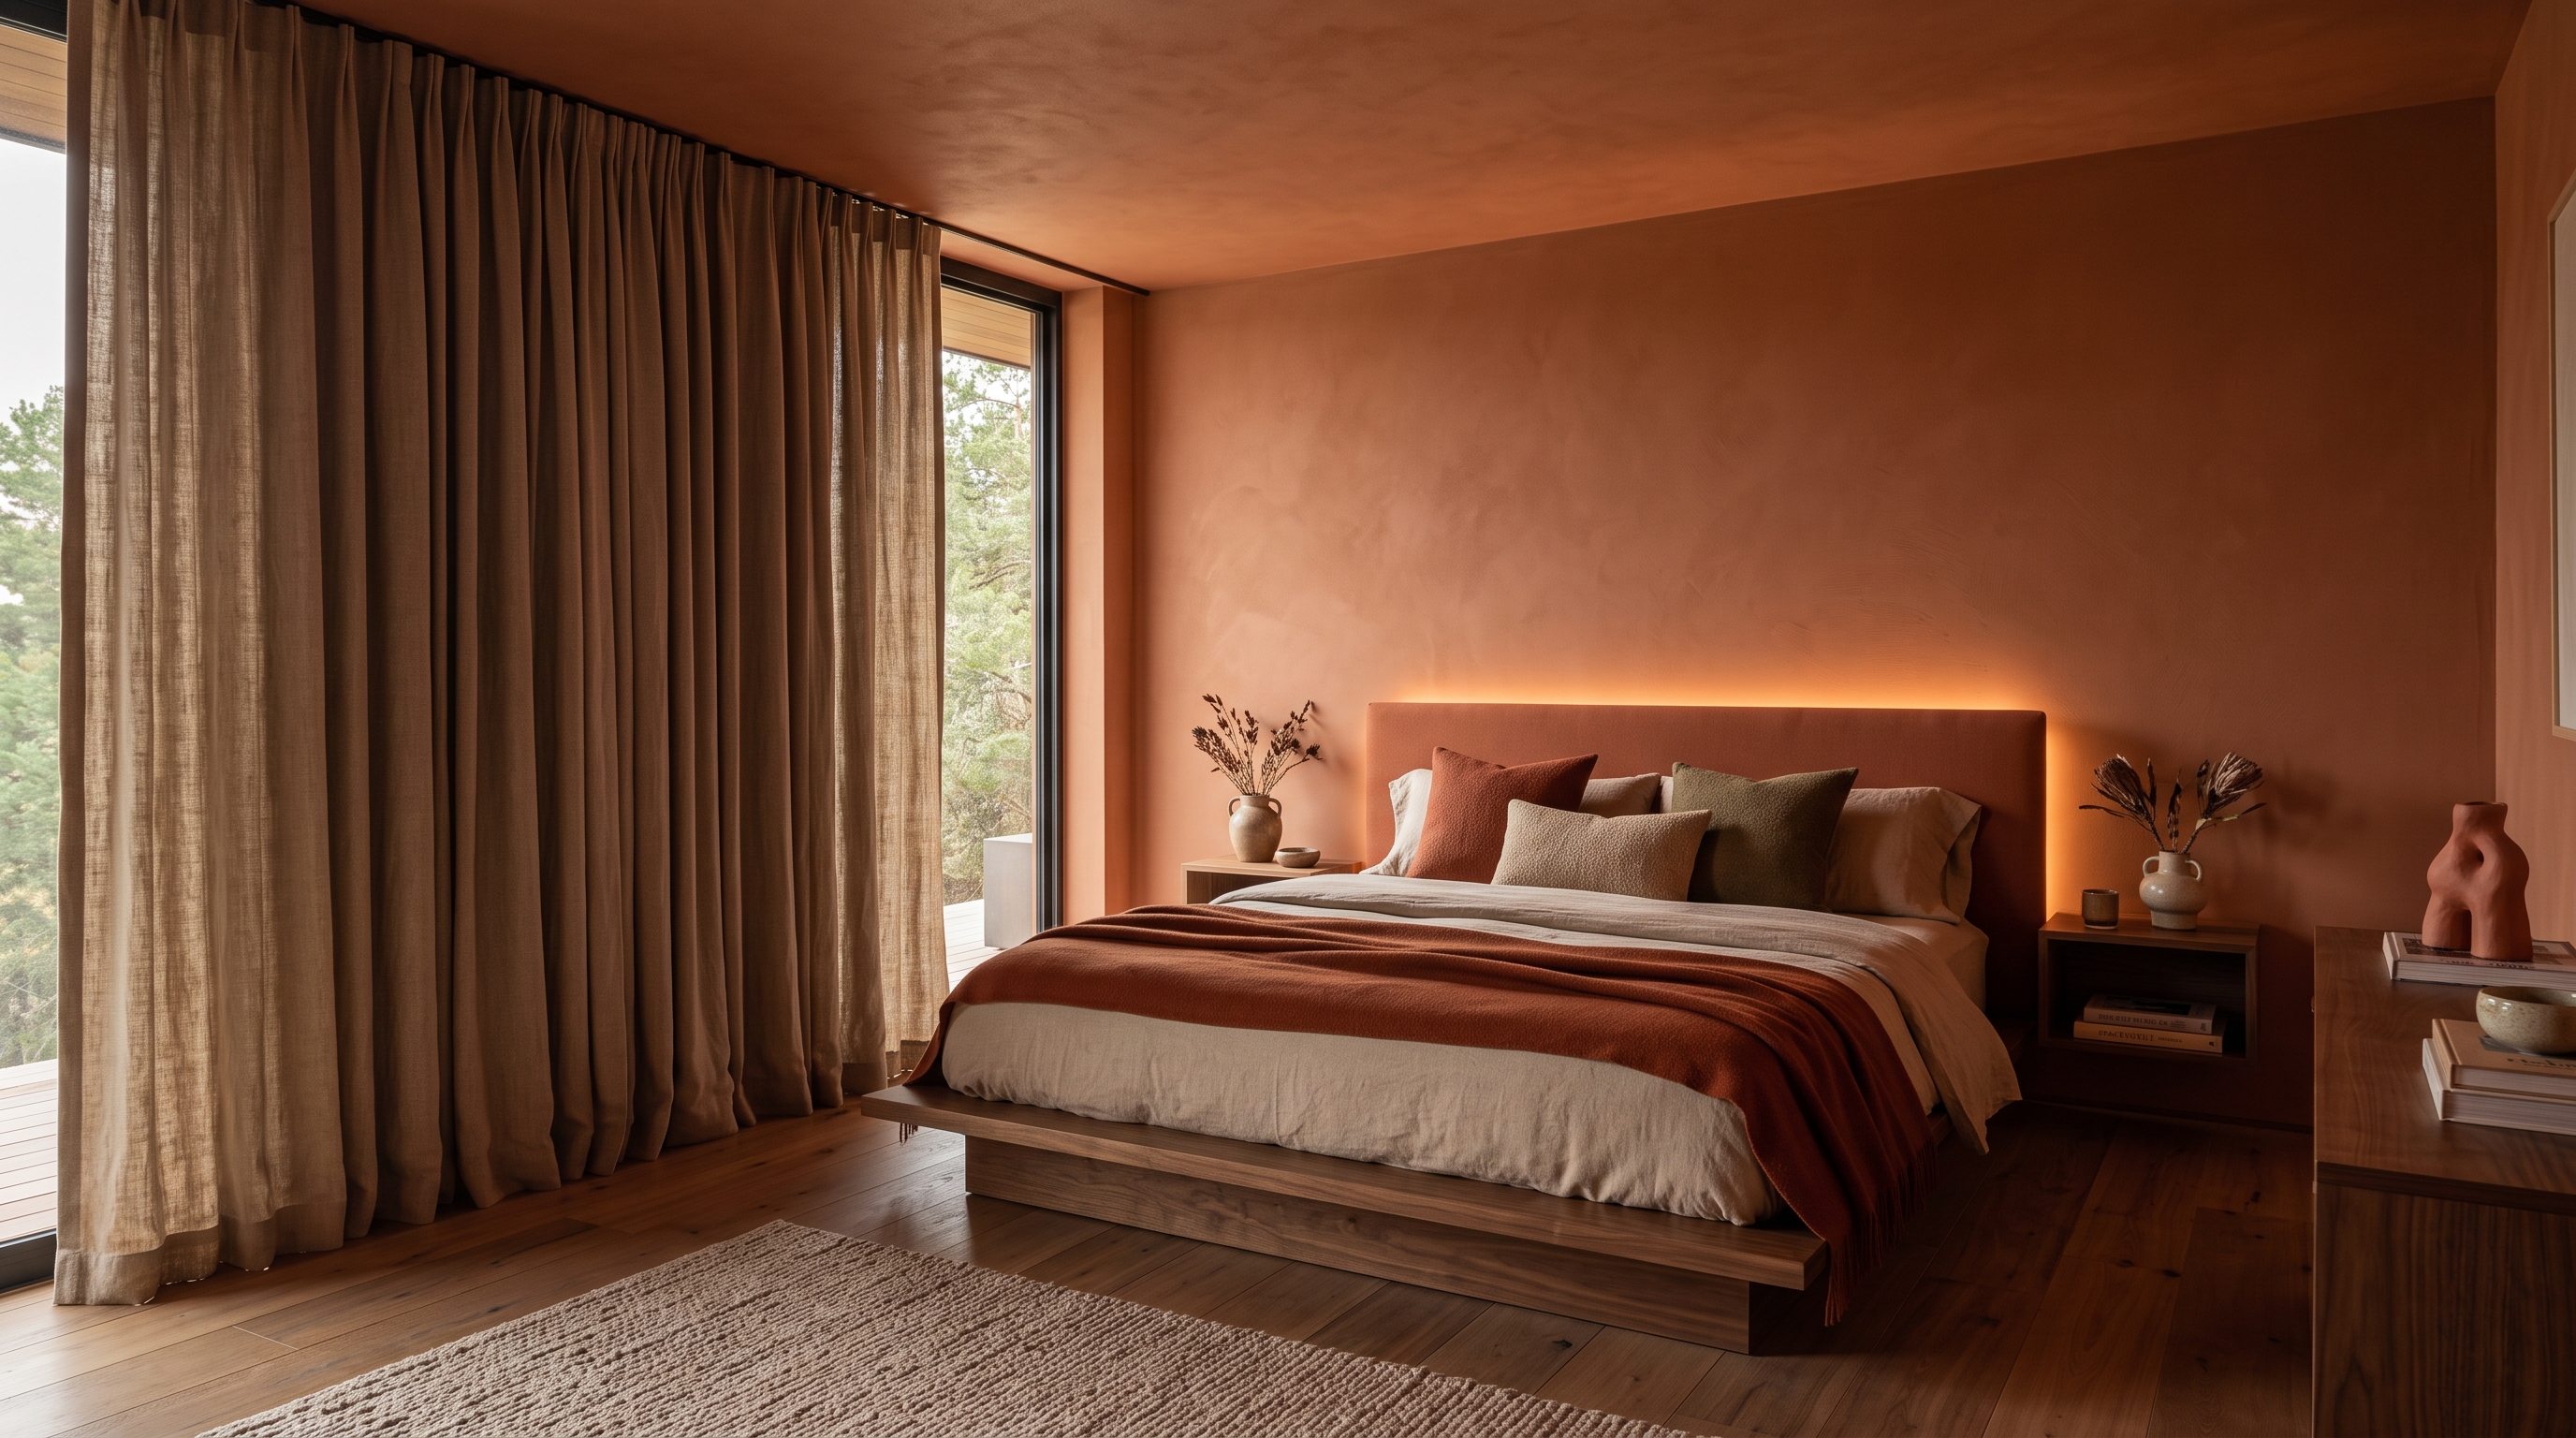
- Why it Works: When dealing with a small bedroom, the traditional, outdated advice has always been to paint everything stark, blinding white to make it feel larger. However, stark white often makes a small room feel cold, sterile, and clinical, completely destroying the cozy, relaxing vibe you actually want in a bedroom. When you paint your walls one color and your ceiling and trim a bright white, you create harsh visual lines. These lines immediately show the brain exactly where the room ends and begins, emphasizing its small size. By painting everything the exact same color, you completely erase those harsh visual boundaries. The sharp corners of the room visually blur into the shadows, tricking the eye into believing the space is endless and expansive, while the rich color wraps around you like a warm hug.
- How to Style: Enter the modern designer secret: 'color drenching.' Create a deeply immersive, monochromatic space where the walls, baseboards, window trims, doors, and even the ceiling are painted in the exact same rich, soothing color. Think warm terracotta, soft sage green, or deep moody navy blue. Choose a matte or eggshell paint finish for the walls to absorb light softly, and a satin finish in the exact same color for the wooden trims and doors. This provides a highly elegant, subtle contrast in texture rather than a jarring contrast in color.
📝 Quick Steps: Select a rich, soothing paint color (like terracotta or navy blue). Tape off the floors and hinges carefully. Paint the walls and ceiling in a matte or eggshell finish. Paint the baseboards, doors, and window trims the exact same color in a satin finish.
🛠️ Tools & Materials: Matte/eggshell wall paint, matching satin trim paint, painter's tape, drop cloths. Rollers, extension poles, detail brushes.
🧽 Maintenance: Wipe down satin-finished baseboards and doors with a damp cloth; use a dry microfiber duster for matte walls to avoid paint burnishing.
⚠️ Safety & Building Codes: Ensure proper ventilation when painting a small, enclosed bedroom. Use Low-VOC or Zero-VOC interior paints to prevent inhaling toxic fumes while you sleep.
💡 Pro Tip: If you are nervous about painting the ceiling a dark color, ask your paint store to mix the ceiling paint at "50% strength" of your wall color. It keeps the hue identical to maintain the illusion but feels slightly lighter overhead!
2. Low-Profile "Platform" Architecture
Minimalist Bed Frames | Vertical Space Expansion
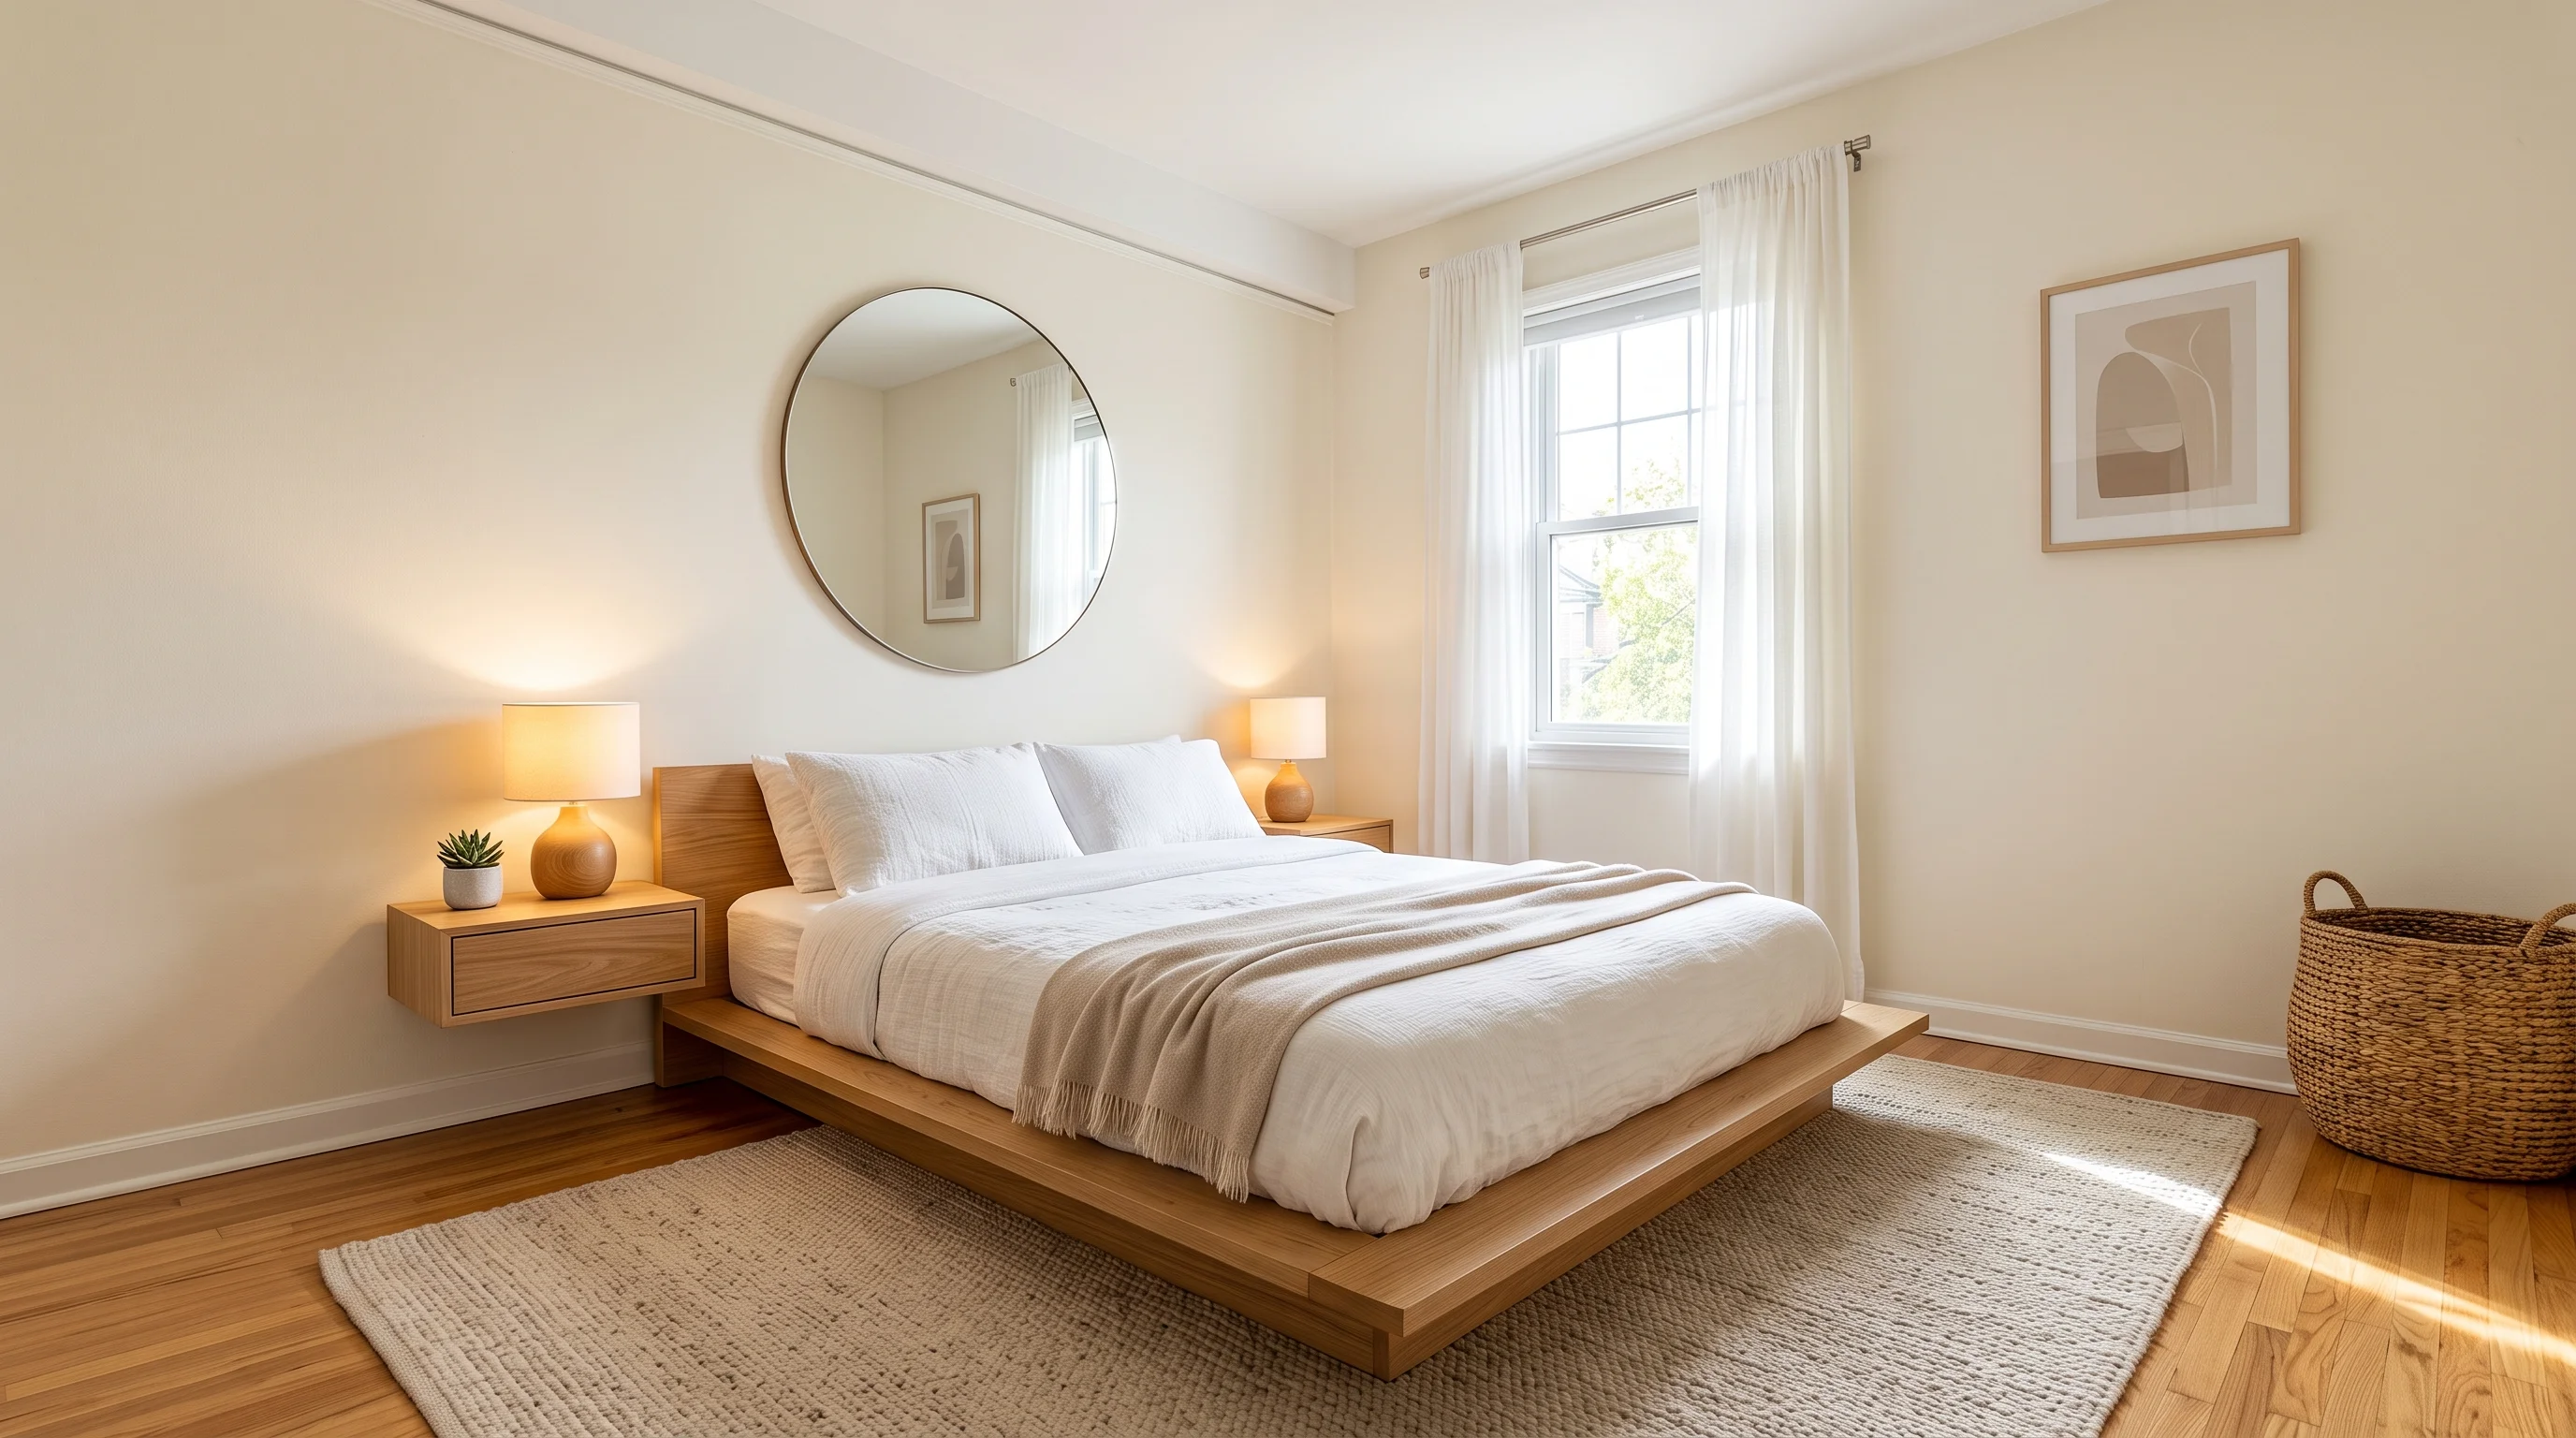
- Why it Works: In a small bedroom, the bed is undoubtedly going to take up the majority of the floor space. Since you cannot easily change the horizontal footprint of the room, you must manipulate the vertical space to make the room feel much larger. Visual height is everything in a compact space. When you use a tall, traditional bed frame that sits 30 inches off the floor, it eats up the empty space in the middle of the room and makes standard ceilings feel claustrophobically low. By lowering the center of gravity and placing your mattress closer to the floor on a sleek platform, you instantly increase the visual distance between the top of the bed and the ceiling.
- How to Style: Use a highly aesthetic, minimalist platform bed frame that sits very low to the ground, featuring a low mattress without a bulky box spring. Opt for a warm, natural wood platform bed for an organic, Japandi-inspired aesthetic, or a deeply upholstered platform bed in boucle fabric for maximum coziness.
📝 Quick Steps: Remove your bulky, traditional bed frame and tall box spring. Assemble a sleek, low-profile platform bed frame. Place your mattress directly onto the wooden slats of the platform. Tuck your area rug generously underneath the new frame.
🛠️ Tools & Materials: Low-profile wood or upholstered platform bed, mattress (no box spring).
🧽 Maintenance: Vacuum frequently under the low-profile bed, as dust bunnies accumulate quickly near the floor where the mattress sits.
⚠️ Safety & Building Codes: Ensure the platform bed has properly spaced slats (usually no more than 2.5 to 3 inches apart) to support your mattress warranty and prevent sagging.
💡 Designer's Advice: Ensure your area rug tucks at least two-thirds of the way under the platform bed. This visually anchors the low-profile furniture and stretches the perceived floor space even further.
3. The "Hotel-Style" Extended Headboard
Oversized Custom Panels | Horizontal Visual Widening
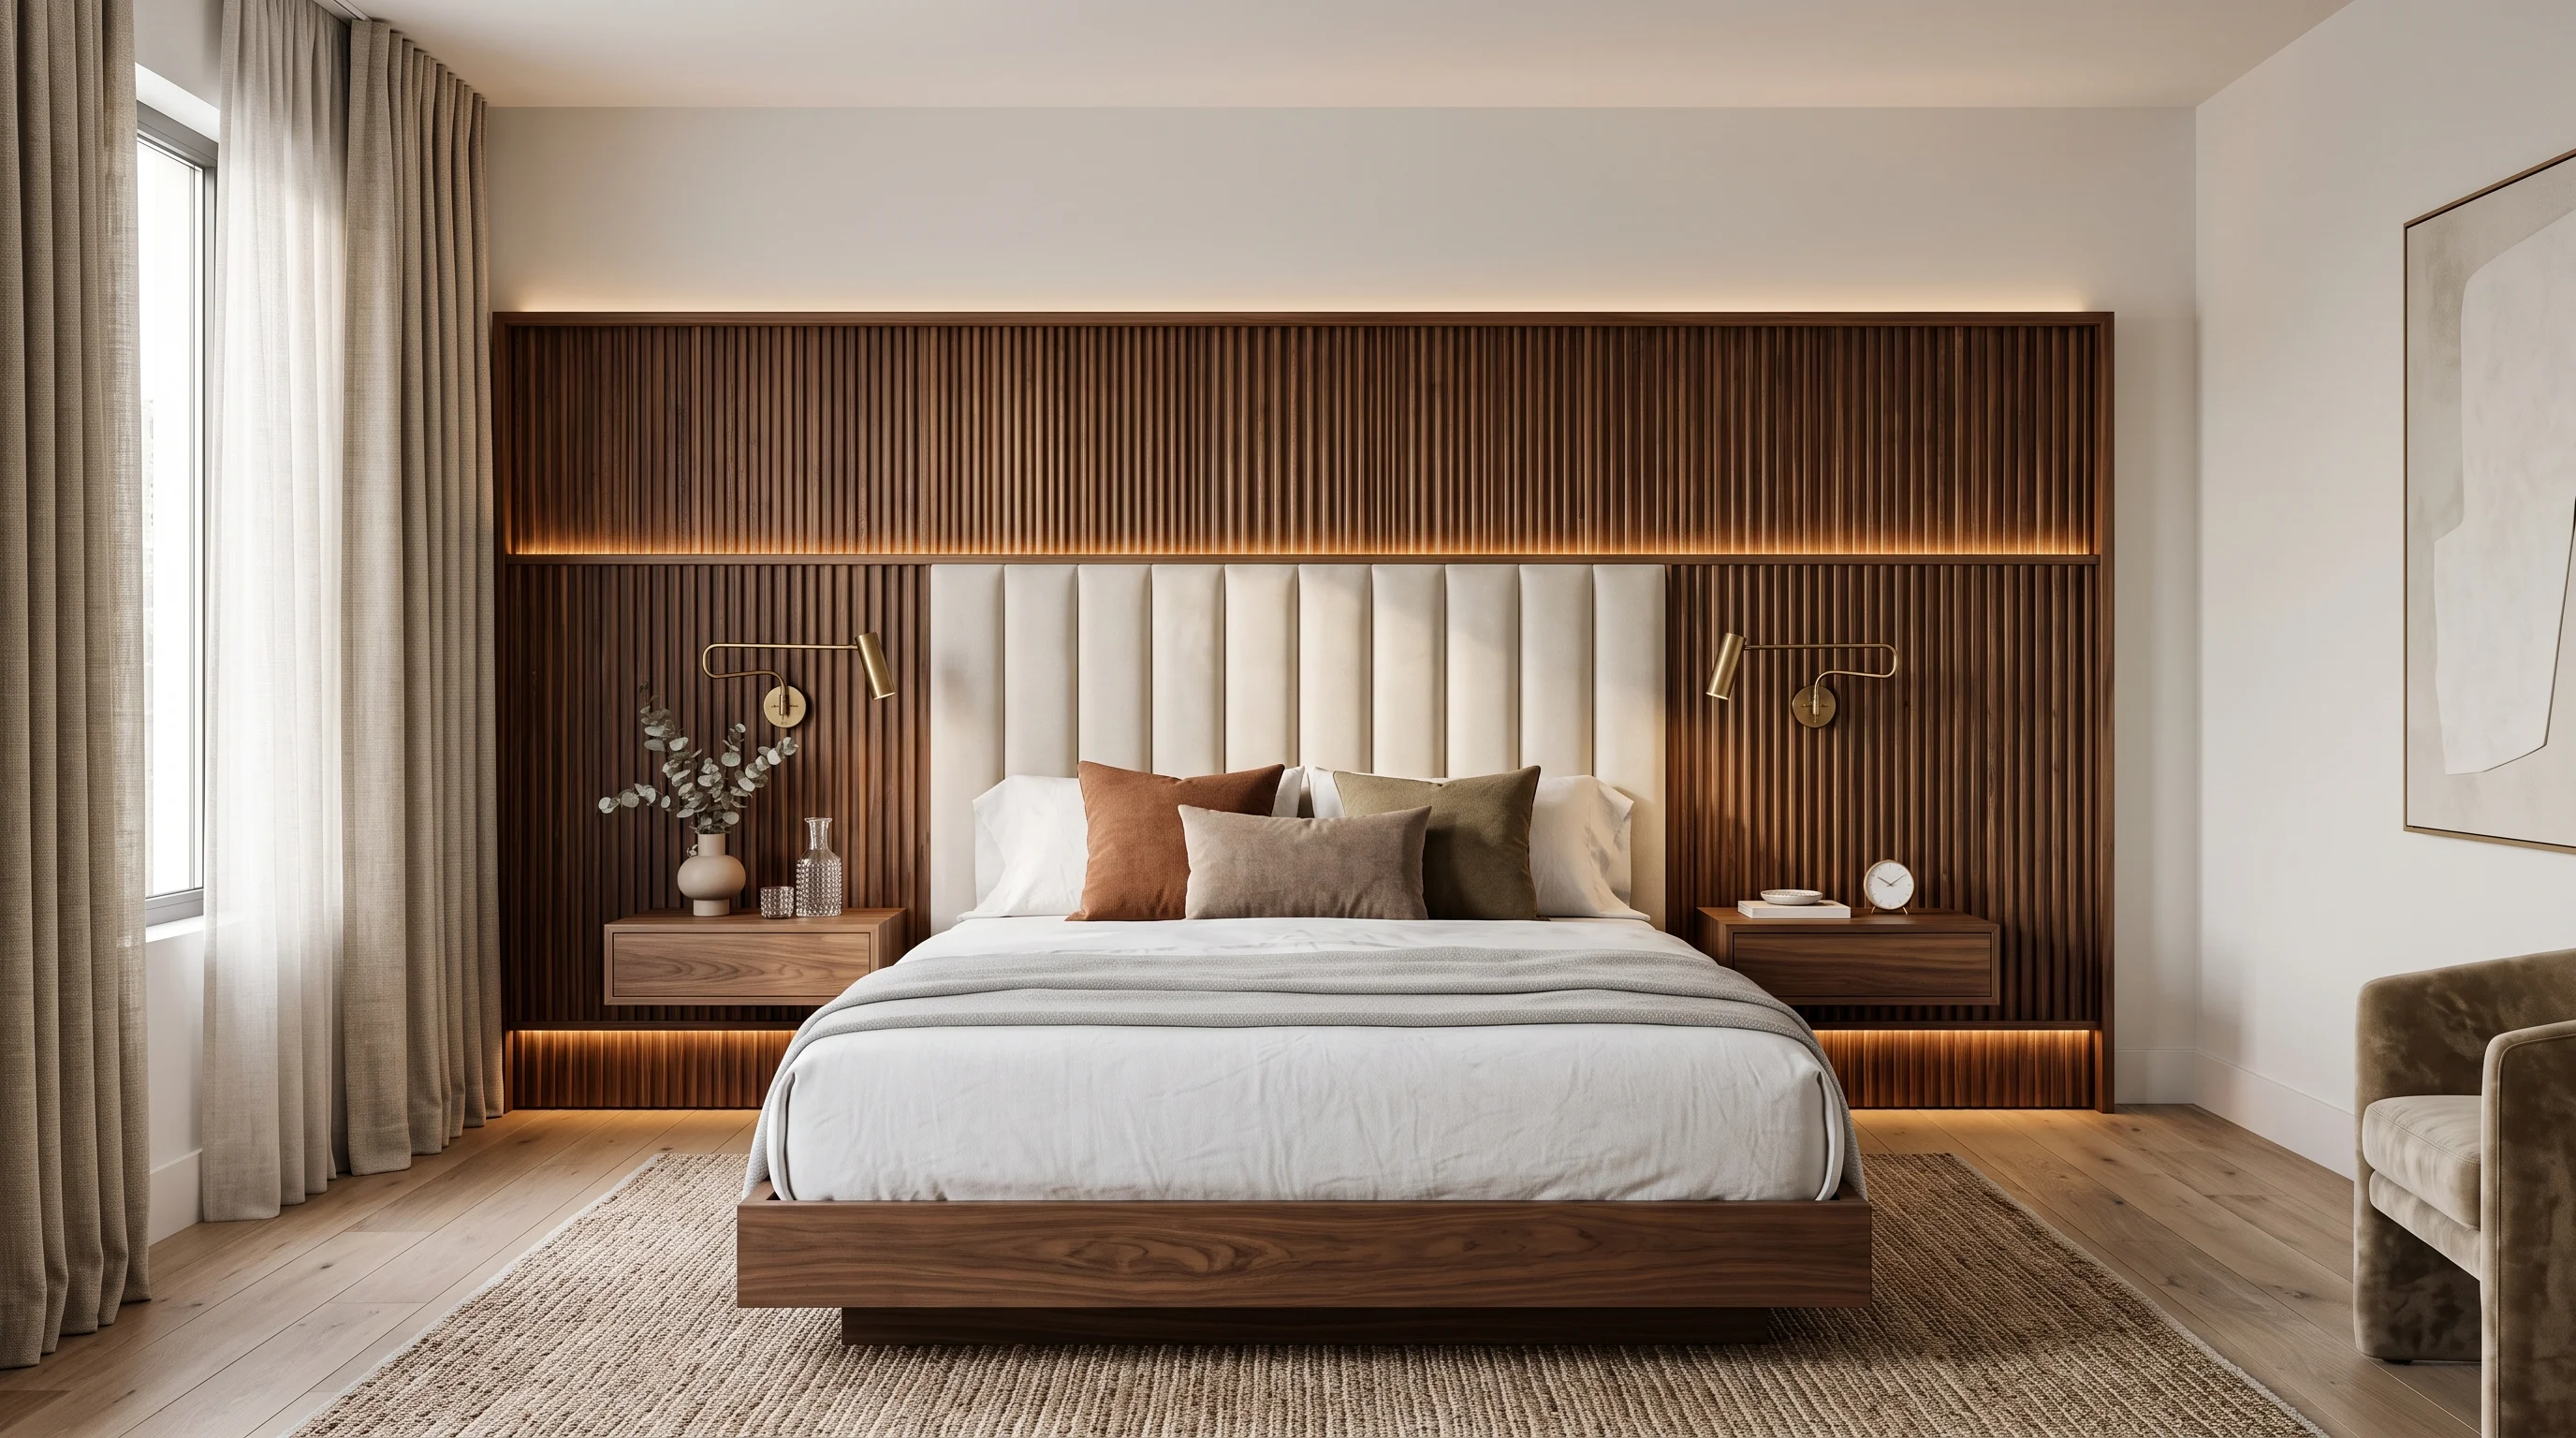
- Why it Works: A standard headboard that exactly matches the width of your mattress is functional, but it does nothing to enhance the architecture of a small room. To make a narrow room feel wider, you need to draw the eye horizontally. Horizontal lines naturally widen a space. A standard headboard chops the wall into three small sections (nightstand, bed, nightstand). An extended headboard unifies these elements into one massive, cohesive architectural feature. It creates a stunning, luxurious focal point that makes the entire back wall feel significantly wider and more grounded.
- How to Style: Create an oversized, custom-looking headboard that extends far beyond the edges of the mattress, running horizontally behind the nightstands to cover a massive portion of the main wall. You do not need to spend thousands on custom carpentry. You can DIY this look by purchasing deeply textured acoustic wall panels (like fluted wood or velvet panels) and mounting them horizontally across the wall directly behind your bed and side tables.
📝 Quick Steps: Measure the total width of your bed plus both nightstands. Purchase fluted wood or velvet acoustic wall panels. Mount the panels horizontally across the entire length of the wall behind the furniture. Push the bed and nightstands flush against the new textured wall.
🛠️ Tools & Materials: Textured acoustic wall panels (fluted wood or velvet), heavy-duty mounting tape or construction adhesive. Measuring tape, level, utility knife.
🧽 Maintenance: Use a brush attachment on your vacuum to gently clean the deep grooves of fluted wood or to remove dust from velvet panels.
⚠️ Safety & Building Codes: If using construction adhesive, ensure you are not applying it over electrical wall outlets. Carefully measure and cut holes in the panels to keep all outlets safely accessible.
💡 Stylist's Secret: Use vertical fluted wooden slats for the headboard material. The overall horizontal shape widens the room, while the vertical lines draw the eye upward, giving you a double optical illusion!
4. Floating Asymmetrical Nightstands
Wall-Mounted Drawers | Continuous Flooring Illusion
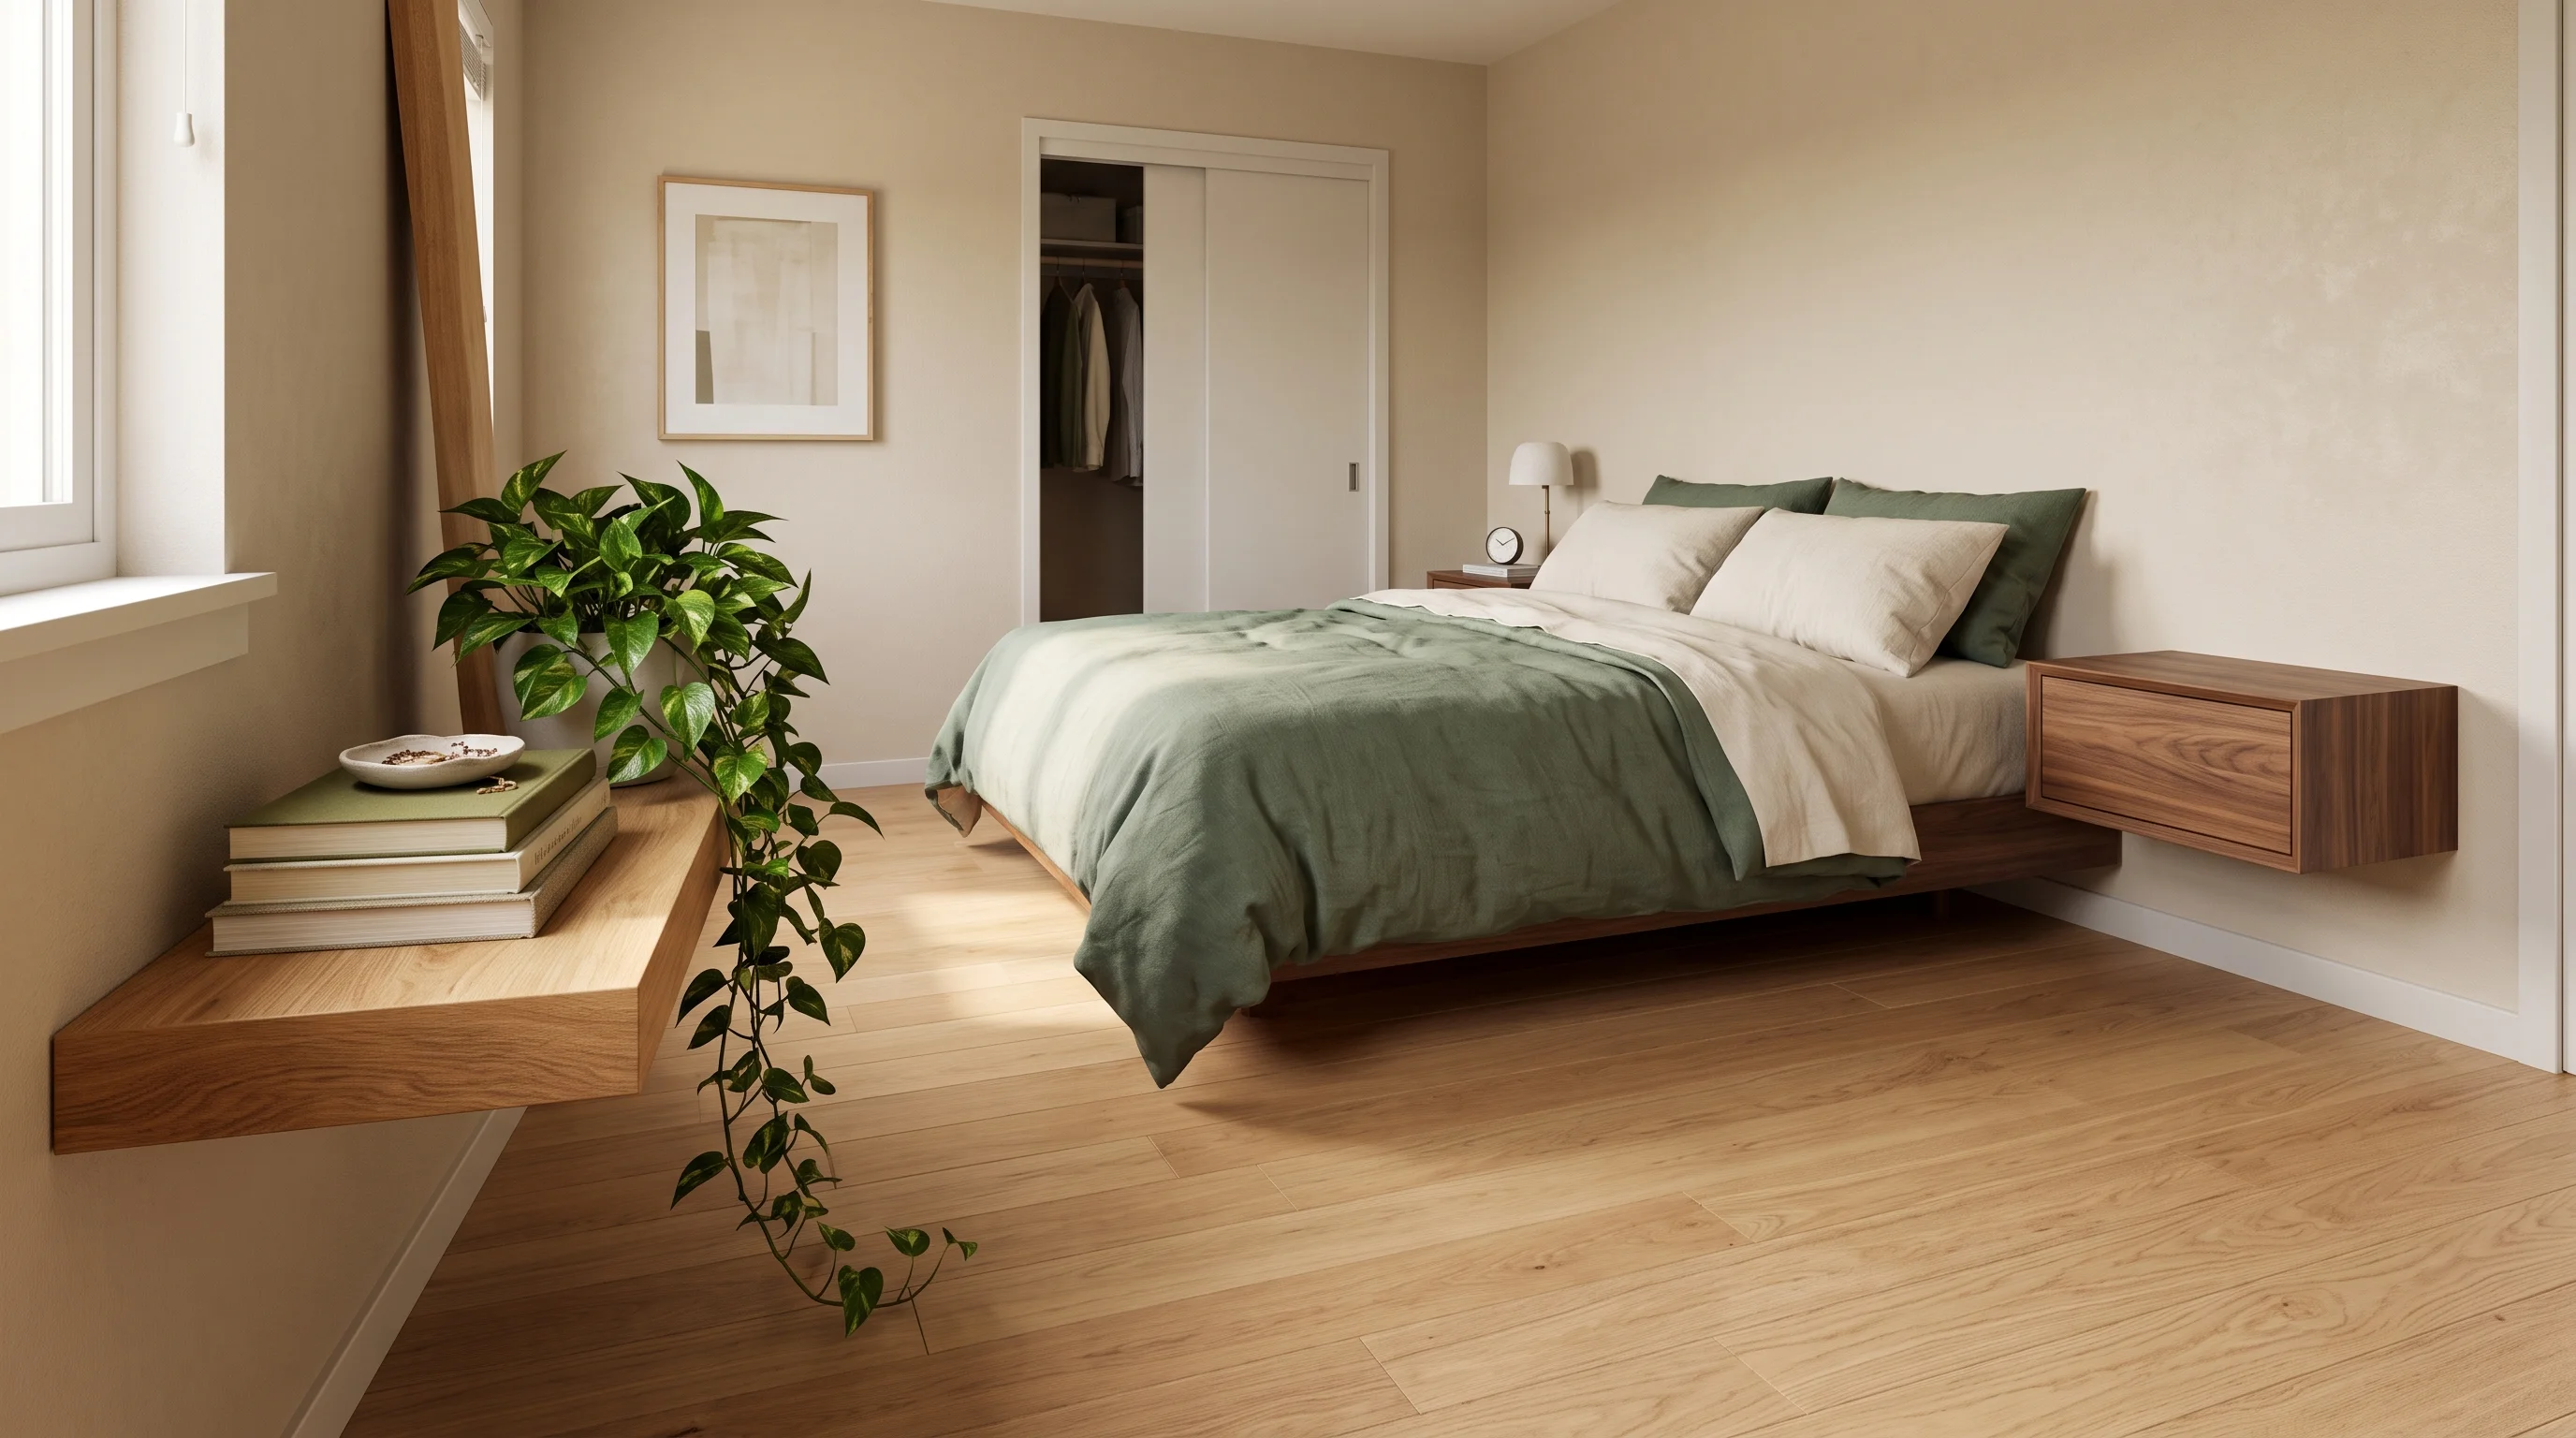
- Why it Works: Heavy, blocky furniture sitting flat on the floor is the ultimate enemy of a small bedroom. The more continuous flooring you can see, the bigger the room will immediately feel. By lifting the furniture off the ground, you allow the flooring to flow seamlessly from wall to wall underneath the nightstands. This uninterrupted visual plane tricks the brain into seeing more square footage. Furthermore, small spaces benefit from slight asymmetry. Instead of perfectly matching heavy nightstands, floating a small wooden drawer on one side and a sleek metal shelf on the other adds high-end, curated visual interest.
- How to Style: Use sleek, minimalist nightstands that are mounted directly to the wall, hovering gracefully above the floor, completely free of bulky legs or heavy bases. Install a beautiful, thick floating wood shelf right next to the bed. Keep the styling incredibly minimal—a single stack of aesthetic books, a small ceramic dish for your jewelry, and a trailing plant.
📝 Quick Steps: Select a small wall-mounted drawer for one side and a floating shelf for the other. Locate the wall studs using a stud finder. Mount the floating nightstands securely to the wall, hovering above the floor. Style minimally with a trailing plant and a small jewelry dish.
🛠️ Tools & Materials: Floating wooden drawer, sleek metal or wood floating shelf. Drill, stud finder, level, heavy-duty wall anchors.
🧽 Maintenance: Wipe the surfaces daily, as floating nightstands naturally collect dust and any clutter is immediately visible.
⚠️ Safety & Building Codes: You must use proper heavy-duty wall anchors or screw directly into studs. A floating nightstand will rip out of hollow drywall if someone leans their body weight on it while getting out of bed.
💡 Pro Tip: Mount the floating nightstands slightly lower than the top of your mattress. It makes reaching for your phone easier and emphasizes the visual height of the bed.
5. Wall-Mounted "Hardwired-Look" Sconces
Plug-In Ambient Light | Clear Nightstand Surfaces
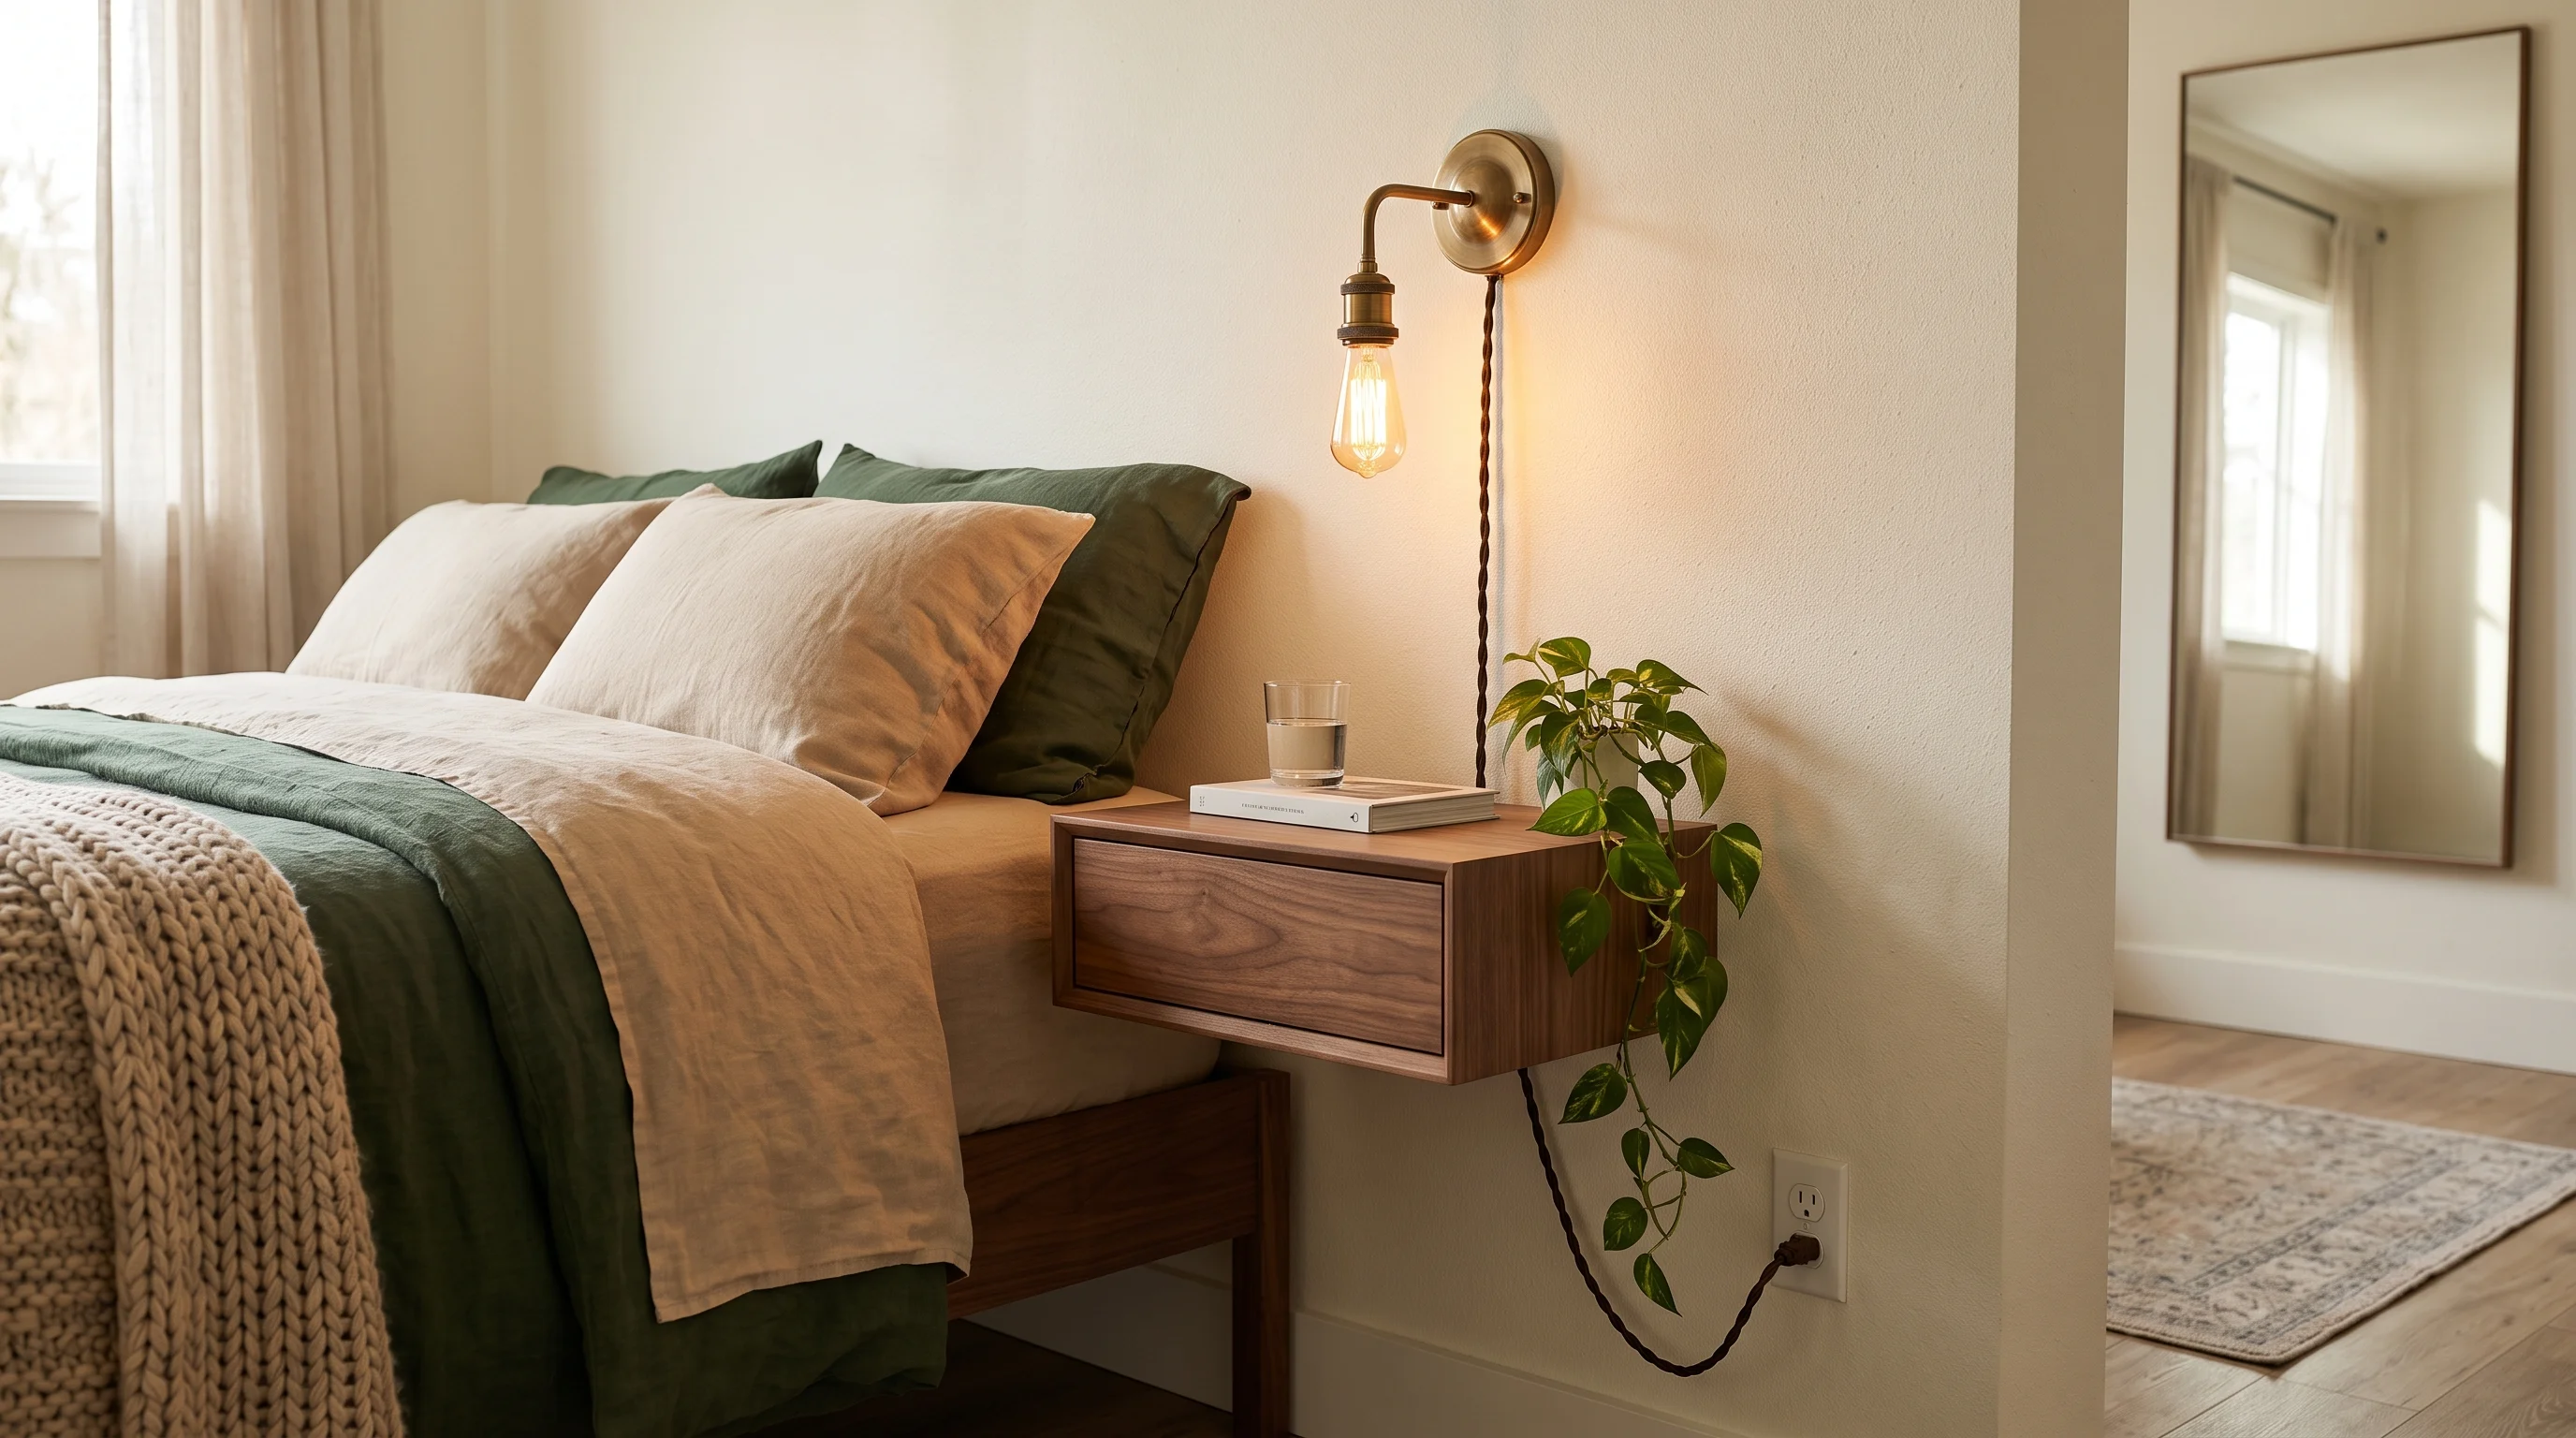
- Why it Works: Small nightstands get cluttered instantly. By the time you add a bulky table lamp, your phone charger, and a glass of water, you have zero functional space left, and the room looks incredibly messy. Moving your lighting from the tabletop to the wall reclaims 100% of your nightstand surface area, instantly eliminating visual clutter. Wall-mounted sconces draw the eye upward, highlighting the vertical height of the room. They also provide deeply relaxing, directional ambient light perfectly positioned for reading in bed.
- How to Style: Install beautiful, high-end brass or matte black wall sconces mounted on the wall directly above your floating nightstands, featuring warm, glowing Edison bulbs. You absolutely do not need to hire an electrician to rip open your drywall. The modern design secret is "plug-in" wall sconces. You simply mount the fixture to the wall with two screws and let the beautiful, fabric-wrapped cord drape down to a standard wall outlet.
📝 Quick Steps: Purchase a pair of plug-in wall sconces with articulating swing arms. Measure and mark the wall above your nightstands (usually around shoulder height when sitting in bed). Mount the sconces to the wall using two screws. Drape the fabric-wrapped cord neatly down to the outlet.
🛠️ Tools & Materials: Brass or matte black plug-in wall sconces, warm glowing Edison bulbs. Screwdriver, measuring tape, level.
🧽 Maintenance: Dust the metal fixtures and exposed Edison bulbs gently with a static duster weekly.
⚠️ Safety & Building Codes: Ensure the hanging cords are tucked neatly behind the nightstand or secured to the wall with cord clips to prevent a tripping or strangulation hazard.
💡 Designer's Advice: Choose sconces with articulating (swing) arms. You can push them completely flat against the wall when not in use to save even more spatial volume!
6. Smoked or Antiqued Mirrored Wardrobes
Tinted Reflective Surfaces | Atmospheric Depth Expansion
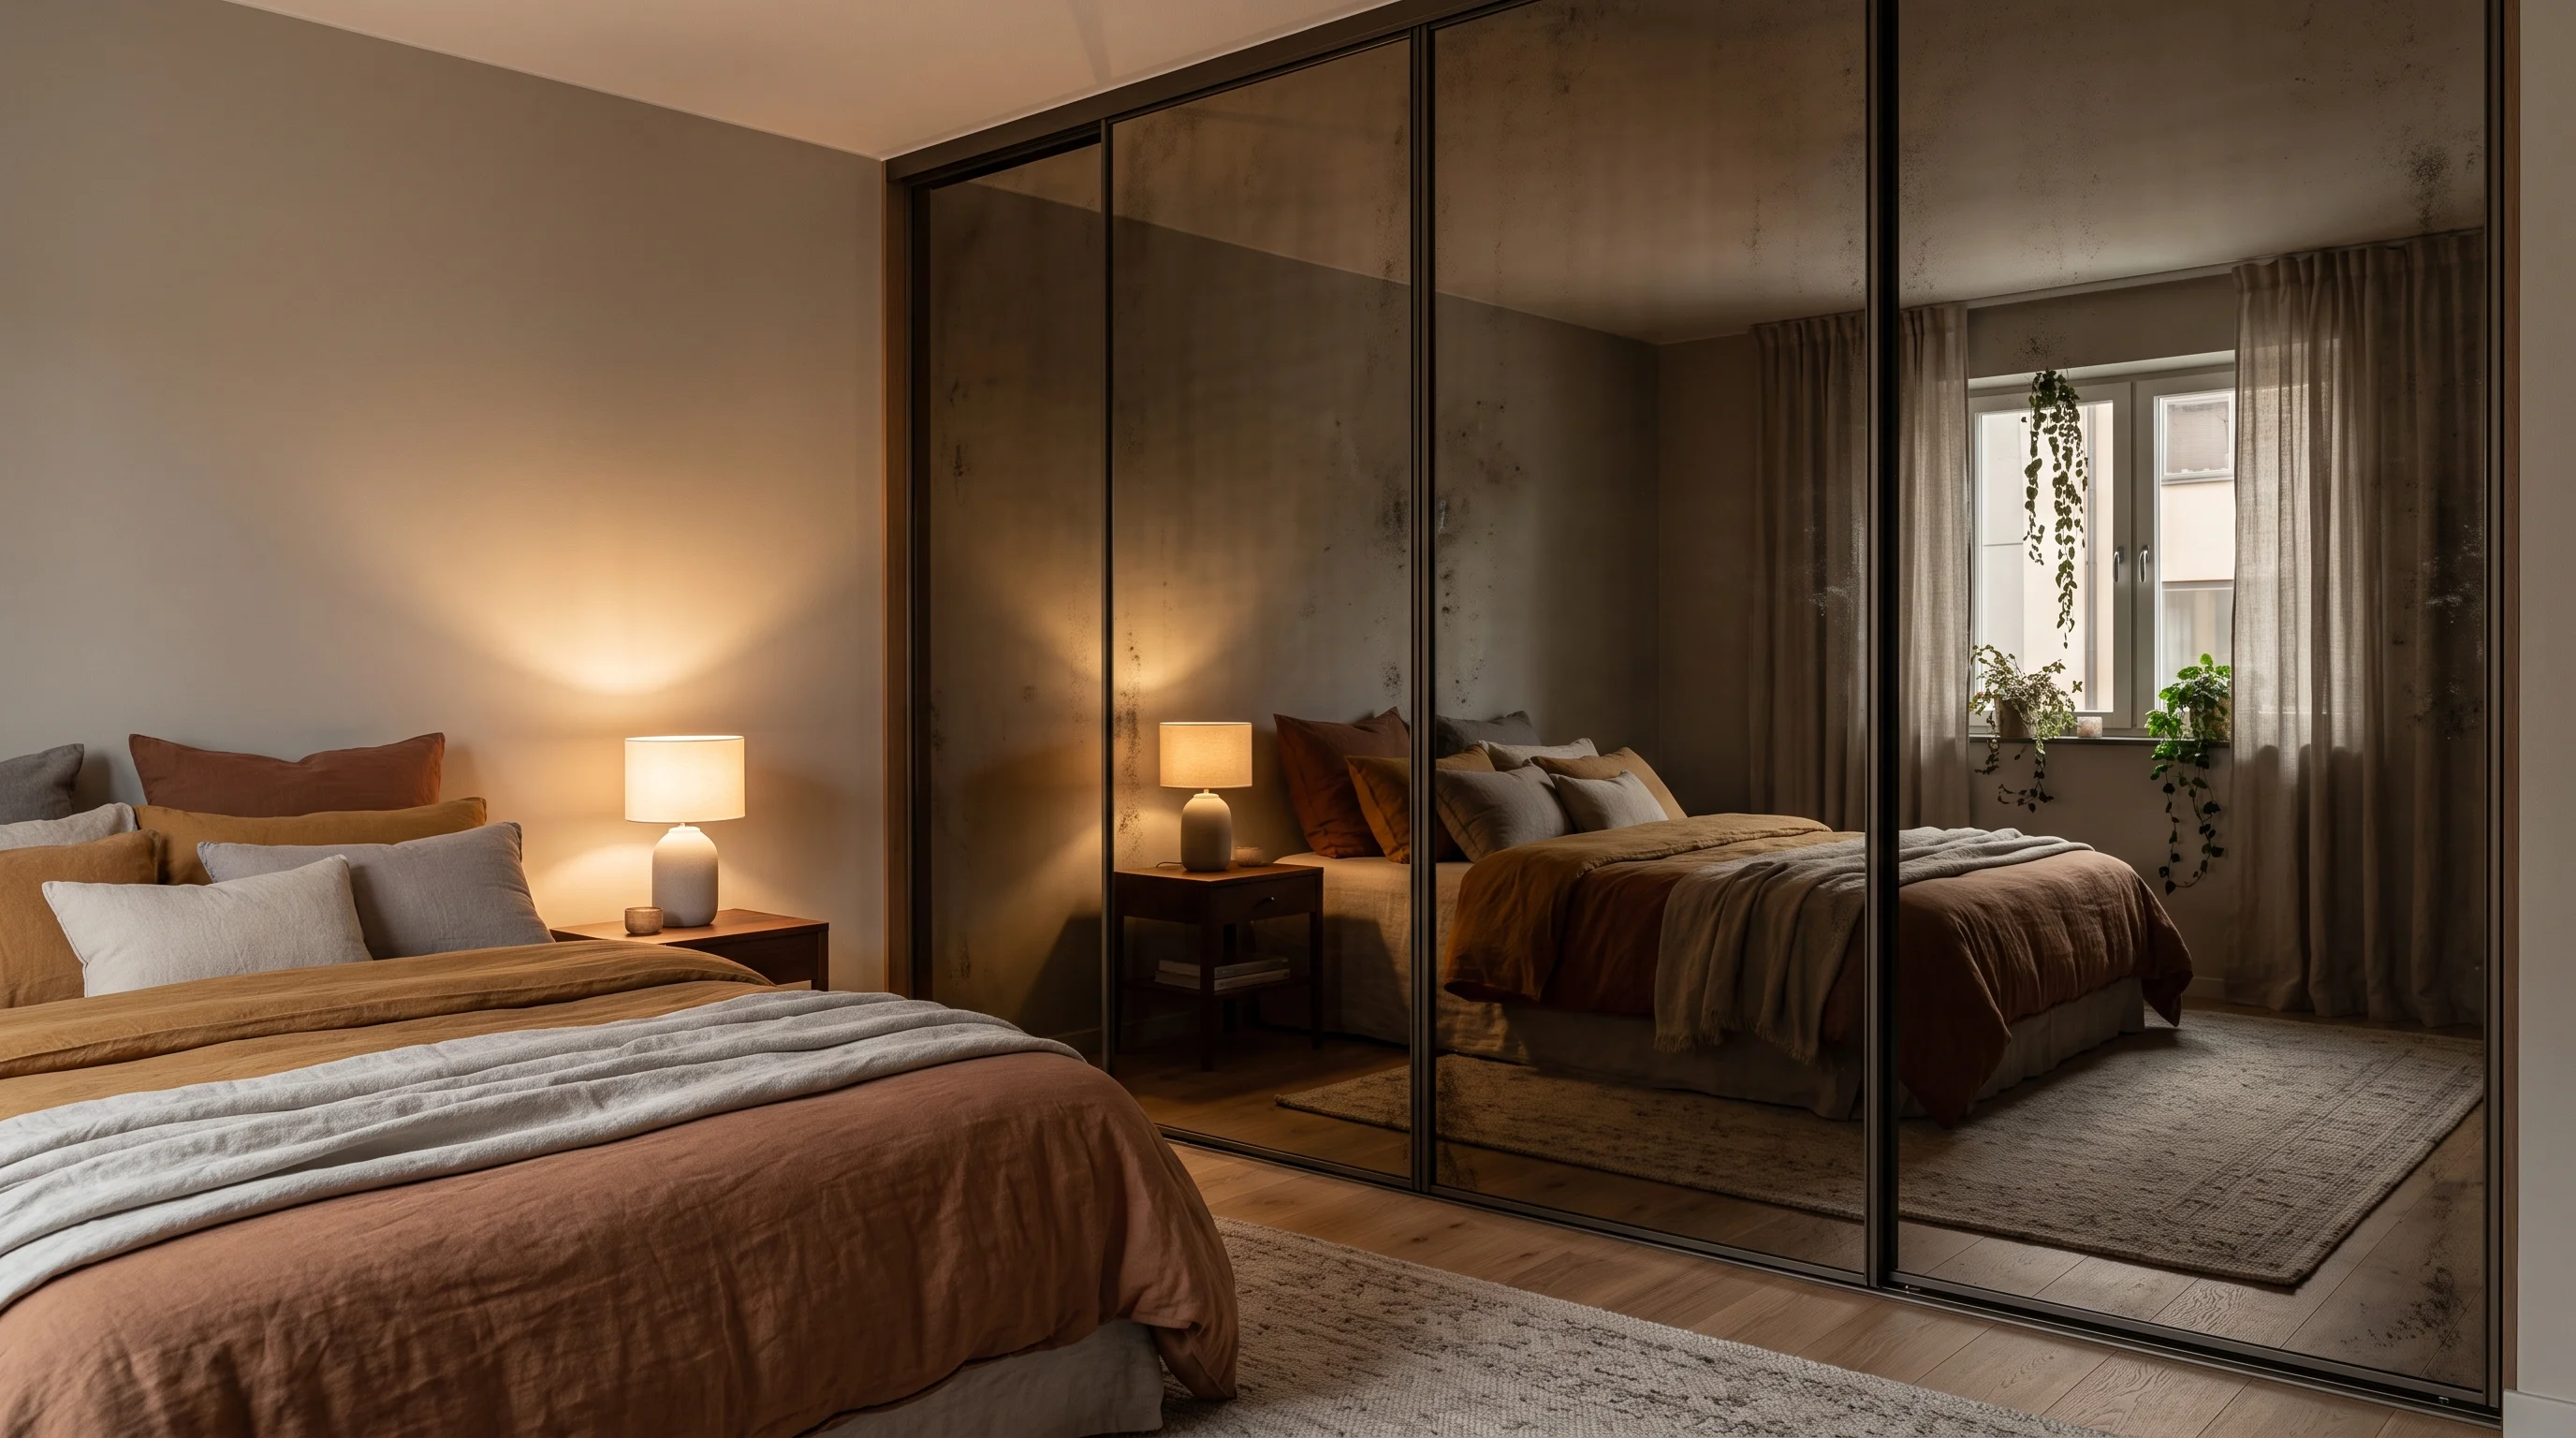
- Why it Works: Mirrors are universally recommended for small spaces because they bounce light and double the visual depth of a room. However, standard clear mirrors on sliding closet doors can feel cheap, harsh, and overly bright, ruining a bedroom's cozy mood. Smoked or antiqued mirrors provide the exact same space-expanding optical illusion as standard mirrors—they reflect the room, making it look twice as long. However, the darker tint completely softens the reflection. Instead of a harsh "funhouse" effect, they create a moody, romantic, and deeply atmospheric glow that maintains the room's cozy privacy.
- How to Style: Aim for floor-to-ceiling wardrobe doors featuring deeply tinted smoked glass, bronze glass, or gently distressed antiqued mirrors. If you are upgrading your closet doors, ask your glass provider for a "bronze tint" or "antique finish." If you have existing plain mirrored doors, you can easily apply a tinted, semi-reflective architectural window film over them as a DIY project.
📝 Quick Steps: Clean your existing mirrored closet doors flawlessly. Purchase a roll of tinted, semi-reflective bronze or smoked architectural window film. Spray the mirrors with a soap and water solution. Apply the tinted film and squeegee out all the air bubbles perfectly flat.
🛠️ Tools & Materials: Smoked, bronze, or antiqued architectural window film, application spray. Smoothing squeegee, utility knife, glass cleaner.
🧽 Maintenance: Clean tinted mirrors with an ammonia-free glass cleaner and a microfiber cloth. Ammonia can degrade the applied tint film over time.
⚠️ Safety & Building Codes: If replacing the actual glass doors, building codes mandate that all mirrored wardrobe doors must be made of shatter-resistant tempered safety glass or have a protective safety backing applied.
💡 Pro Tip: If you don't have wardrobe doors, leaning a massive, heavy antiqued floor mirror in the darkest corner of the bedroom will achieve the exact same space-doubling, cozy effect.
7. High-Mounted Wrap-Around Drapery
Ceiling-to-Floor Curtains | Wall-to-Wall Fabric Softness
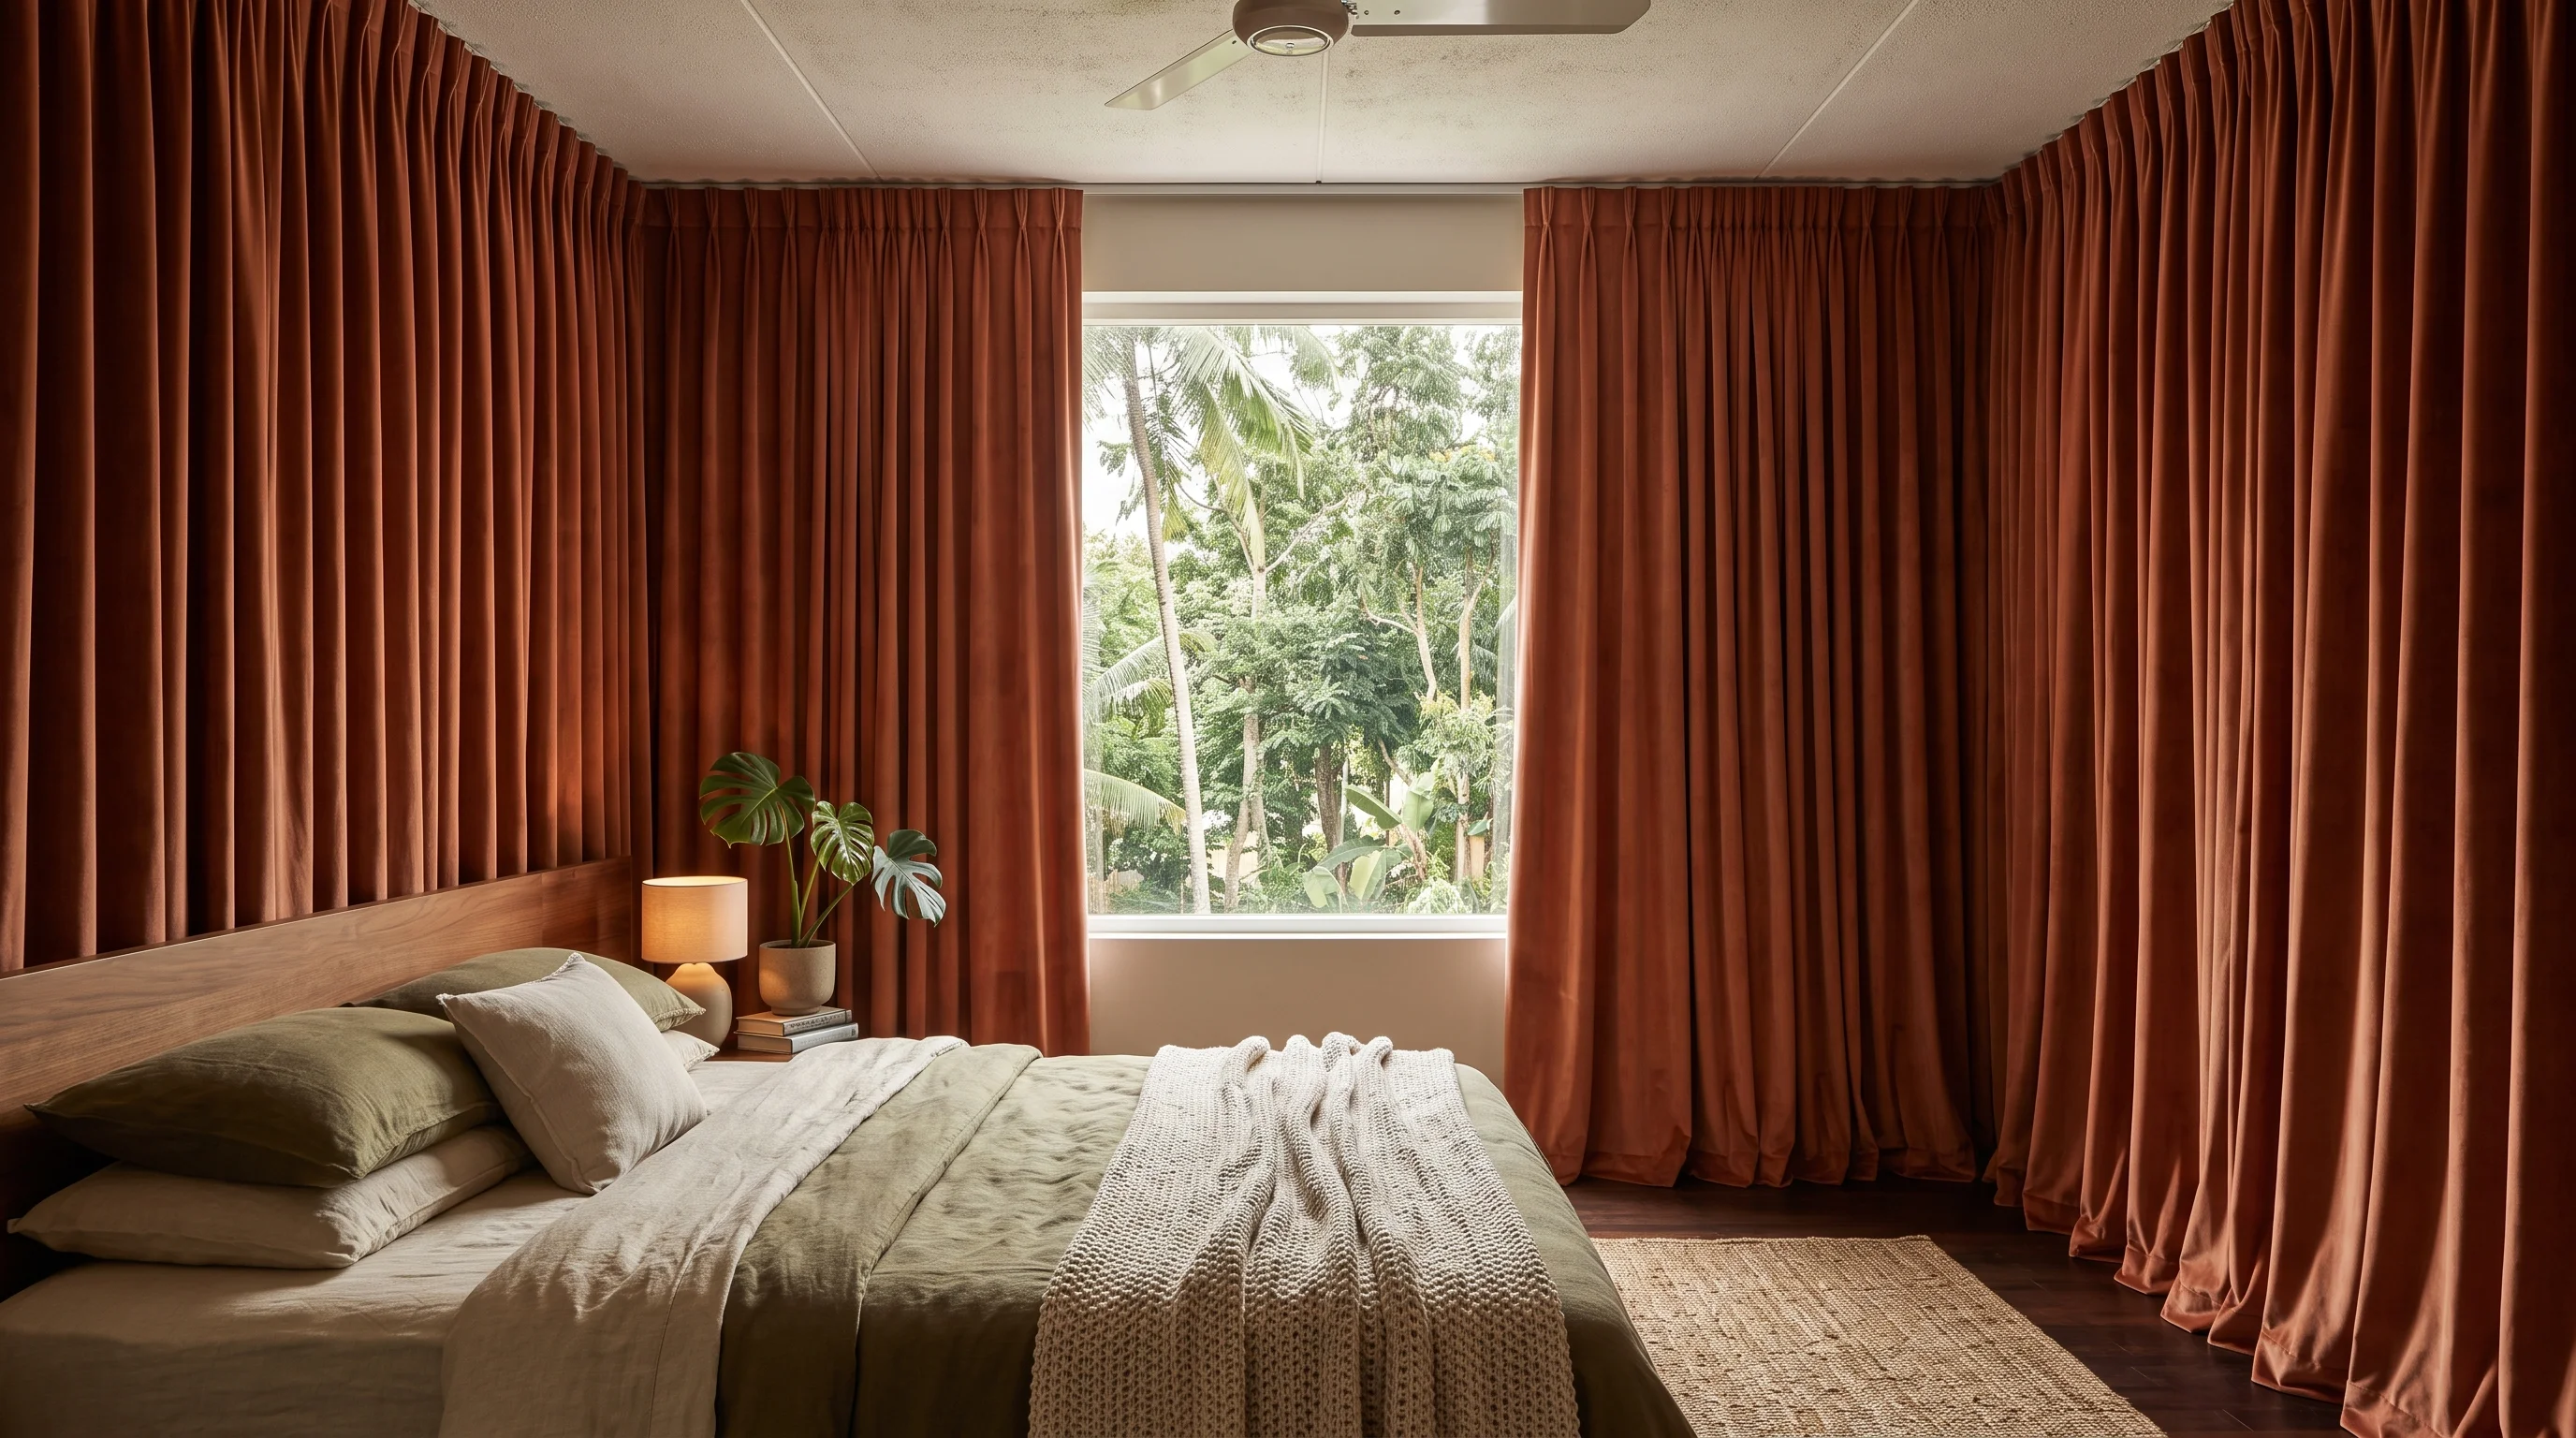
- Why it Works: Window treatments in small rooms are often an afterthought, but they are secretly one of the most powerful tools in an interior designer's arsenal for manipulating space and texture. Mounting the curtain rod inches above the actual window frame draws the eye straight up to the ceiling, instantly making the room feel significantly taller. By extending the rod horizontally past the window edges, you can pull the curtains wide open to maximize natural light, while simultaneously tricking the brain into thinking the window itself is massive.
- How to Style: Use lush, heavy, richly textured curtains (like velvet or heavy linen) mounted at the absolute highest point where the wall meets the ceiling, extending far past the window frame, and sweeping all the way to the floor. Do not just cover the window; cover the entire wall. Hanging a continuous wall of drapery behind the bed or across an entire windowed wall softens the harsh, boxy corners of a small bedroom.
📝 Quick Steps: Purchase extra-long curtain panels (velvet or heavy linen) and a long curtain rod. Mount the rod brackets at the very top of the wall, where it meets the ceiling. Extend the rod far past the actual edges of the window frame. Hang the lush curtains so they sweep the floor.
🛠️ Tools & Materials: Heavy, extra-long velvet or linen curtains. Long curtain rod or ceiling-mounted track system.
🧽 Maintenance: Steam the curtains after hanging to remove deep wrinkles. Vacuum velvet curtains gently with a brush attachment to remove dust.
⚠️ Safety & Building Codes: Ensure the heavy drapery is kept securely away from any baseboard heaters or portable space heaters to prevent severe fire hazards.
💡 Contractor's Secret: Match the curtain color perfectly to your color-drenched walls! This creates a seamless, continuous visual wrap that makes the walls feel endless rather than chopping them up with contrasting colors.
8. Monochromatic Texture Layering
Tactile Bedding Mix | Calming Visual Flow
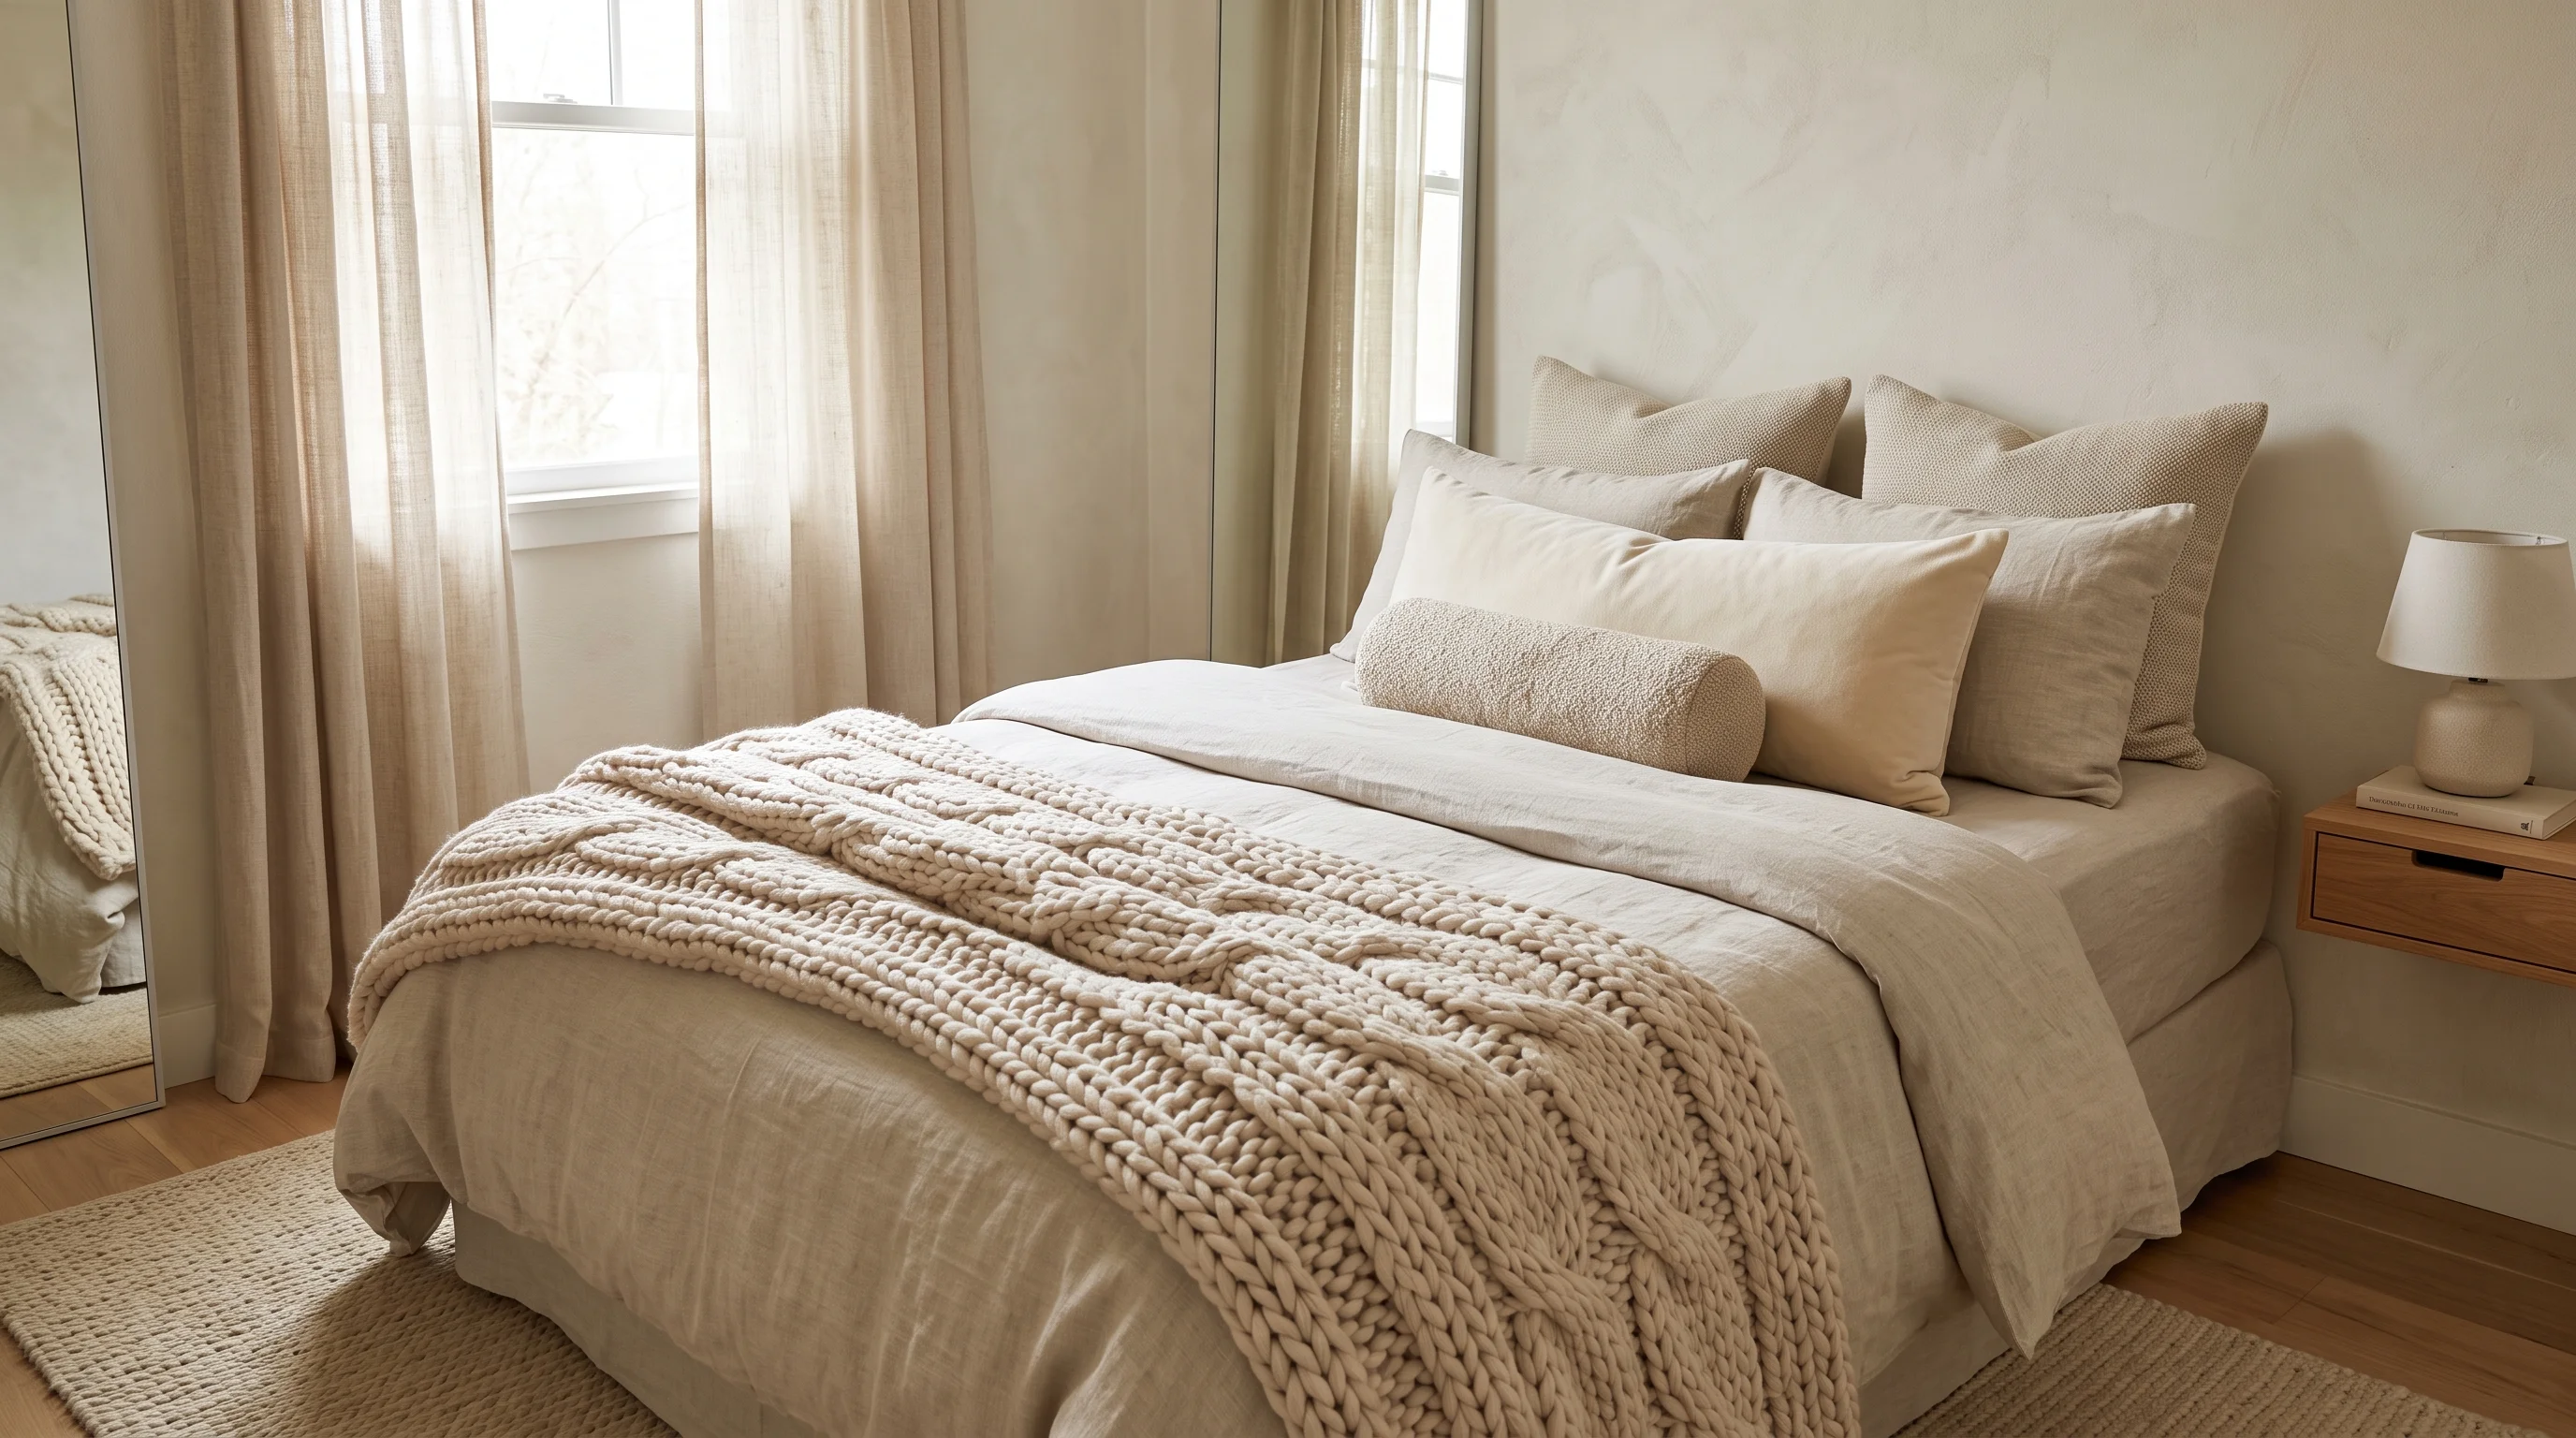
- Why it Works: When decorating a small space, people often add too many different colors and patterns, resulting in visual chaos that makes the room feel cramped and stressful. The secret to a rich, cozy room without clutter is utilizing texture instead of pattern. Keeping the color palette strictly monochromatic prevents the eye from stopping and starting, allowing the visual flow of the room to remain smooth and expansive. By heavily layering different textures, you add deep, luxurious visual interest and massive physical coziness without introducing any chaotic visual clutter.
- How to Style: Create a perfectly balanced bed dressed entirely in a single, soothing color palette (like warm oatmeals, soft creams, or moody charcoals), but featuring an extreme variety of different tactile materials. Start with crisp, breathable percale or linen sheets as your base. Add a chunky, heavily knitted wool throw blanket draped casually at the foot of the bed. Incorporate accent pillows made of rich, soft velvet or trendy, nubby boucle fabric.
📝 Quick Steps: Select a single, soothing color palette for the entire bed (e.g., warm oatmeal). Lay down crisp percale or linen sheets. Place a thick, overstuffed duvet on top. Add accent pillows in velvet or boucle fabric, and drape a chunky wool throw at the foot of the bed.
🛠️ Tools & Materials: Percale or linen sheets, chunky wool throw blanket, velvet or boucle accent pillows, oversized down duvet insert.
🧽 Maintenance: Dry clean heavy wool blankets and velvet pillows to maintain their tactile quality and prevent shrinking or crushing the fabric pile.
⚠️ Safety & Building Codes: If using electric blankets within your texture layers, never tuck the wires tightly under the mattress or place heavy objects on top of them, as this can overheat the coils and cause a fire.
💡 Designer's Advice: Always size up your duvet insert! Put a King-size down insert inside a Queen-size duvet cover. It creates that ultra-plush, overstuffed, cloud-like hotel volume that makes the bed look irresistible.
9. Hidden Perimeter Ambient Lighting
LED Bias Illumination | Soft Shadowless Glow
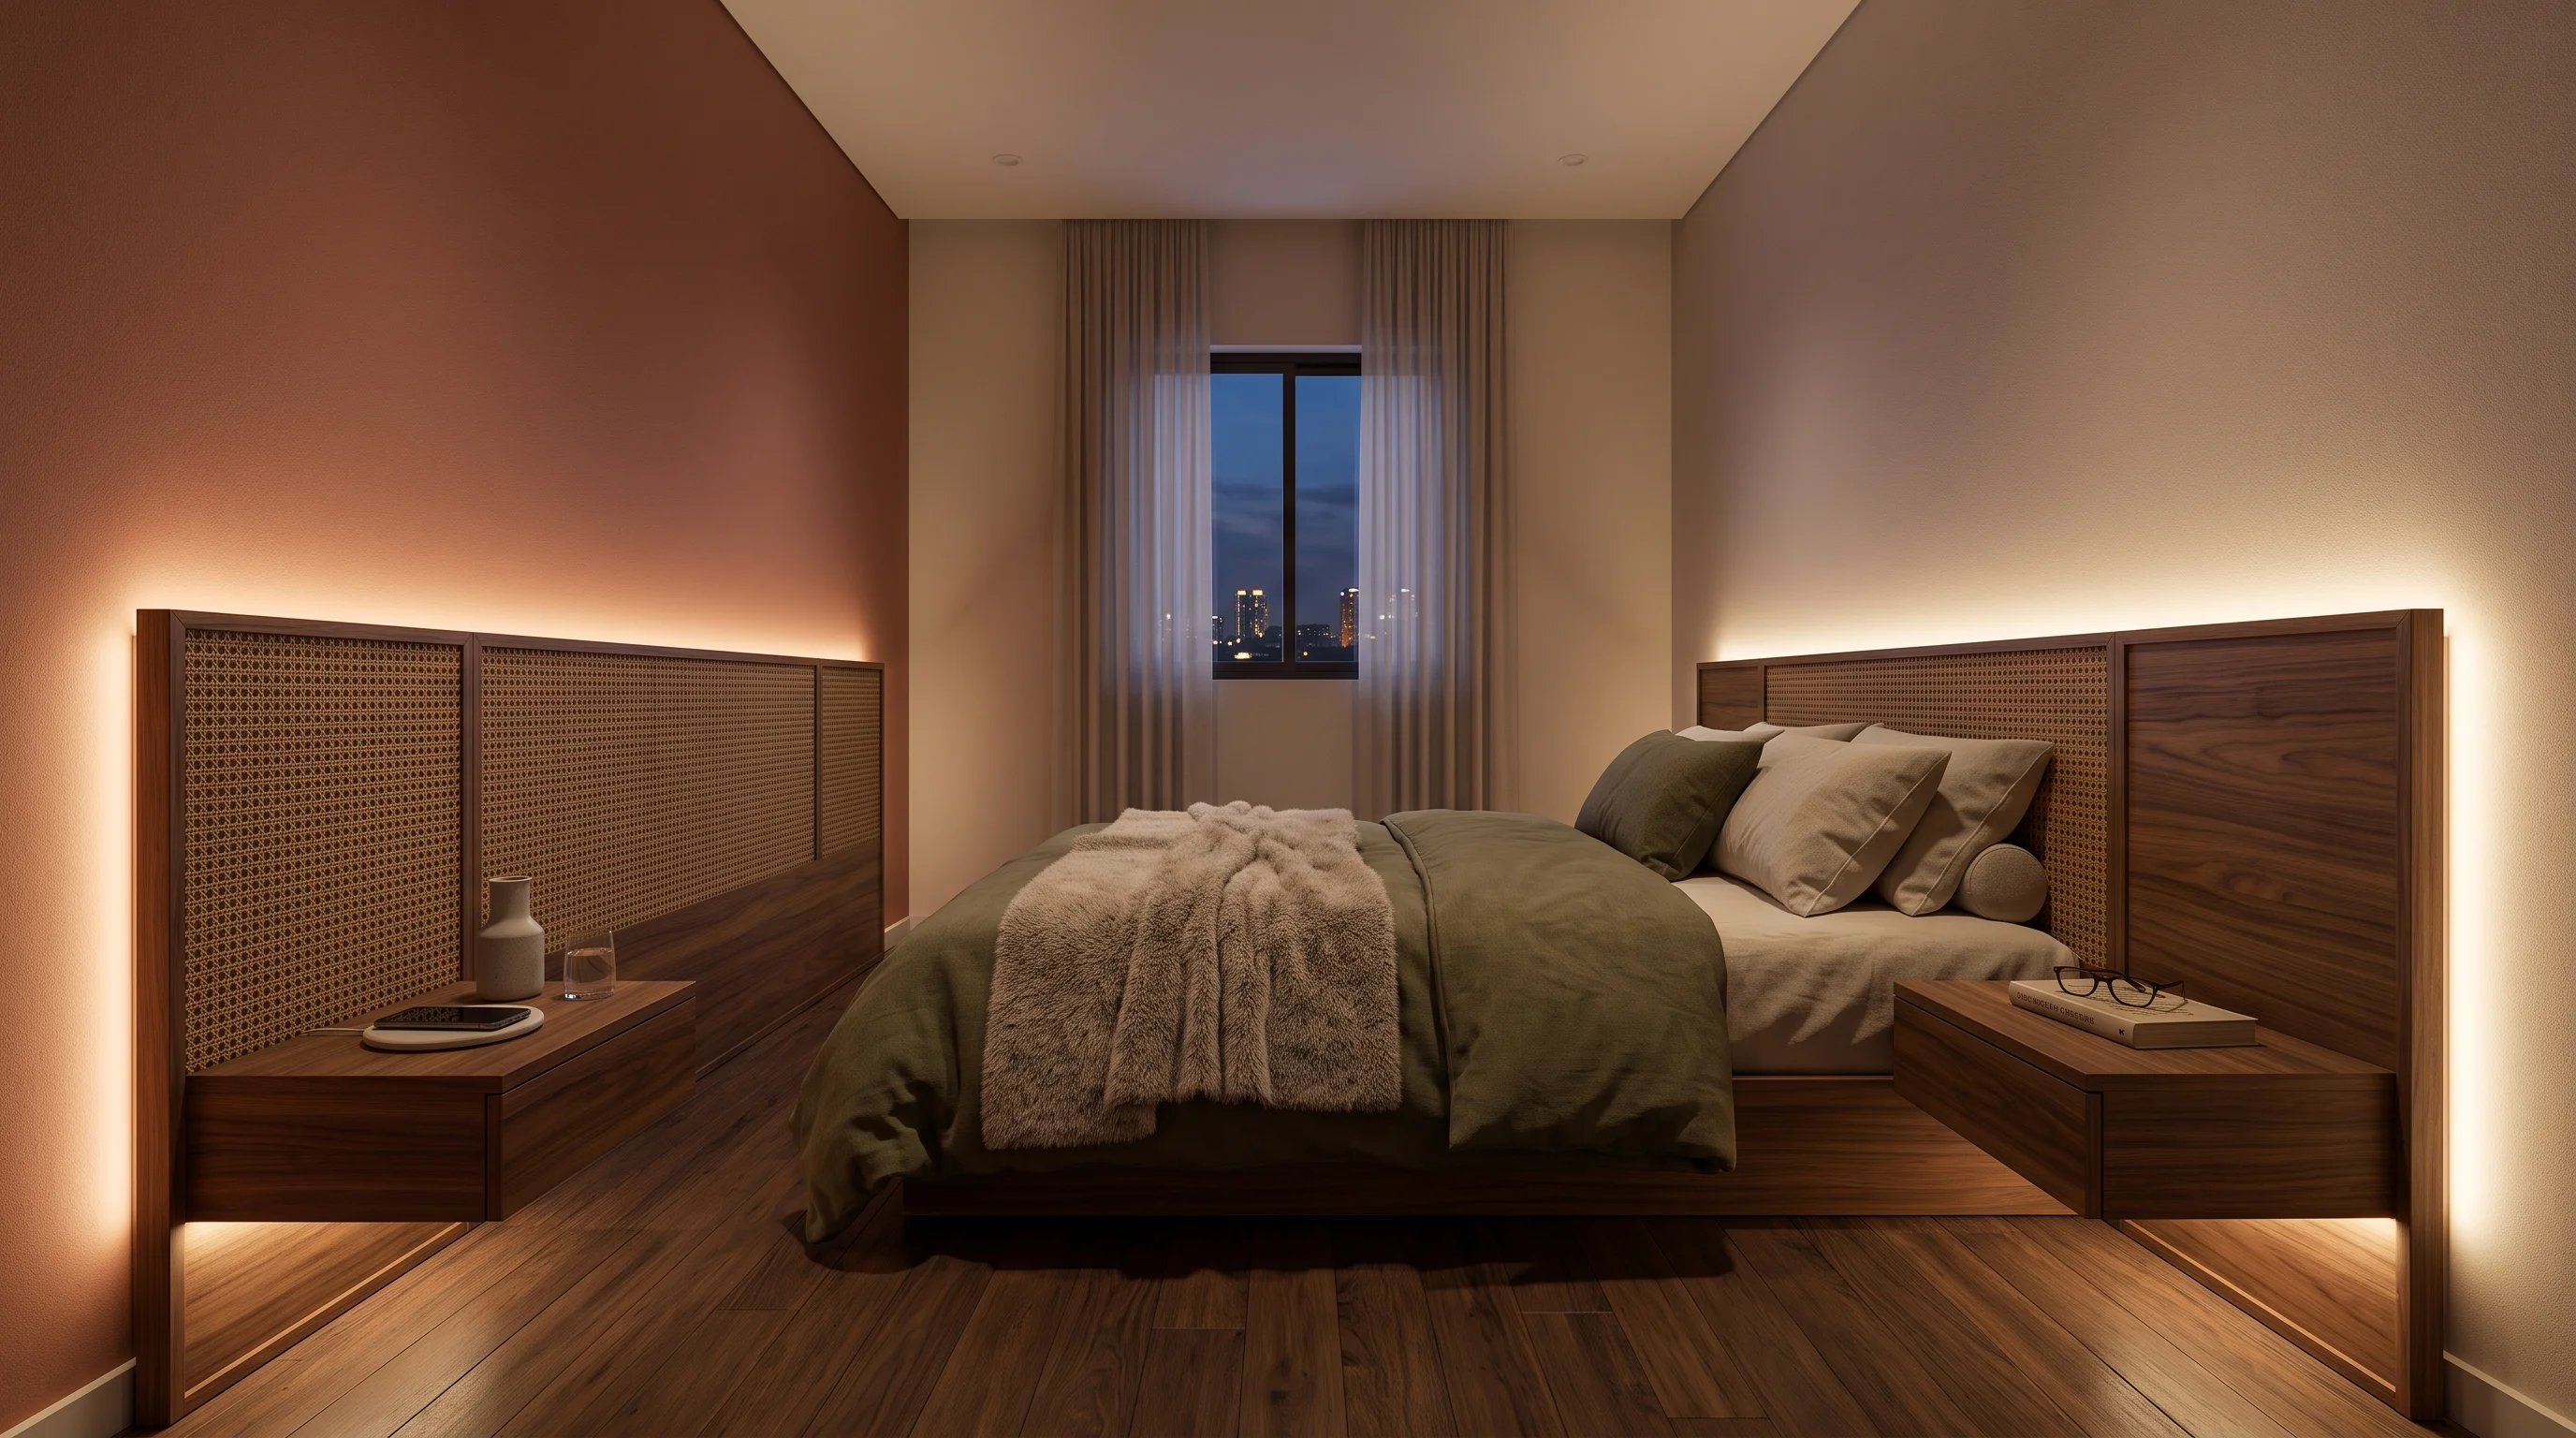
- Why it Works: Overhead ceiling lights cast harsh, downward shadows that highlight every flaw and make small rooms feel like interrogation chambers. Cozy spaces require soft, glowing, layered ambient light. This is known as "bias lighting." By placing the light source behind an object so it washes gently against the wall or floor, you completely eliminate harsh shadows. When a bed is backlit, it visually separates the furniture from the wall, adding a stunning sense of three-dimensional depth that makes the room feel larger.
- How to Style: Introduce a completely invisible, magical glow of warm light emanating from behind the headboard, underneath the floating nightstands, or glowing softly under the bed frame. Purchase high-quality, smart LED light strips with a warm white setting (aim for a color temperature of 2700K). Adhere them to the back edge of your headboard facing the wall, or run them along the bottom rails of your bed frame facing the floor.
📝 Quick Steps: Buy smart LED light strips capable of warm white (2700K) settings. Wipe down the back of your headboard or the bottom of your bed frame. Peel the adhesive backing and stick the LED strips facing the wall or floor. Plug the strips into a smart plug.
🛠️ Tools & Materials: High-quality smart LED light strips (2700K), smart plug.
🧽 Maintenance: Ensure the adhesive strip stays secure; if it peels away from the wood, use small cable clips to tack the LED strip permanently into place.
⚠️ Safety & Building Codes: Do not let LED strips directly touch highly flammable fabrics (like dust ruffles or upholstery) for extended periods. Ensure the power adapters are kept in well-ventilated areas.
💡 Pro Tip: Connect these LED strips to a smart plug scheduled to slowly fade on 30 minutes before sunset. It automatically sets a moody, cozy atmosphere before you even step foot into the room!
Bonus Upgrades
- The Mirror-Facing Window Trick: Hang a mirror on the wall directly adjacent to your window. It catches the natural light at an angle and blasts it across the room, mimicking the effect of having an entirely new window installed.
- Continuous Flooring: Never break up a small bedroom floor with multiple small rugs. If you have beautiful hardwood, leave it completely exposed or use one massive, room-sized rug to create an unbroken visual plane.
Quick Reference Cheat Sheet
| Feature | Best For | Estimated Cost | Professional Needed? |
|---|---|---|---|
| Color Drenching | Blurring harsh wall boundaries | $50 - $150 | No |
| Platform Beds | Expanding vertical ceiling space | $150 - $400 | No |
| Extended Headboards | Widening narrow walls visually | $80 - $200 | No |
| Smoked Mirrors | Doubling space without harsh glare | $40 - $150 | No (Using film) |
| Texture Layering | Adding coziness without clutter | $100 - $250 | No |
Frequently Asked Questions (FAQ)
Q: Do dark colors make a small bedroom look even smaller?
A: This is a massive design myth! While bright white reflects light, it also clearly defines the corners of a room. Dark, moody colors (when used to paint the walls, trim, and ceiling together) absorb light and blur the edges of the room, making it incredibly difficult for the eye to tell where the walls end. This actually makes the space feel vast, deep, and deeply cozy.
Q: What size area rug is best for a small bedroom?
A: A common mistake is buying a small rug (like a 5x8) for a small room, which chops up the floor and makes the space feel cramped. Always go larger! An 8x10 rug placed under the bottom two-thirds of a Queen bed stretches the visual footprint and makes the entire room feel much wider.
Q: Should I put a TV in a small bedroom?
A: A large black TV screen acts like a visual black hole in a small room. If you must have one, consider a "Frame TV" that displays art when off, or paint the wall behind the TV a dark, moody color so the screen completely blends in and disappears when not in use.
Final Thoughts
Transforming a small bedroom into a space that feels both impressively expansive and wonderfully cozy is completely within your reach. It is all about outsmarting the physical dimensions with brilliant design choices. By utilizing the magic of color drenching, lowering your furniture profiles, and mastering the art of soft, ambient lighting, you can easily turn a cramped box into a deeply intentional, luxurious retreat. You do not need to tear down walls or expand your home's footprint. Pick a few of these transformative hacks to implement this weekend, layer up those beautiful textures, and get ready to experience the absolute best sleep of your life in your stunning, newly upgraded Vindy Space!
Read Next on Vindy Space:
*When you purchase through links on our site, we may earn an affiliate commission.*
Author: Vindy P.