
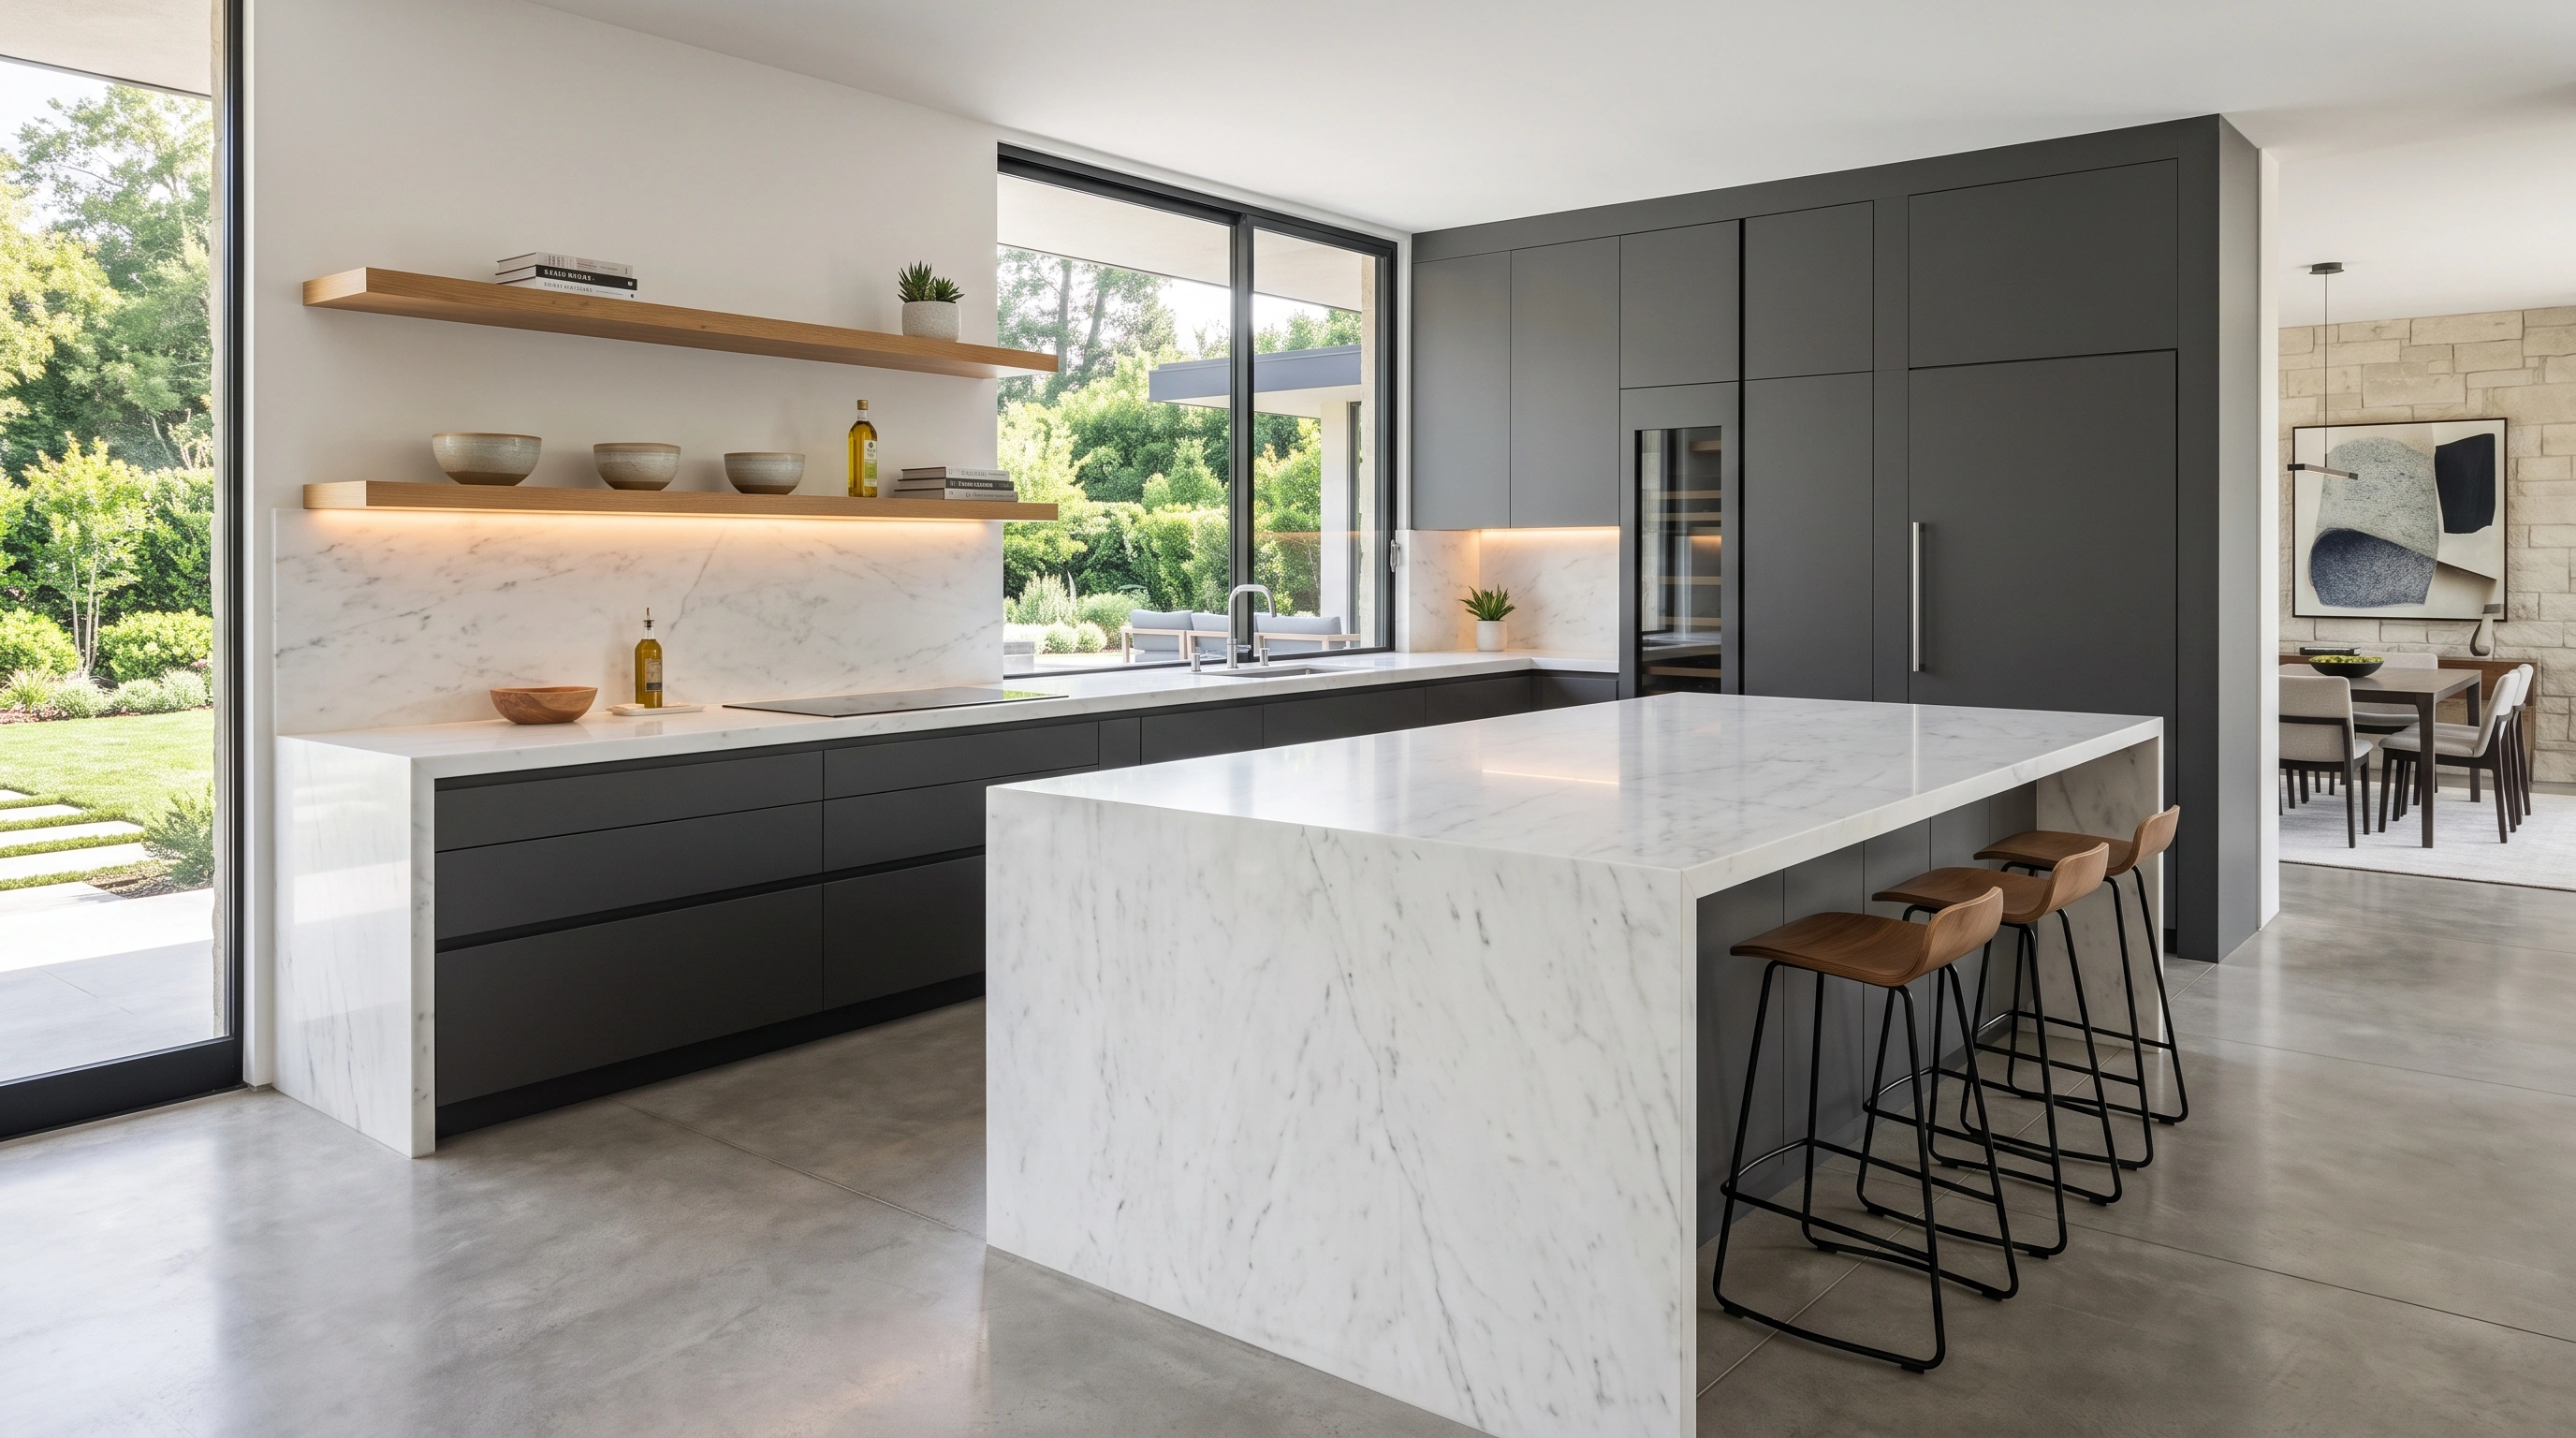
The kitchen is undeniably the heart of the home, but it is also the hardest room to keep visually calm. Between bulky countertop appliances, chaotic spice cabinets, and an endless array of differently shaped food packaging, even the most beautifully designed kitchen can quickly feel like a cluttered nightmare. True luxury in kitchen design is not just about installing expensive marble countertops or brass hardware; it is about seamless, intuitive organization. When every single item has a dedicated, aesthetic home, cooking stops being a stressful chore and transforms into a relaxing, creative experience.
Welcome to Vindy Space! Today, we are taking a revolutionary approach to kitchen storage. We are moving far beyond the basic, mismatched plastic storage bins you see in standard pantries. The secret to a high-end kitchen is implementing clever, highly practical organizational systems that look just as beautiful as they function. You do not need a complete remodel to achieve a magazine-worthy space. From conquering the chaotic black hole under your sink to eliminating visual noise in your pantry, here is your ultimate guide to 8 practical, highly trending modern kitchen organization hacks you can implement this weekend.
Table of Contents
- 1. The Aesthetic Glass Decanting System
- 2. Adjustable Pegboard Drawer Matrices
- 3. The Concealed Appliance Garage
- 4. Vertical Tension Rods for Baking Sheets
- 5. Zone-Based Acrylic Refrigerator Organization
- 6. Magnetic Wall Mounts for Knives and Spices
- 7. Anchored Countertop Vignettes (The Tray Hack)
- 8. The Under-Sink Clear Pull-Out Matrix
1. The Aesthetic Glass Decanting System
Uniform Borosilicate Jars | Minimalist Typography Labels
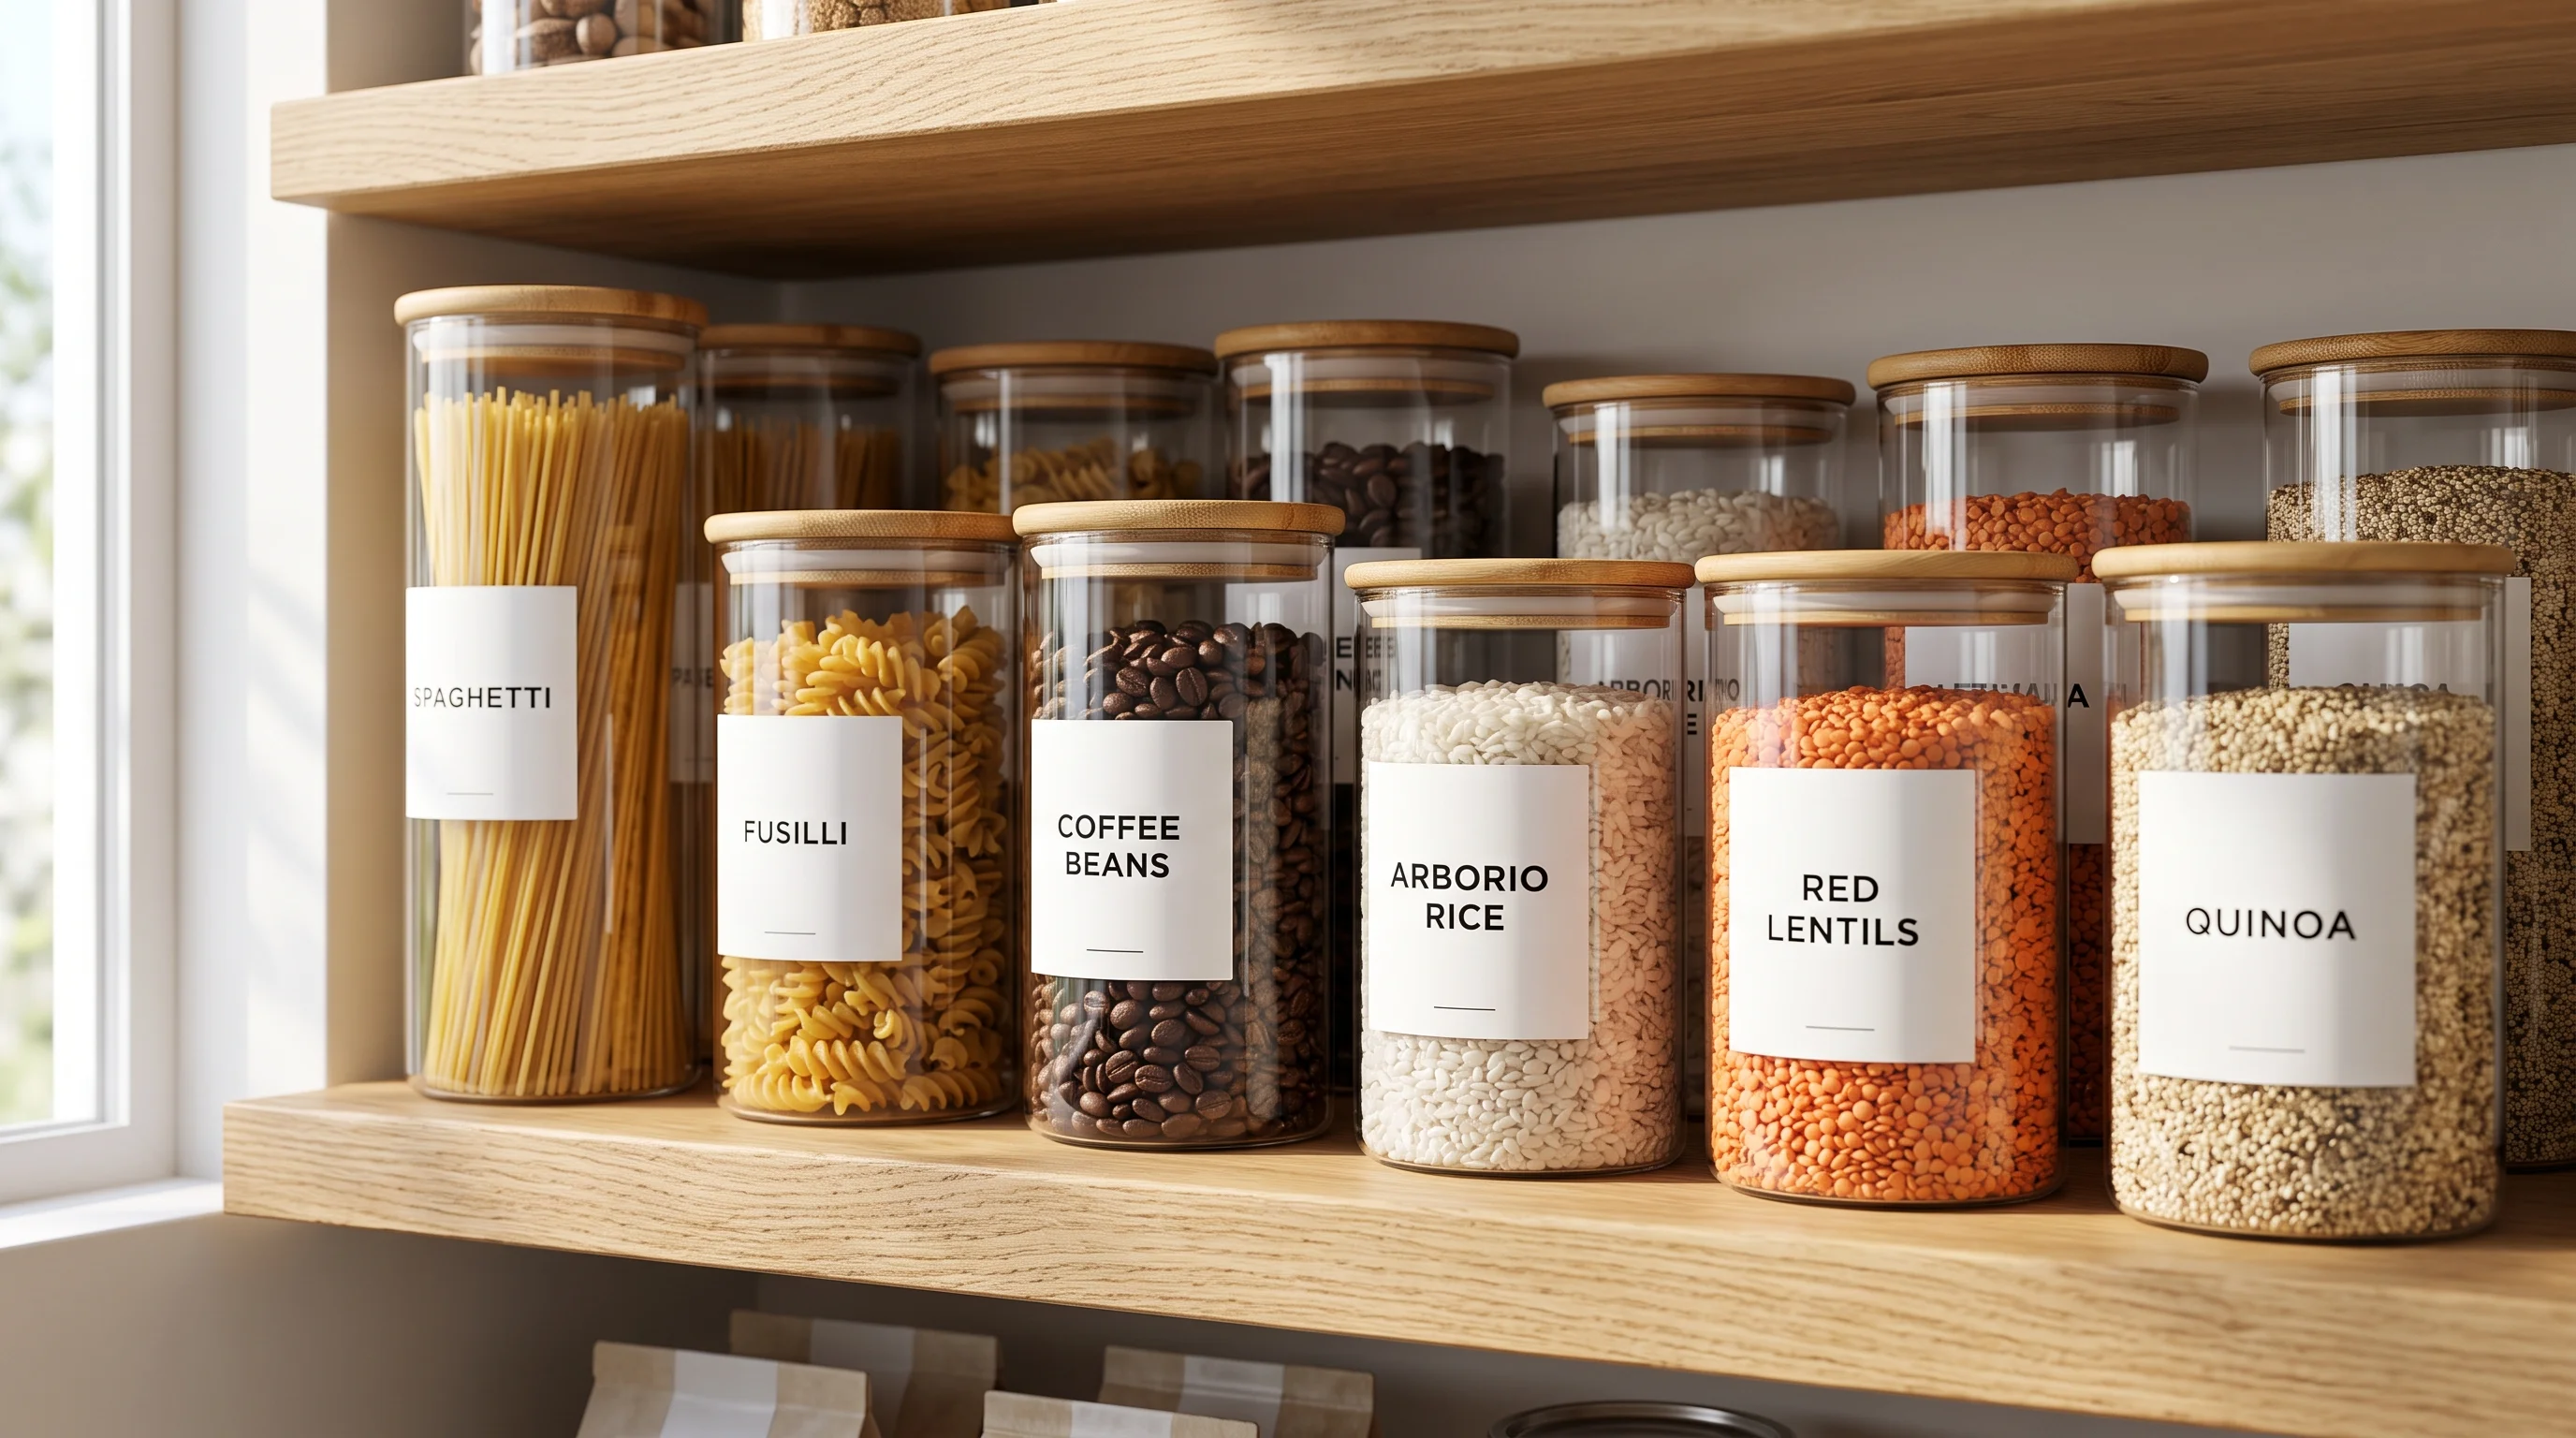
- Why it Works: The biggest source of visual clutter in any kitchen is the chaotic mix of neon-colored, mismatched cardboard boxes and plastic bags in your pantry. Decanting is the ultimate designer secret to instant visual peace. It completely eliminates the visual noise of loud corporate branding and chaotic packaging colors. It creates a uniform, calming aesthetic while allowing you to instantly see exactly how much inventory you have left.
- How to Style: Create a highly curated, magazine-perfect pantry where every dry good (pasta, rice, flour, cereal, and coffee) is displayed in uniform, clear borosilicate glass jars with sleek bamboo or airtight matte black lids.
📝 Quick Steps: Discard all original packaging the moment you return from the grocery store. Wash and completely dry your new glass jars to prevent internal moisture. Pour dry goods into the uniform jars. Use custom, waterproof minimalist typography labels applied at the exact same height on every single jar.
🛠️ Tools & Materials: Bulk set of high-quality borosilicate glass jars in three standardized sizes, bamboo or matte black lids. Custom waterproof minimalist labels.
🧽 Maintenance: Wash glass jars thoroughly between refills to prevent stale crumb buildup at the bottom.
⚠️ Safety & Building Codes: Keep large, heavy glass jars stored on lower pantry shelves to prevent dangerous shattering accidents from high drops.
💡 Designer's Advice: Cut out the cooking instructions and expiration dates from the original packaging and tape them to the bottom of your glass jars for easy reference!
2. Adjustable Pegboard Drawer Matrices
Natural Wood Bases | Custom Dowel Dividers
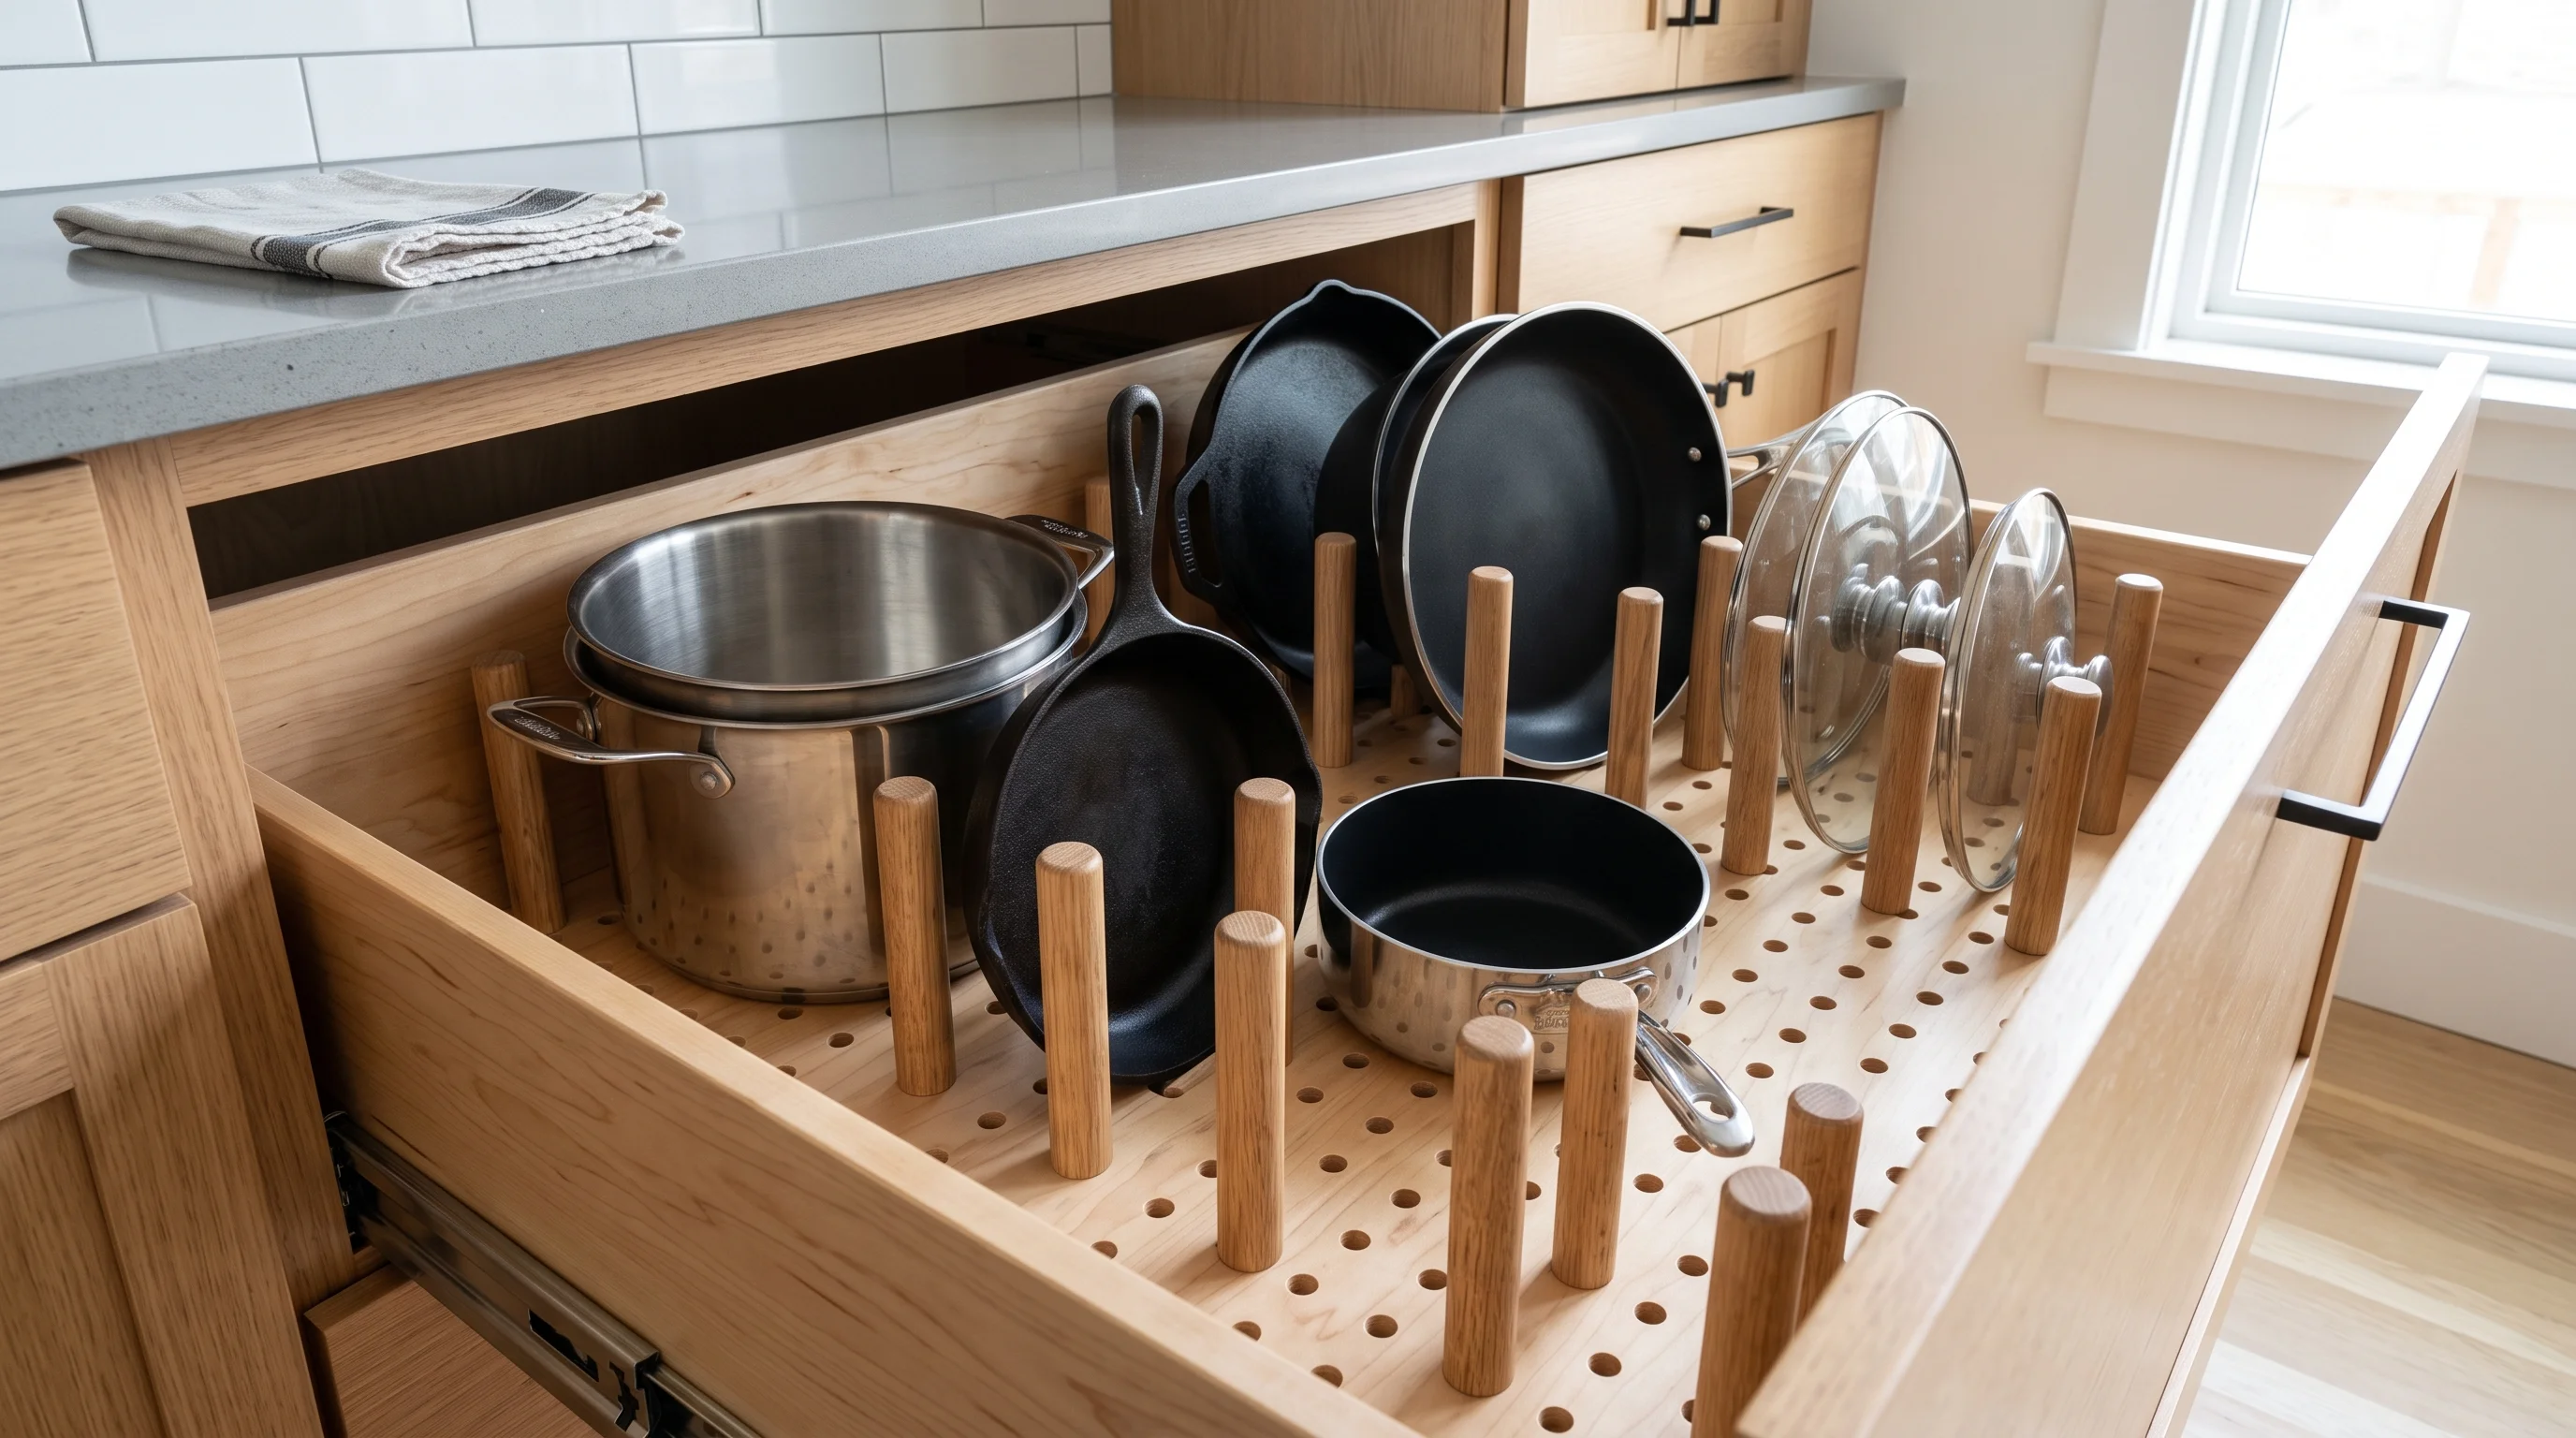
- Why it Works: Stacking heavy pots, pans, and glass lids inside a deep lower cabinet is a recipe for scratched non-stick surfaces and frustrating daily avalanches. Traditional open cabinet shelves are incredibly inefficient for cookware. A pegboard matrix prevents expensive cookware from scratching and allows you to instantly grab the exact pan you need without unstacking a heavy, noisy pile of metal.
- How to Style: Build deep, pull-out lower drawers featuring a beautiful, natural wood pegboard base. Vertical wooden dowels securely hold every pot, pan, and lid perfectly in its own isolated, upright zone.
📝 Quick Steps: Measure the exact internal dimensions of your deep lower drawer. Buy a thick piece of plywood, drill a grid of uniform holes, and drop it into the bottom of the drawer. Use thick wooden dowel pegs to create custom, adjustable barriers around your specific cookware. As your collection changes, simply rearrange the pegs.
🛠️ Tools & Materials: Thick piece of plywood, thick wooden dowel pegs. Measuring tape, circular saw, drill with wood bits.
🧽 Maintenance: Wipe the wooden pegboard with a dry microfiber cloth; avoid wet spills inside deep drawers to prevent the raw wood from warping.
⚠️ Safety & Building Codes: Ensure the cabinet drawer glides are heavily rated (heavy-duty slides) to support the combined weight of cast iron pans and a thick wooden pegboard base.
💡 Pro Tip: Use an extra-tall pegboard grid for your food storage drawers to finally keep all those mismatched plastic Tupperware lids perfectly organized and standing upright!
3. The Concealed Appliance Garage
Tambour Roll-Up Doors | Seamless Countertop Minimalism
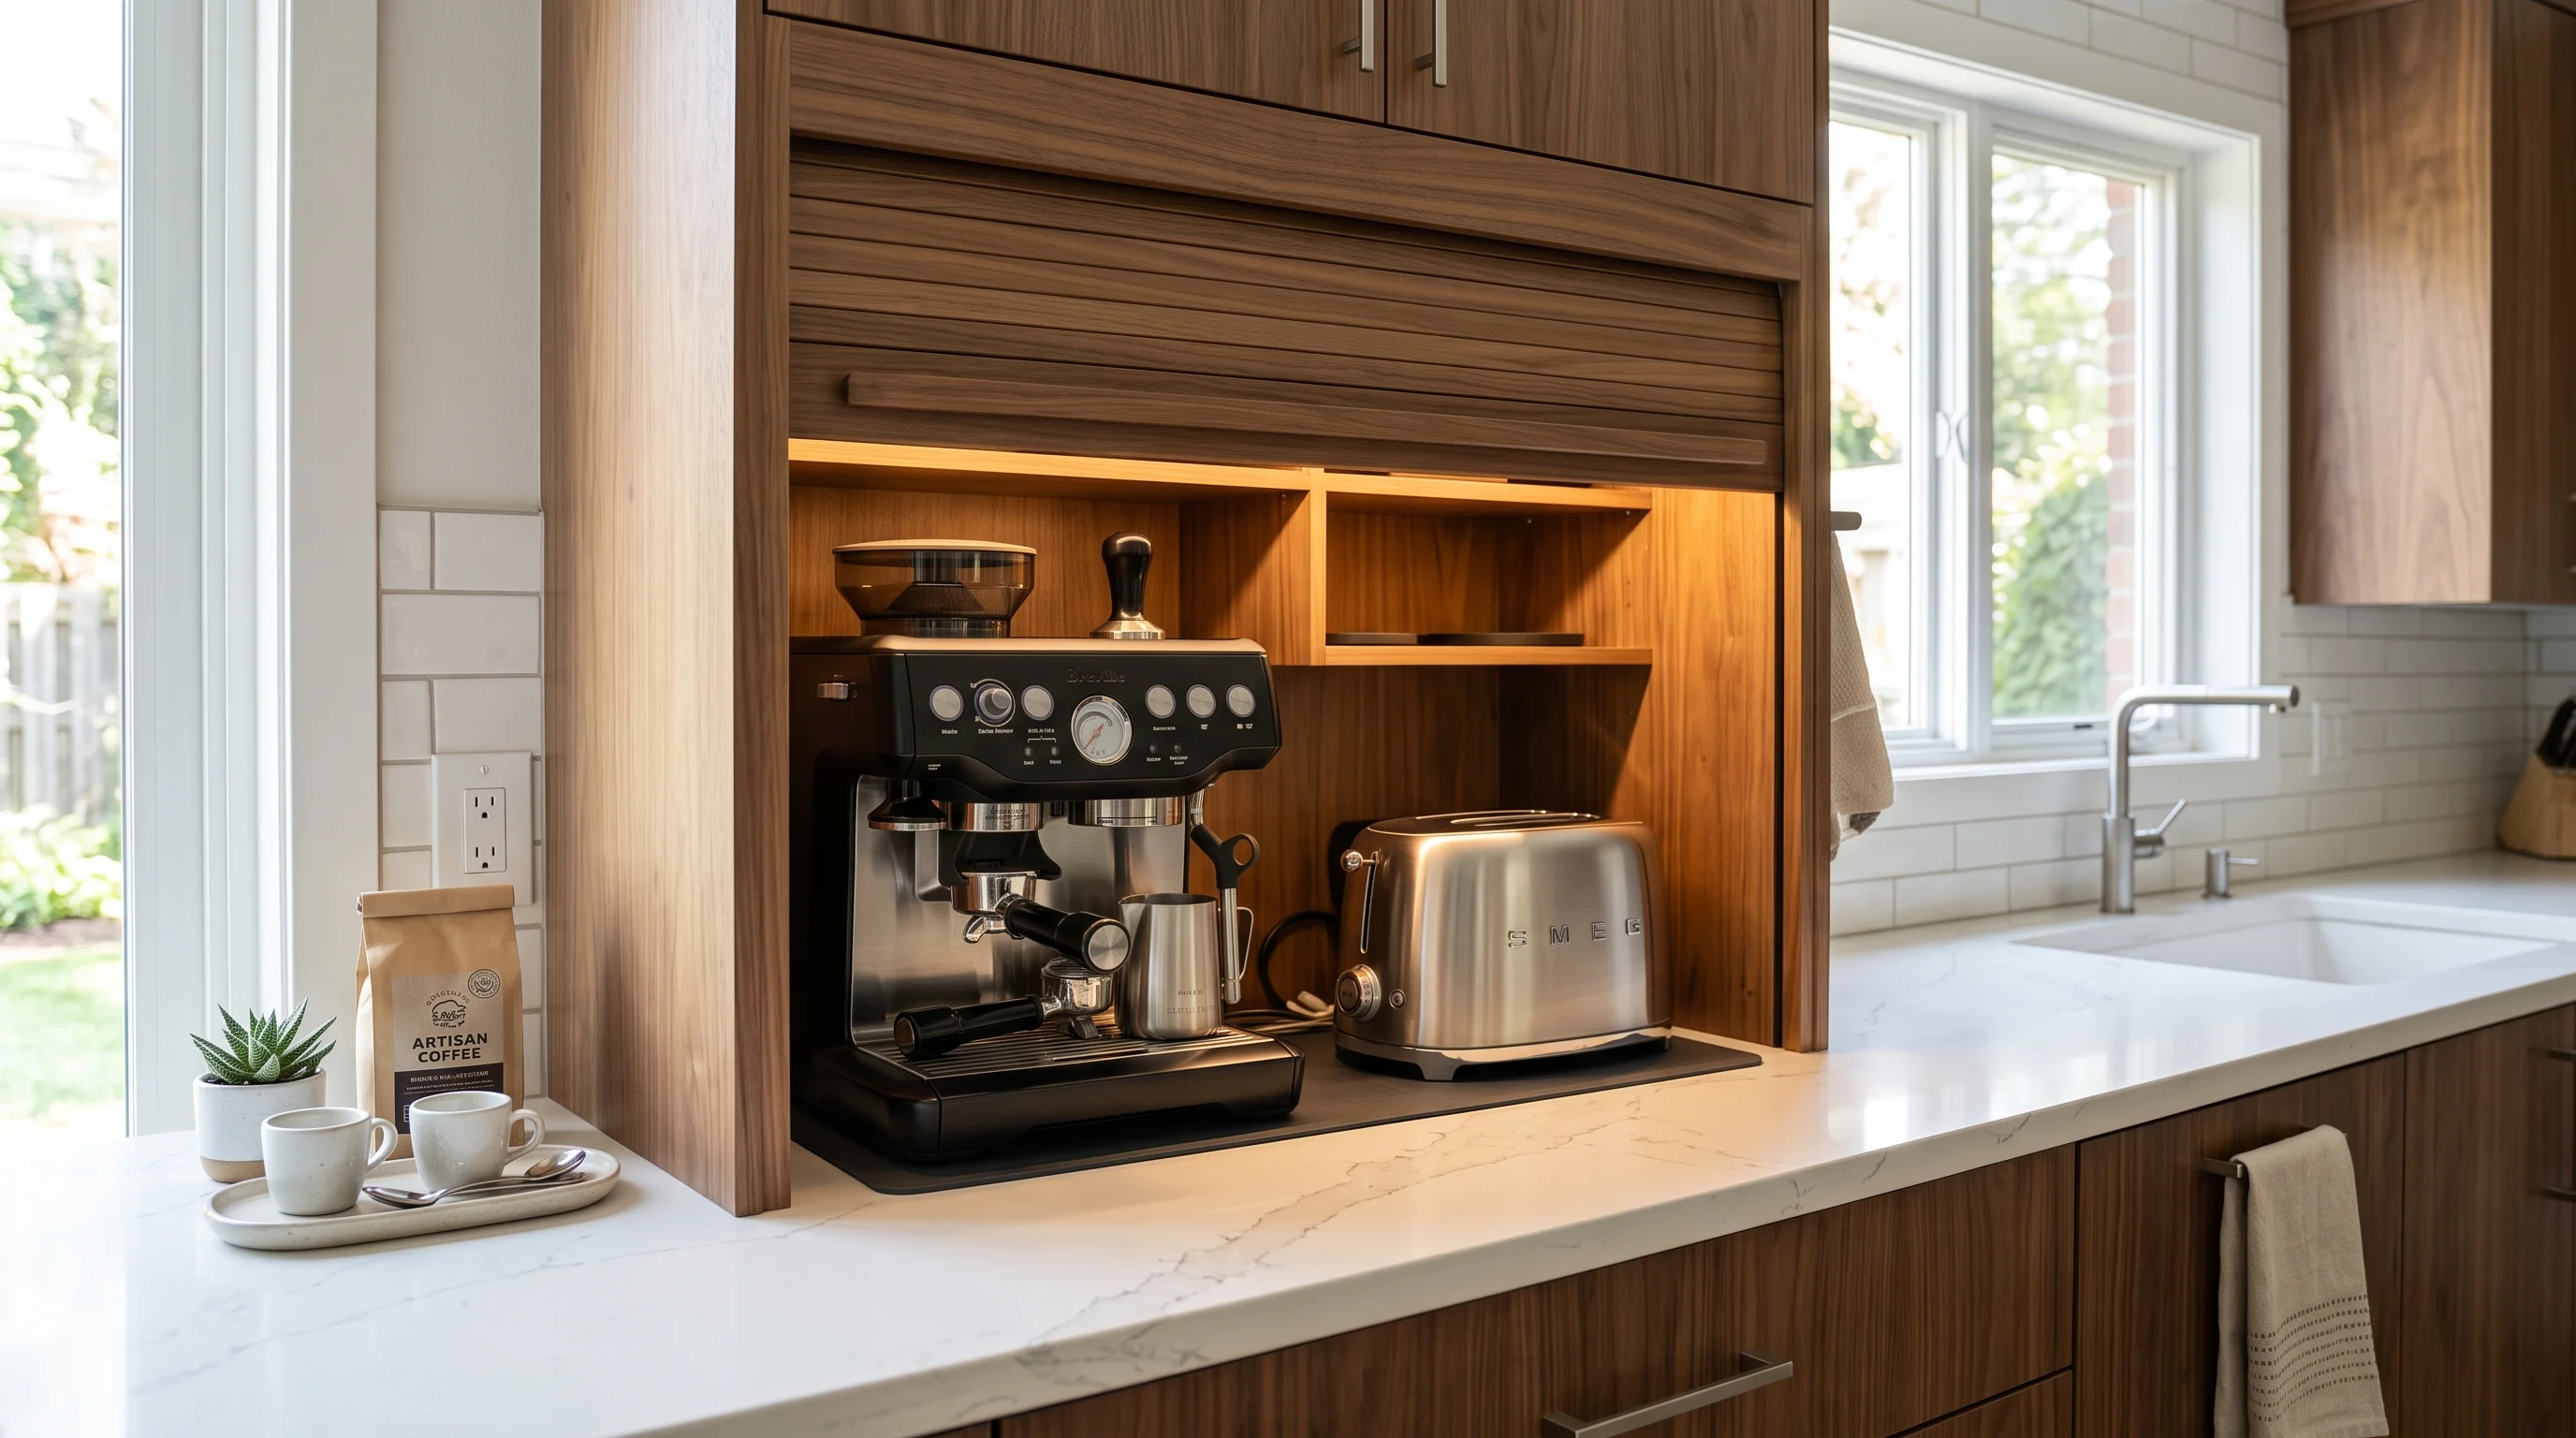
- Why it Works: Even the most expensive, high-end blenders, toasters, and coffee makers look messy when permanently lined up on a countertop. The modern organizational standard is absolute countertop minimalism. Countertop minimalism is the hallmark of luxury kitchens. Hiding appliances removes cord clutter and heavy visual weight, making the kitchen look incredibly sleek, expansive, and clean.
- How to Style: Aim for a completely empty, pristine countertop. When it is time to cook or make coffee, a sleek cabinet door opens at counter level to reveal a hidden "garage" containing all your plugged-in appliances.
📝 Quick Steps: Dedicate a specific section of your cabinetry to house your appliances. Install a wooden tambour door (a slatted roll-up door) or pocket doors that slide back into the cabinet walls. Keep the inside fully wired with outlets. Place your coffee maker, toaster, and blender inside.
🛠️ Tools & Materials: Wooden tambour door kit or pocket door sliding hardware. Power drill, level, finishing nails.
🧽 Maintenance: Wipe up coffee grounds and toaster crumbs from the garage floor daily to prevent pests from gathering inside the closed cabinet.
⚠️ Safety & Building Codes: Ensure inside outlets are GFCI protected. NEVER operate heat-generating appliances (like toasters or air fryers) with the garage door closed to prevent severe fire hazards.
💡 Designer's Advice: Install a slide-out wooden tray track inside the appliance garage. You can pull the heavy espresso machine out, brew your coffee, and push it back in without ever lifting it!
4. Vertical Tension Rods for Baking Sheets
Spring-Loaded Dividers | Upright Filing Systems
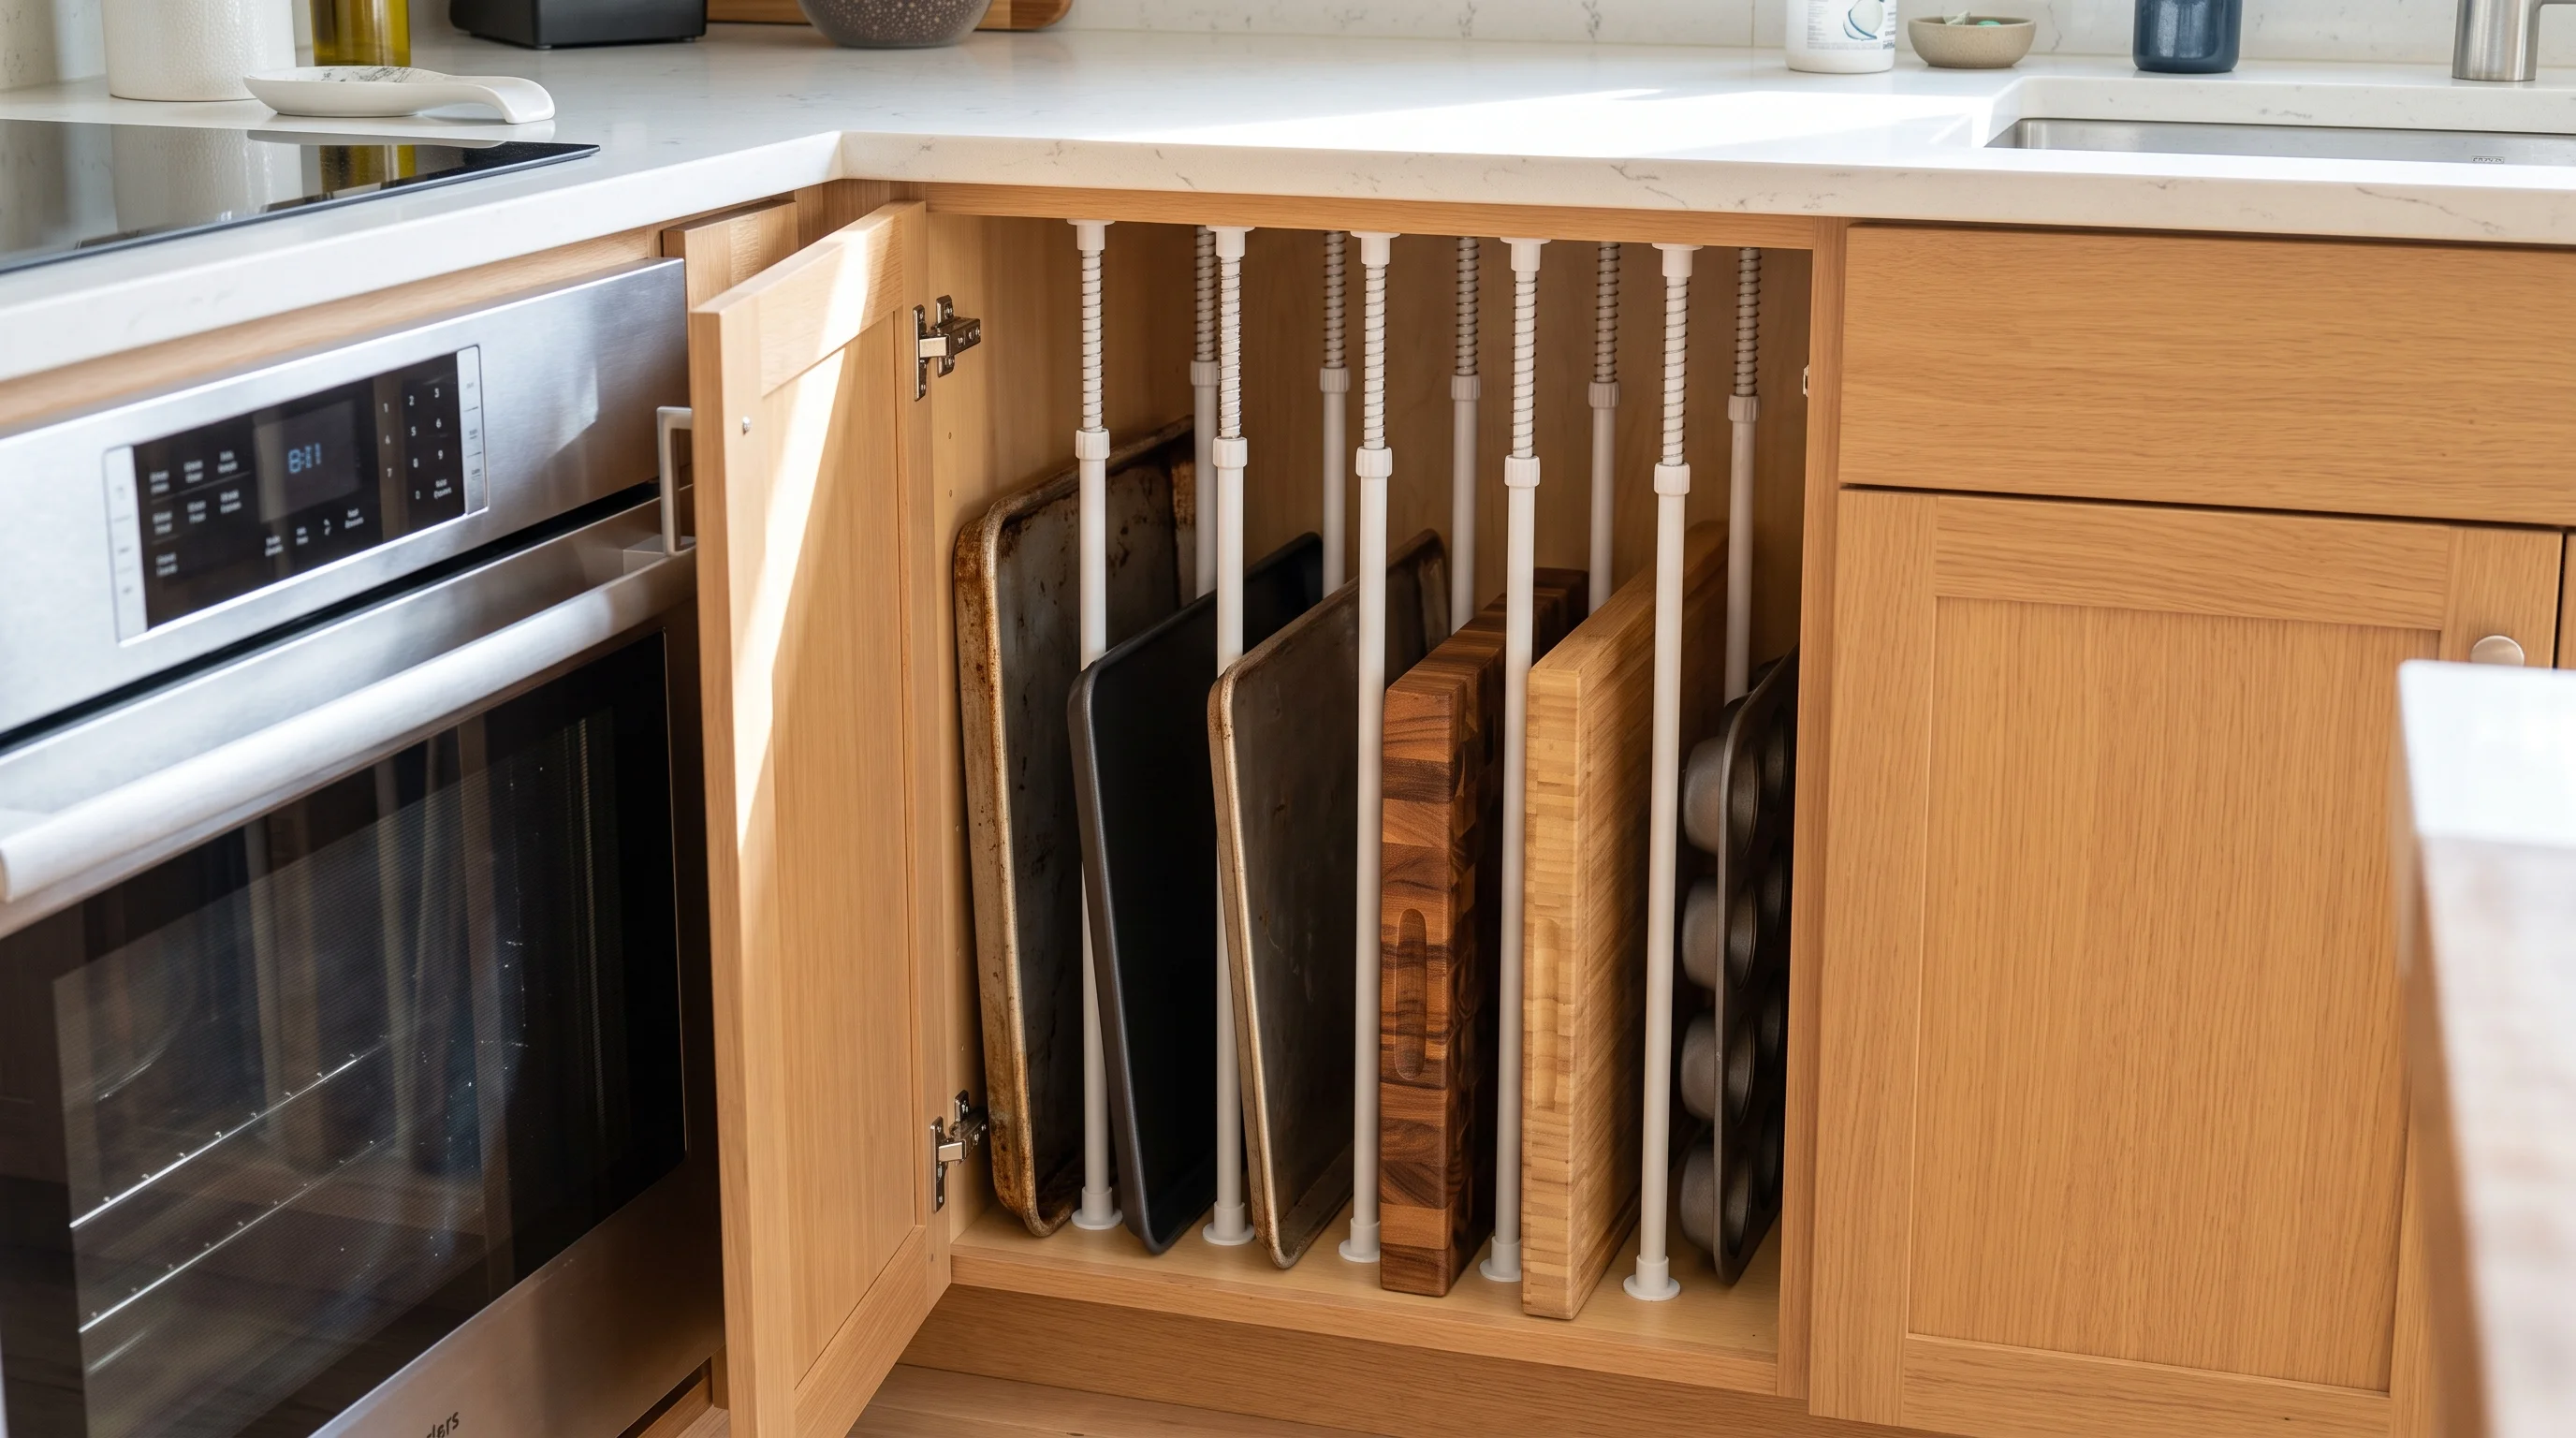
- Why it Works: Baking sheets, cutting boards, and muffin tins are notoriously difficult to store. Stacking them flat requires you to remove the entire heavy pile just to access the one sheet at the bottom. This hack converts a frustrating horizontal stacking system into a highly efficient vertical filing cabinet, utilizing awkward vertical cabinet space that normally goes to waste.
- How to Style: Transform a narrow lower cabinet or the space above your refrigerator into a perfectly organized filing system, where every cutting board and baking tray stands upright and slides out effortlessly.
📝 Quick Steps: Measure the height between the top and bottom shelves of your cabinet. Purchase several heavy-duty, short spring-loaded tension rods. Install them vertically, spacing them two to three inches apart to create instant, adjustable vertical slots. Slide your baking sheets into the slots upright.
🛠️ Tools & Materials: Heavy-duty, short spring-loaded tension rods.
🧽 Maintenance: Check the tension periodically, as sliding heavy pans in and out can bump and loosen the rods over time.
⚠️ Safety & Building Codes: Do not over-pack the slots. Tightly jammed metal sheets can suddenly spring out when you pull one, potentially pinching fingers or causing injury.
💡 Pro Tip: This incredibly cheap tension rod hack works brilliantly under the sink for hanging spray bottles by their triggers, freeing up massive amounts of base space!
5. Zone-Based Acrylic Refrigerator Organization
Clear Modular Bins | Rotating Condiment Turntables

- Why it Works: The refrigerator is often the most disorganized space in the kitchen, leading to forgotten, expired food pushed to the very back. Creating zones forces everything into a specific, visible category. Containing loose items in clear bins prevents small jars from getting lost in the back, significantly reducing food waste and making weekly meal prep infinitely faster.
- How to Style: Build a hyper-organized, brilliantly lit fridge interior featuring crystal-clear acrylic bins for produce, and sleek, rotating acrylic turntables (Lazy Susans) for all condiments and sauces. Add long, deep acrylic bins to pull out items like drawers. Use one bin exclusively for breakfast items, one for cheeses, and one for prepped veggies. Place a clear acrylic Lazy Susan on the top shelf for hot sauces and dressings.
📝 Quick Steps: Empty and deeply clean the refrigerator shelves. Add long, deep acrylic bins to pull out items like drawers. Use one bin exclusively for breakfast items, one for cheeses, and one for prepped veggies. Place a clear acrylic Lazy Susan on the top shelf for hot sauces and dressings.
🛠️ Tools & Materials: Deep clear acrylic bins, clear acrylic Lazy Susan. White chalk marker.
🧽 Maintenance: Hand-wash acrylic bins with mild soap and warm water. Never put them in the dishwasher, as the extreme heat will warp and melt the plastic.
⚠️ Safety & Building Codes: Do not block the cooling vents in the back of the fridge with tall acrylic bins, as this restricts airflow and causes dangerous temperature fluctuations for perishable food.
💡 Designer's Advice: Label the front of your acrylic bins with a white chalk marker (e.g., "Snacks", "Deli"). It looks highly aesthetic and wipes off easily with a wet cloth when you reorganize!
6. Magnetic Wall Mounts for Knives and Spices
Acacia Wood Strips | Vertical Backsplash Storage
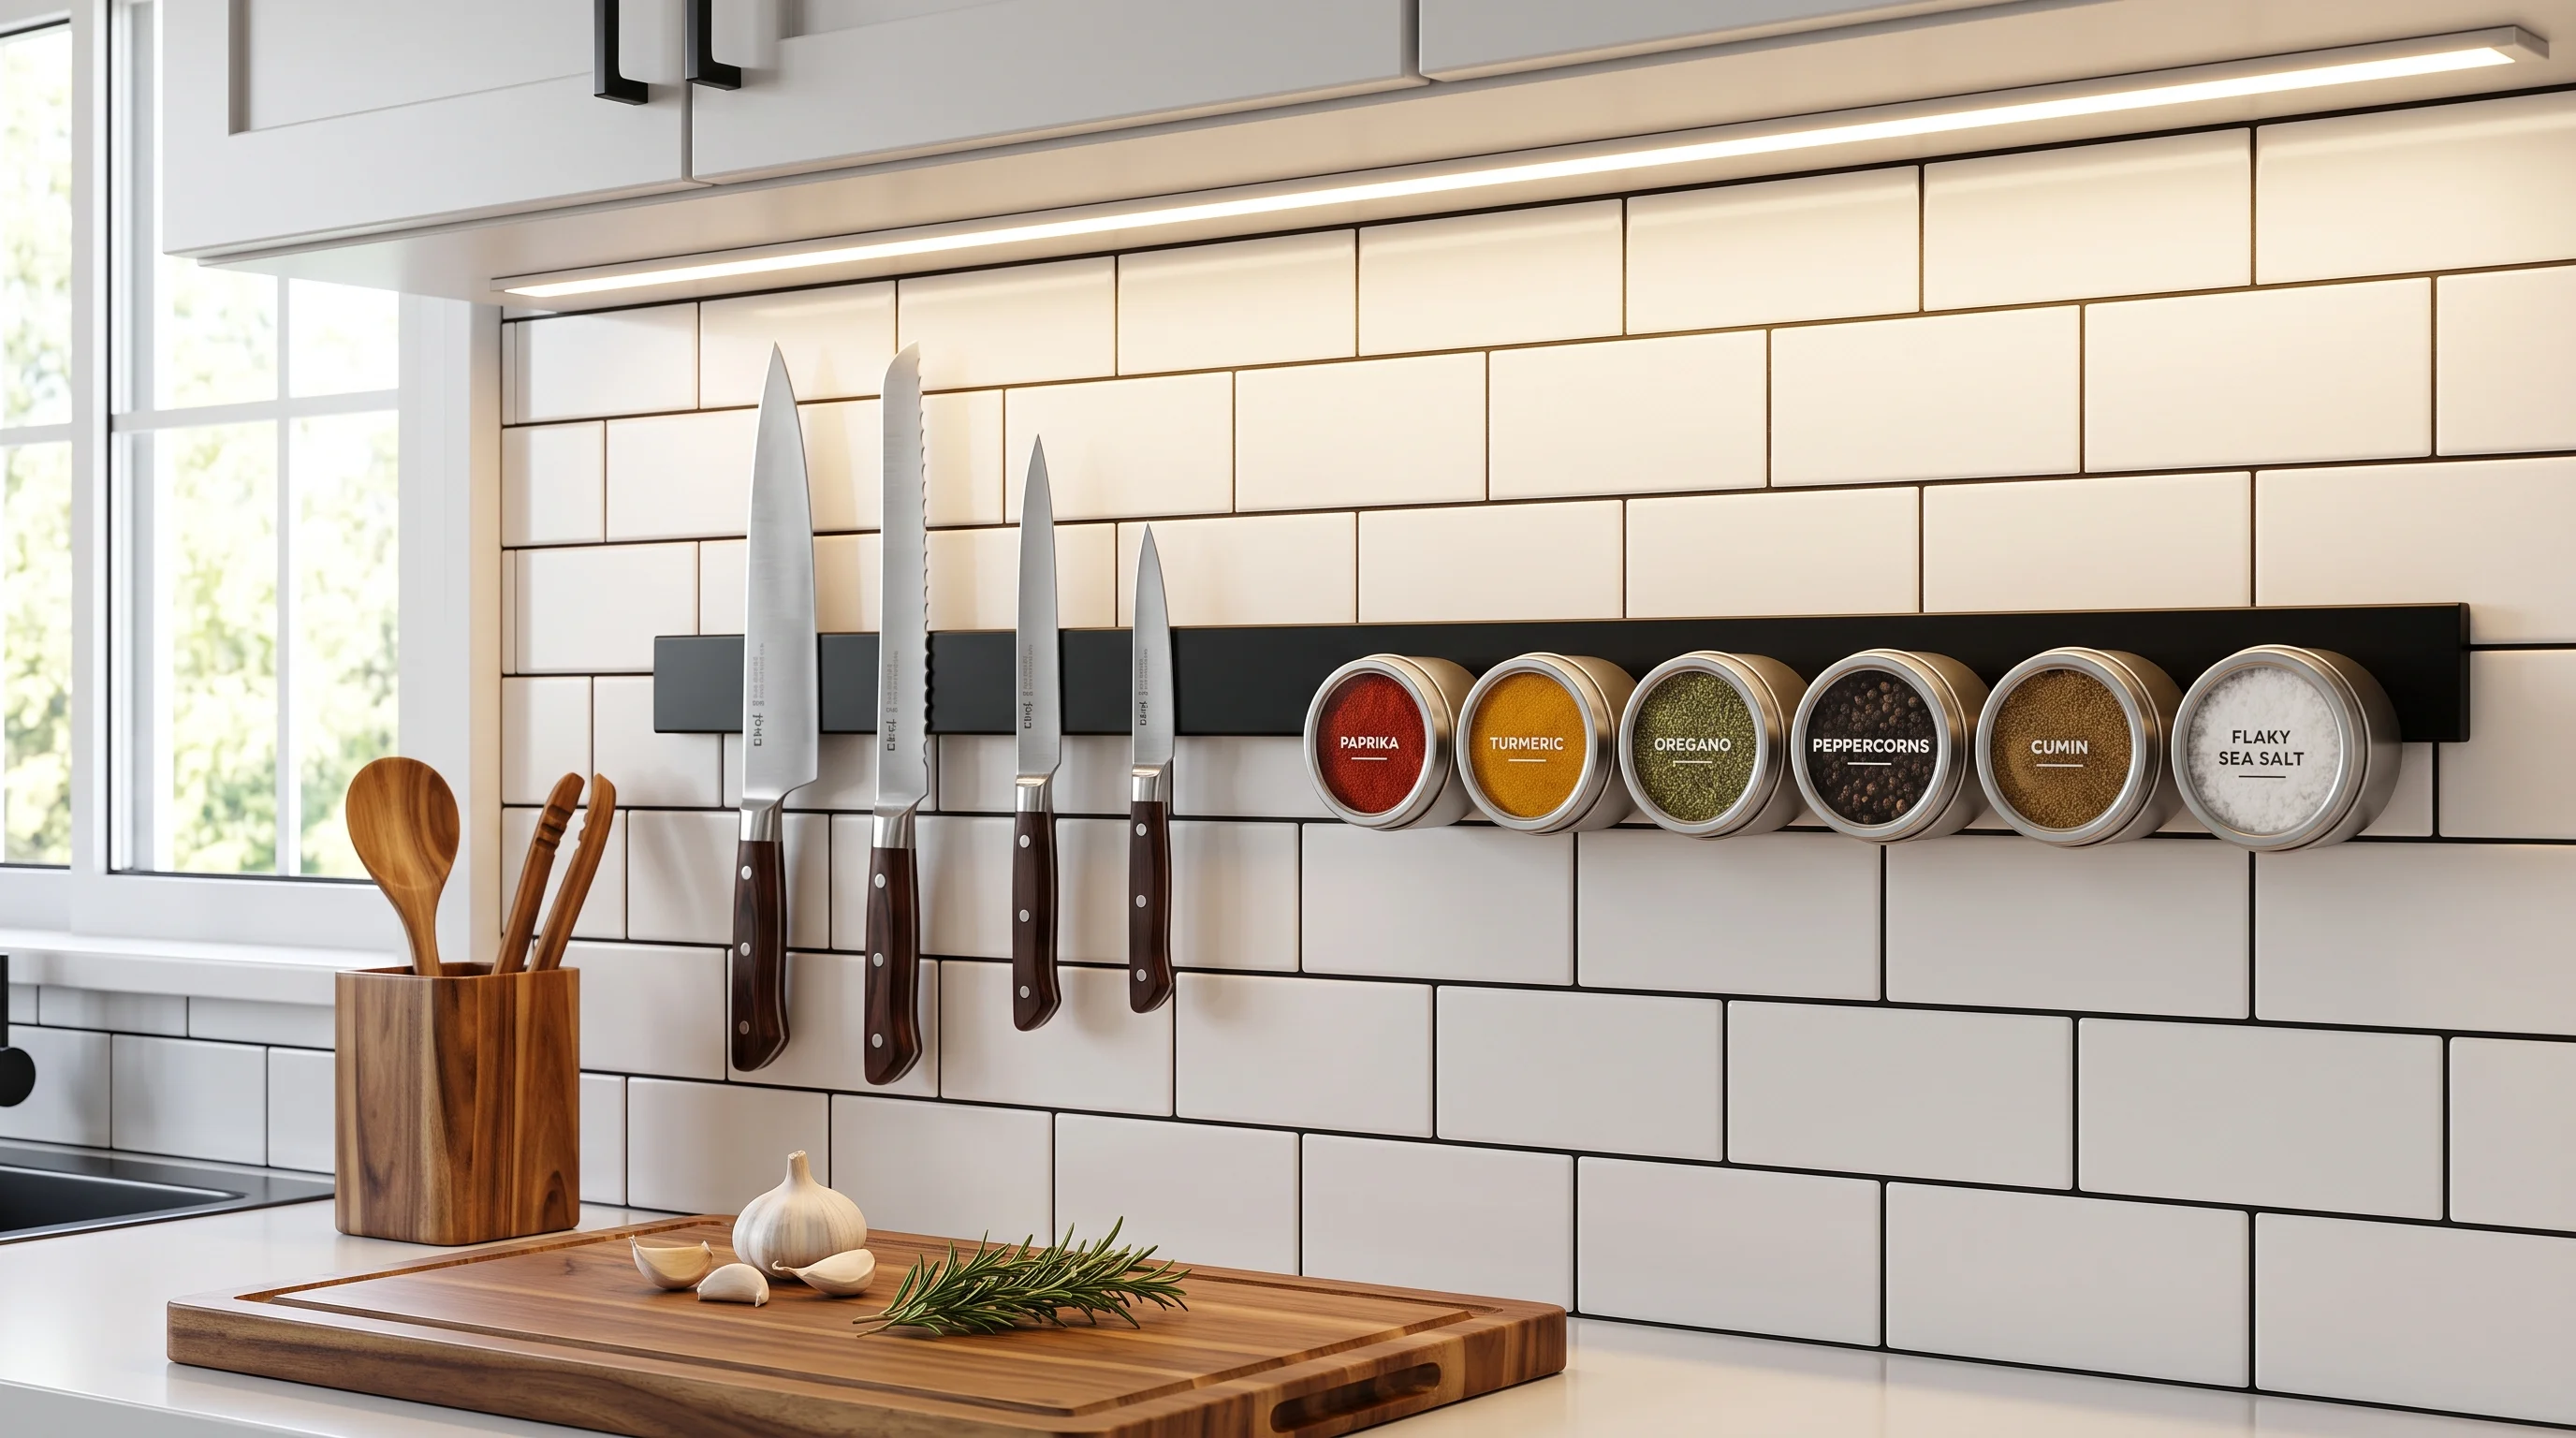
- Why it Works: Bulky wooden knife blocks take up premium chopping space on your counter, and spice racks clutter up your valuable upper cabinets. The modern solution is to utilize vertical, unused wall space. It utilizes completely wasted vertical wall space, instantly freeing up premium chopping real estate on your counters while turning your culinary tools into a visual feature.
- How to Style: Install a sleek, continuous strip of beautiful acacia wood or matte black metal mounted directly to your tile backsplash, holding professional chef's knives and uniform metal spice tins in a mesmerizing display.
📝 Quick Steps: Locate a safe wall space away from the stove. Install a high-strength magnetic strip horizontally under your upper cabinets using screws or heavy-duty mounting tape. For knives, this keeps them sharp and easily accessible. For spices, purchase small, magnetic-backed metal tins with clear lids and attach them.
🛠️ Tools & Materials: High-strength acacia wood or matte black magnetic strip, heavy-duty mounting tape. Small, magnetic-backed metal spice tins with clear lids.
🧽 Maintenance: Wipe the magnetic wood strip occasionally with food-safe mineral oil to keep the wood from drying out and cracking.
⚠️ Safety & Building Codes: Keep magnetic knife strips completely out of reach of children, and never mount them in an area where a falling knife could hit your hands while working.
💡 Pro Tip: Avoid mounting magnetic knife strips directly above the stove. The rising heat and cooking grease will damage your expensive knives and make the handles dangerously slippery!
7. Anchored Countertop Vignettes (The Tray Hack)
Textural Boundaries | Curated Daily Essentials
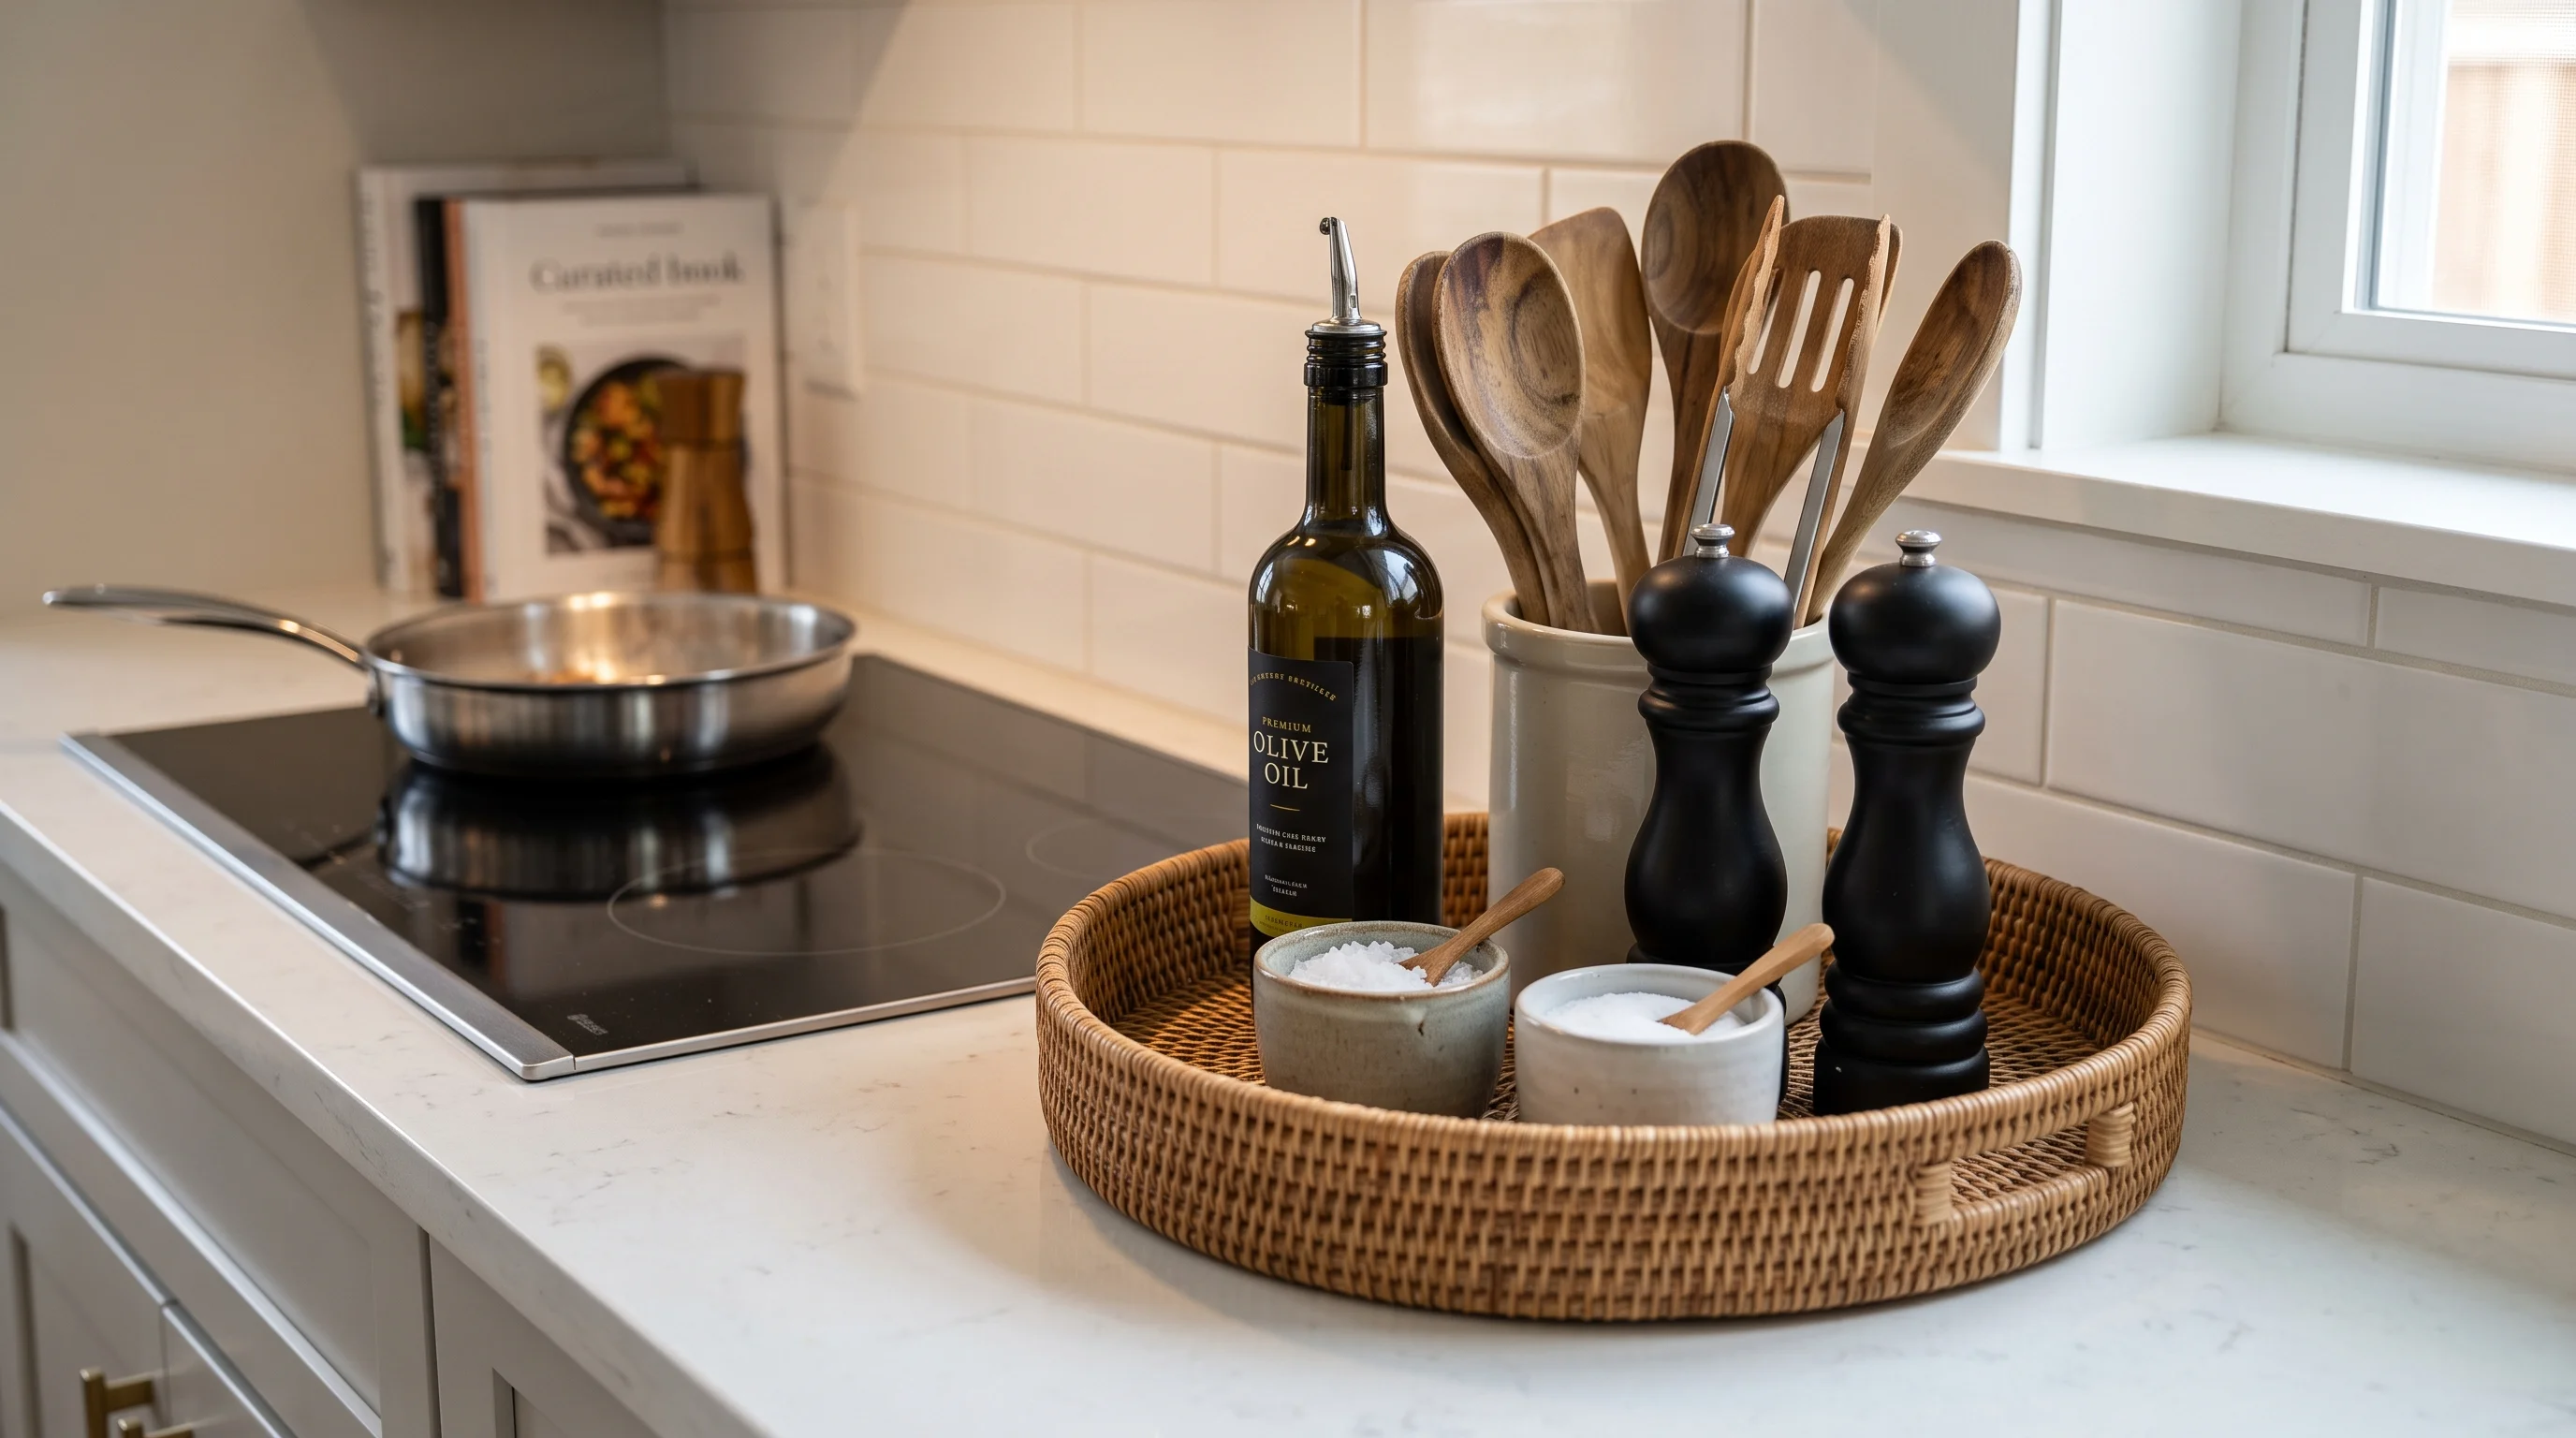
- Why it Works: While the goal is clear countertops, there are some items you absolutely must keep out for daily use, such as olive oil, salt cellars, pepper grinders, and a wooden spoon crock. If left loose, they look like clutter. A tray provides a visual boundary, tricking the brain into seeing a curated, intentional collection rather than random, messy clutter left out by accident.
- How to Style: Create a highly intentional, styled grouping of essential cooking tools resting on a beautiful, textural tray next to the stove. Use a heavy marble slab, a ribbed wooden tray, or a woven rattan basket to anchor your daily essentials.
📝 Quick Steps: Gather your absolute daily cooking essentials (oils, salt, utensils). Use a heavy marble slab, a ribbed wooden tray, or a woven rattan basket to anchor your daily essentials. Arrange items neatly inside the tray boundary.
🛠️ Tools & Materials: Heavy marble slab, ribbed wooden tray, or woven rattan basket, small ceramic pot. Pothos trailing plant.
🧽 Maintenance: A tray makes wiping down the countertop infinitely easier—you simply lift the entire tray at once! Clean the tray itself weekly to remove cooking grease.
⚠️ Safety & Building Codes: Keep wooden or woven rattan trays a safe distance away from open gas burners to prevent a severe fire hazard.
💡 Designer's Advice: Add a small, easy-to-care-for trailing plant (like a Pothos in a tiny ceramic pot) to your tray to bring a pop of organic, biophilic life to the kitchen.
8. The Under-Sink Clear Pull-Out Matrix
Multi-Level Acrylic Drawers | Sliding Pipe Solutions
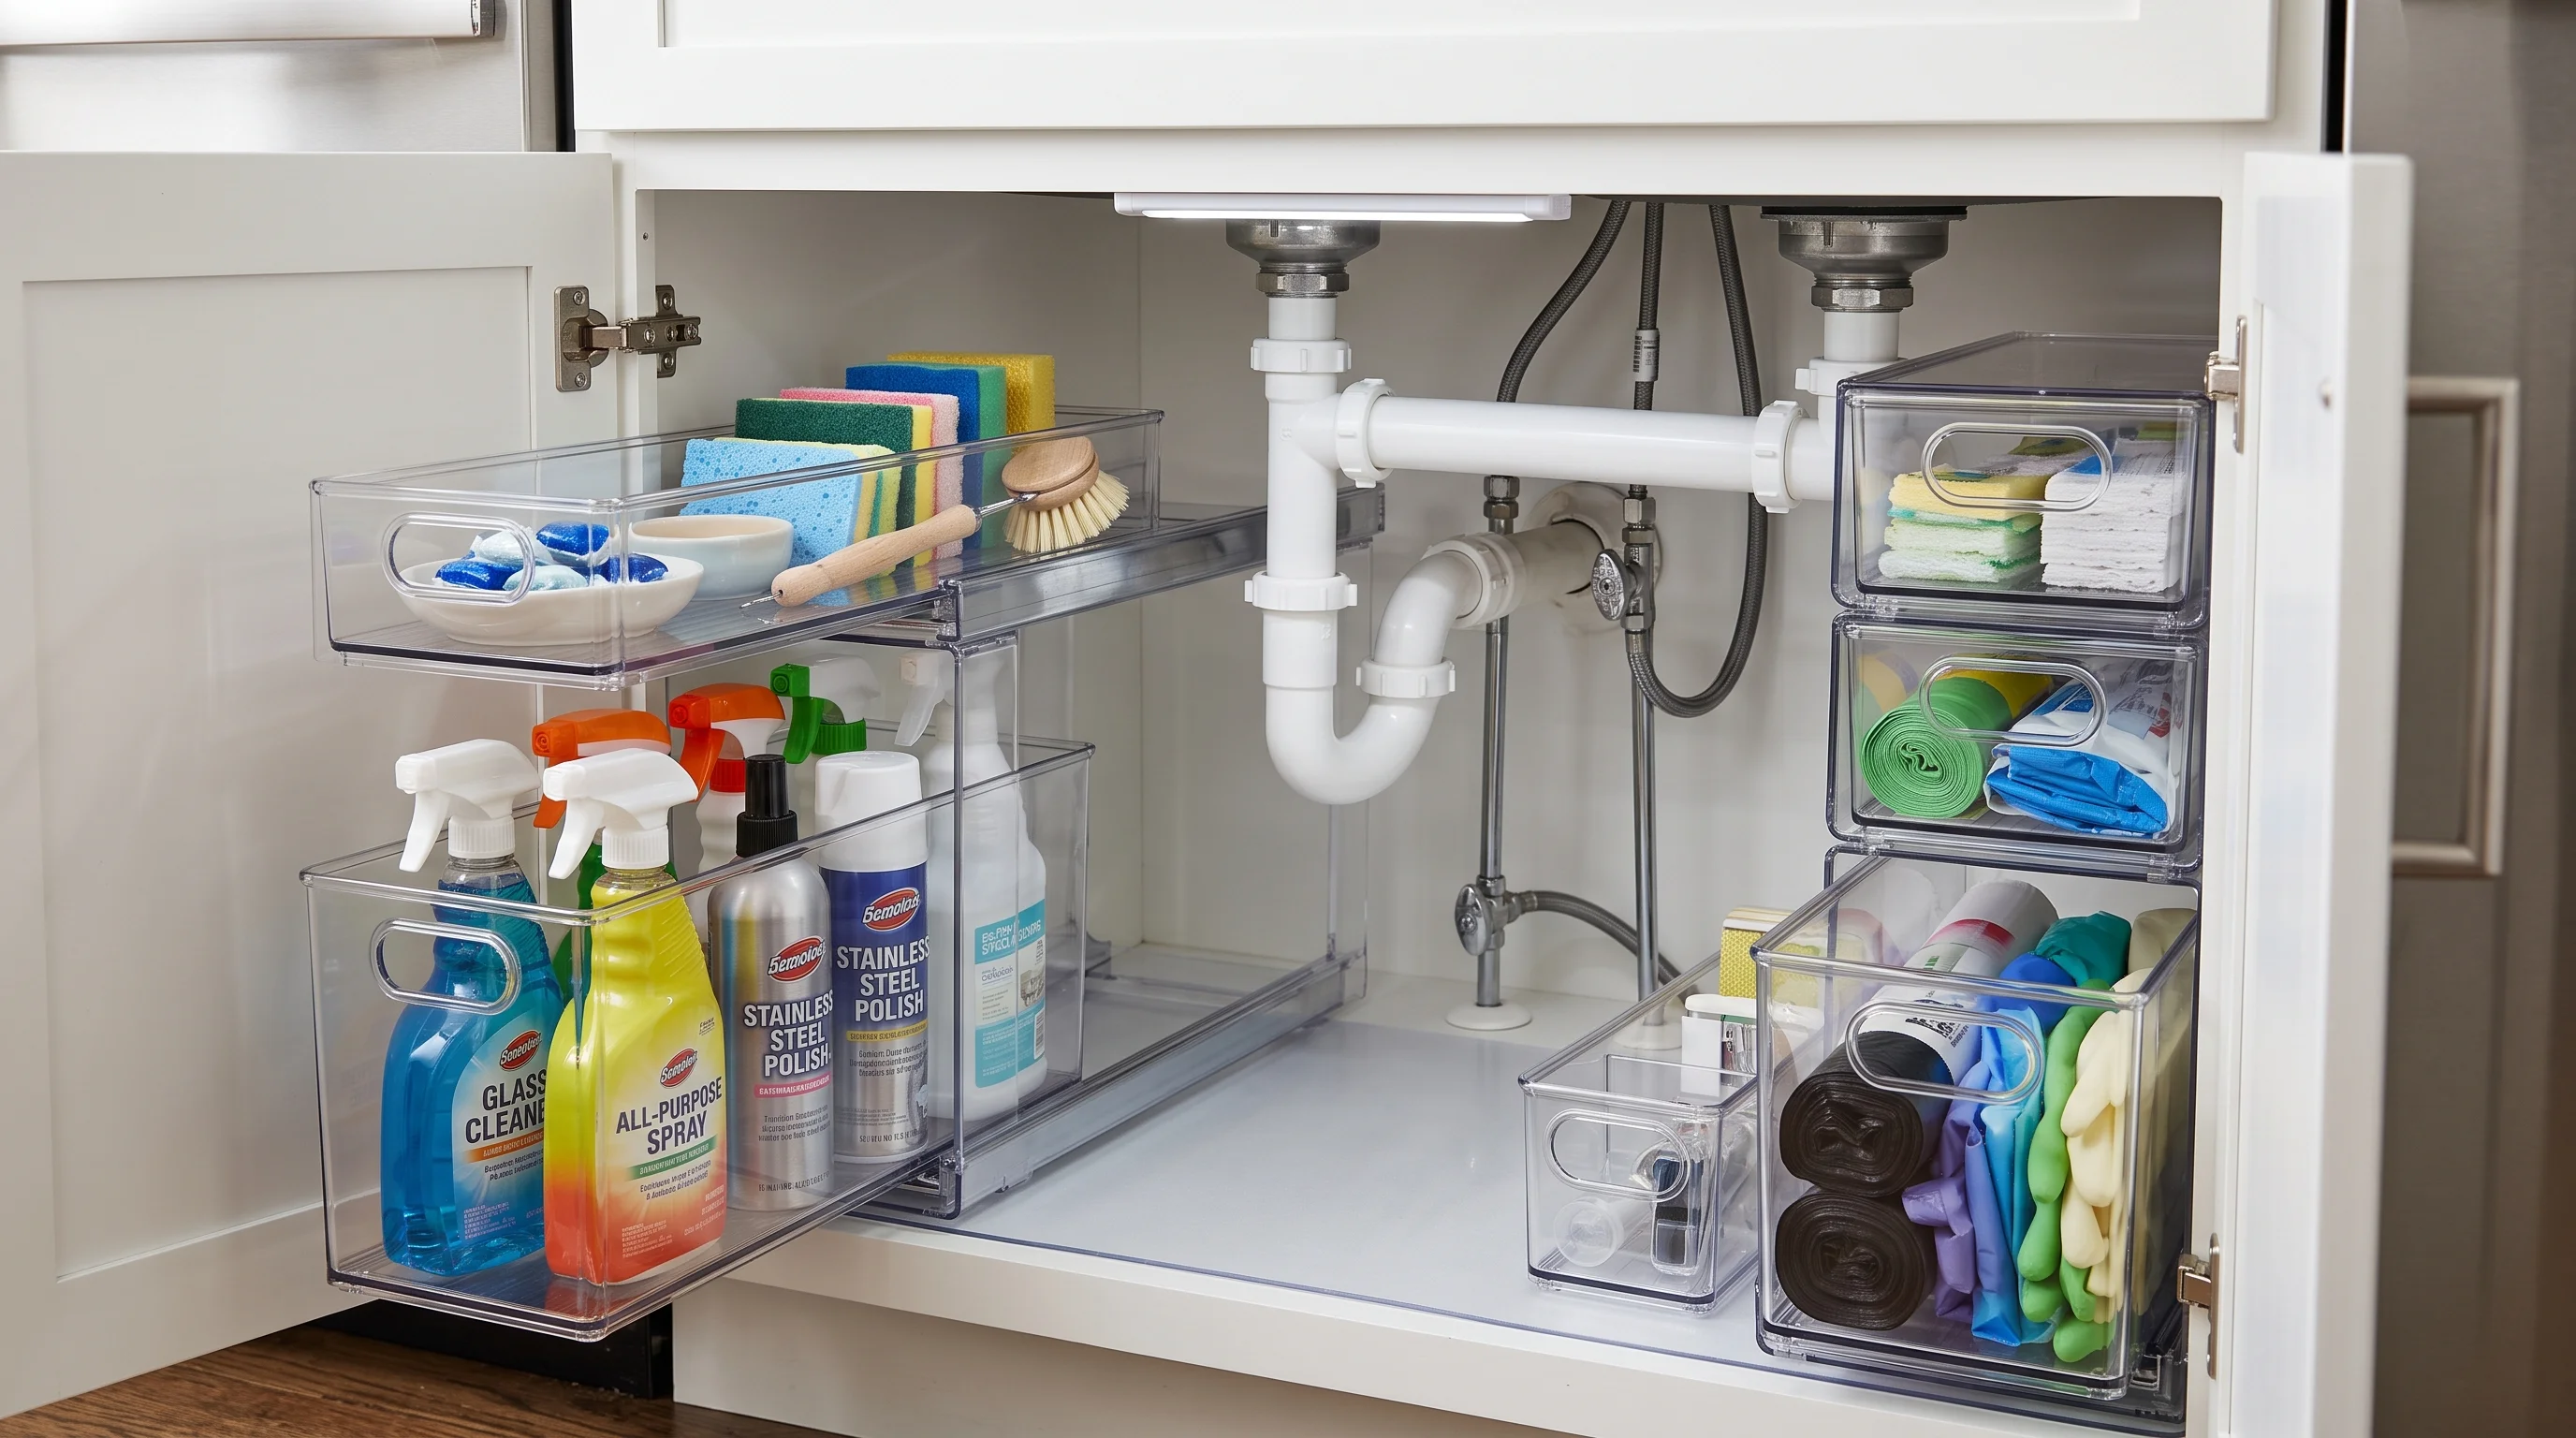
- Why it Works: The cabinet beneath the kitchen sink is usually a dark, chaotic mess of cleaning sprays, sponges, and trash bags dodging the plumbing pipes. A pull-out matrix maximizes the awkward vertical storage space on either side of the plumbing trap, bringing dark, hard-to-reach items into the light with a simple pull.
- How to Style: Build a pristine, multi-level storage system that works perfectly around the awkward plumbing, featuring sliding clear drawers that bring cleaning supplies out into the light.
📝 Quick Steps: Measure the space around your pipes carefully. Invest in modular, clear acrylic pull-out drawers that fit on either side of the plumbing. Keep sponges and dishwasher pods in the top sliding trays, and tall spray bottles in the bottom bins.
🛠️ Tools & Materials: Modular clear acrylic pull-out drawers. Battery-operated, motion-sensor LED puck light.
🧽 Maintenance: Check beneath the clear bins monthly to ensure no slow plumbing leaks or water damage are hiding beneath the organizers.
⚠️ Safety & Building Codes: Always store hazardous cleaning chemicals in child-proof bins or install a safety magnetic lock on the cabinet doors to protect children and pets.
💡 Pro Tip: Mount a battery-operated, motion-sensor LED puck light to the ceiling of the under-sink cabinet. It instantly illuminates your cleaning supplies the second you open the door!
Bonus Upgrades
- The "Hidden Prep" Station: Install a heavy-duty pull-out cutting board right above your trash can drawer. You can chop your veggies and instantly sweep the scraps directly into the bin below without moving!
- Decanted Dish Soap: Get rid of the ugly plastic Dawn dish soap bottle on your sink. Decant your dish soap into a beautiful glass olive oil dispenser with a metal pour spout for an instantly elevated sink aesthetic.
Quick Reference Cheat Sheet
| Feature | Best For | Estimated Cost | Professional Needed? |
|---|---|---|---|
| Glass Decanting | Killing pantry visual noise | $40 - $100 | No |
| Pegboard Drawers | Protecting pots & pans | $30 - $70 | No |
| Appliance Garage | Absolute counter minimalism | $150 - $400 | Yes (For pocket doors) |
| Tension Rods | Upright baking sheet storage | $15 - $30 | No |
| Acrylic Fridge Bins | Preventing lost, expired food | $40 - $80 | No |
| Countertop Trays | Curating daily use items | $20 - $50 | No |
Frequently Asked Questions (FAQ)
Q: Is it expensive to decant pantry items into glass jars?
A: It can be a high upfront cost if you buy everything at once, but you don't have to! Start by decanting just your top 5 most-used items (like rice, sugar, flour, coffee, and pasta). You can slowly build your collection of jars over time for a budget-friendly transition.
Q: What is the rule of thumb for keeping appliances on the counter?
A: Interior designers use the "Daily Use" rule. If you do not use an appliance every single day (like a waffle maker, a slow cooker, or a stand mixer), it belongs hidden away in a cabinet or pantry. Only daily essentials (like a coffee maker) should be visible if you don't have an appliance garage.
Q: How do I organize spices if I can't mount them on the wall?
A: If you cannot use a magnetic wall strip, buy a tiered acrylic riser shelf for inside your upper cabinet, or lay them flat in a top drawer using a slanted spice drawer insert so all the labels face upward.
Final Thoughts
An organized kitchen is the absolute foundation of a peaceful, functional home. By implementing a mix of these highly practical, trending modern strategies, you can completely revolutionize how your kitchen operates. You do not have to tackle the entire room in one day. Start small this weekend by decanting your pantry goods into sleek glass jars or anchoring your stove-side essentials on a beautiful marble tray. Say goodbye to the frustration of avalanching pots and hidden spices, embrace clean aesthetics, and get ready to cook in your beautifully organized, highly functional Vindy Space!
Read Next on Vindy Space:
*When you purchase through links on our site, we may earn an affiliate commission.*
Author: Vindy P.