
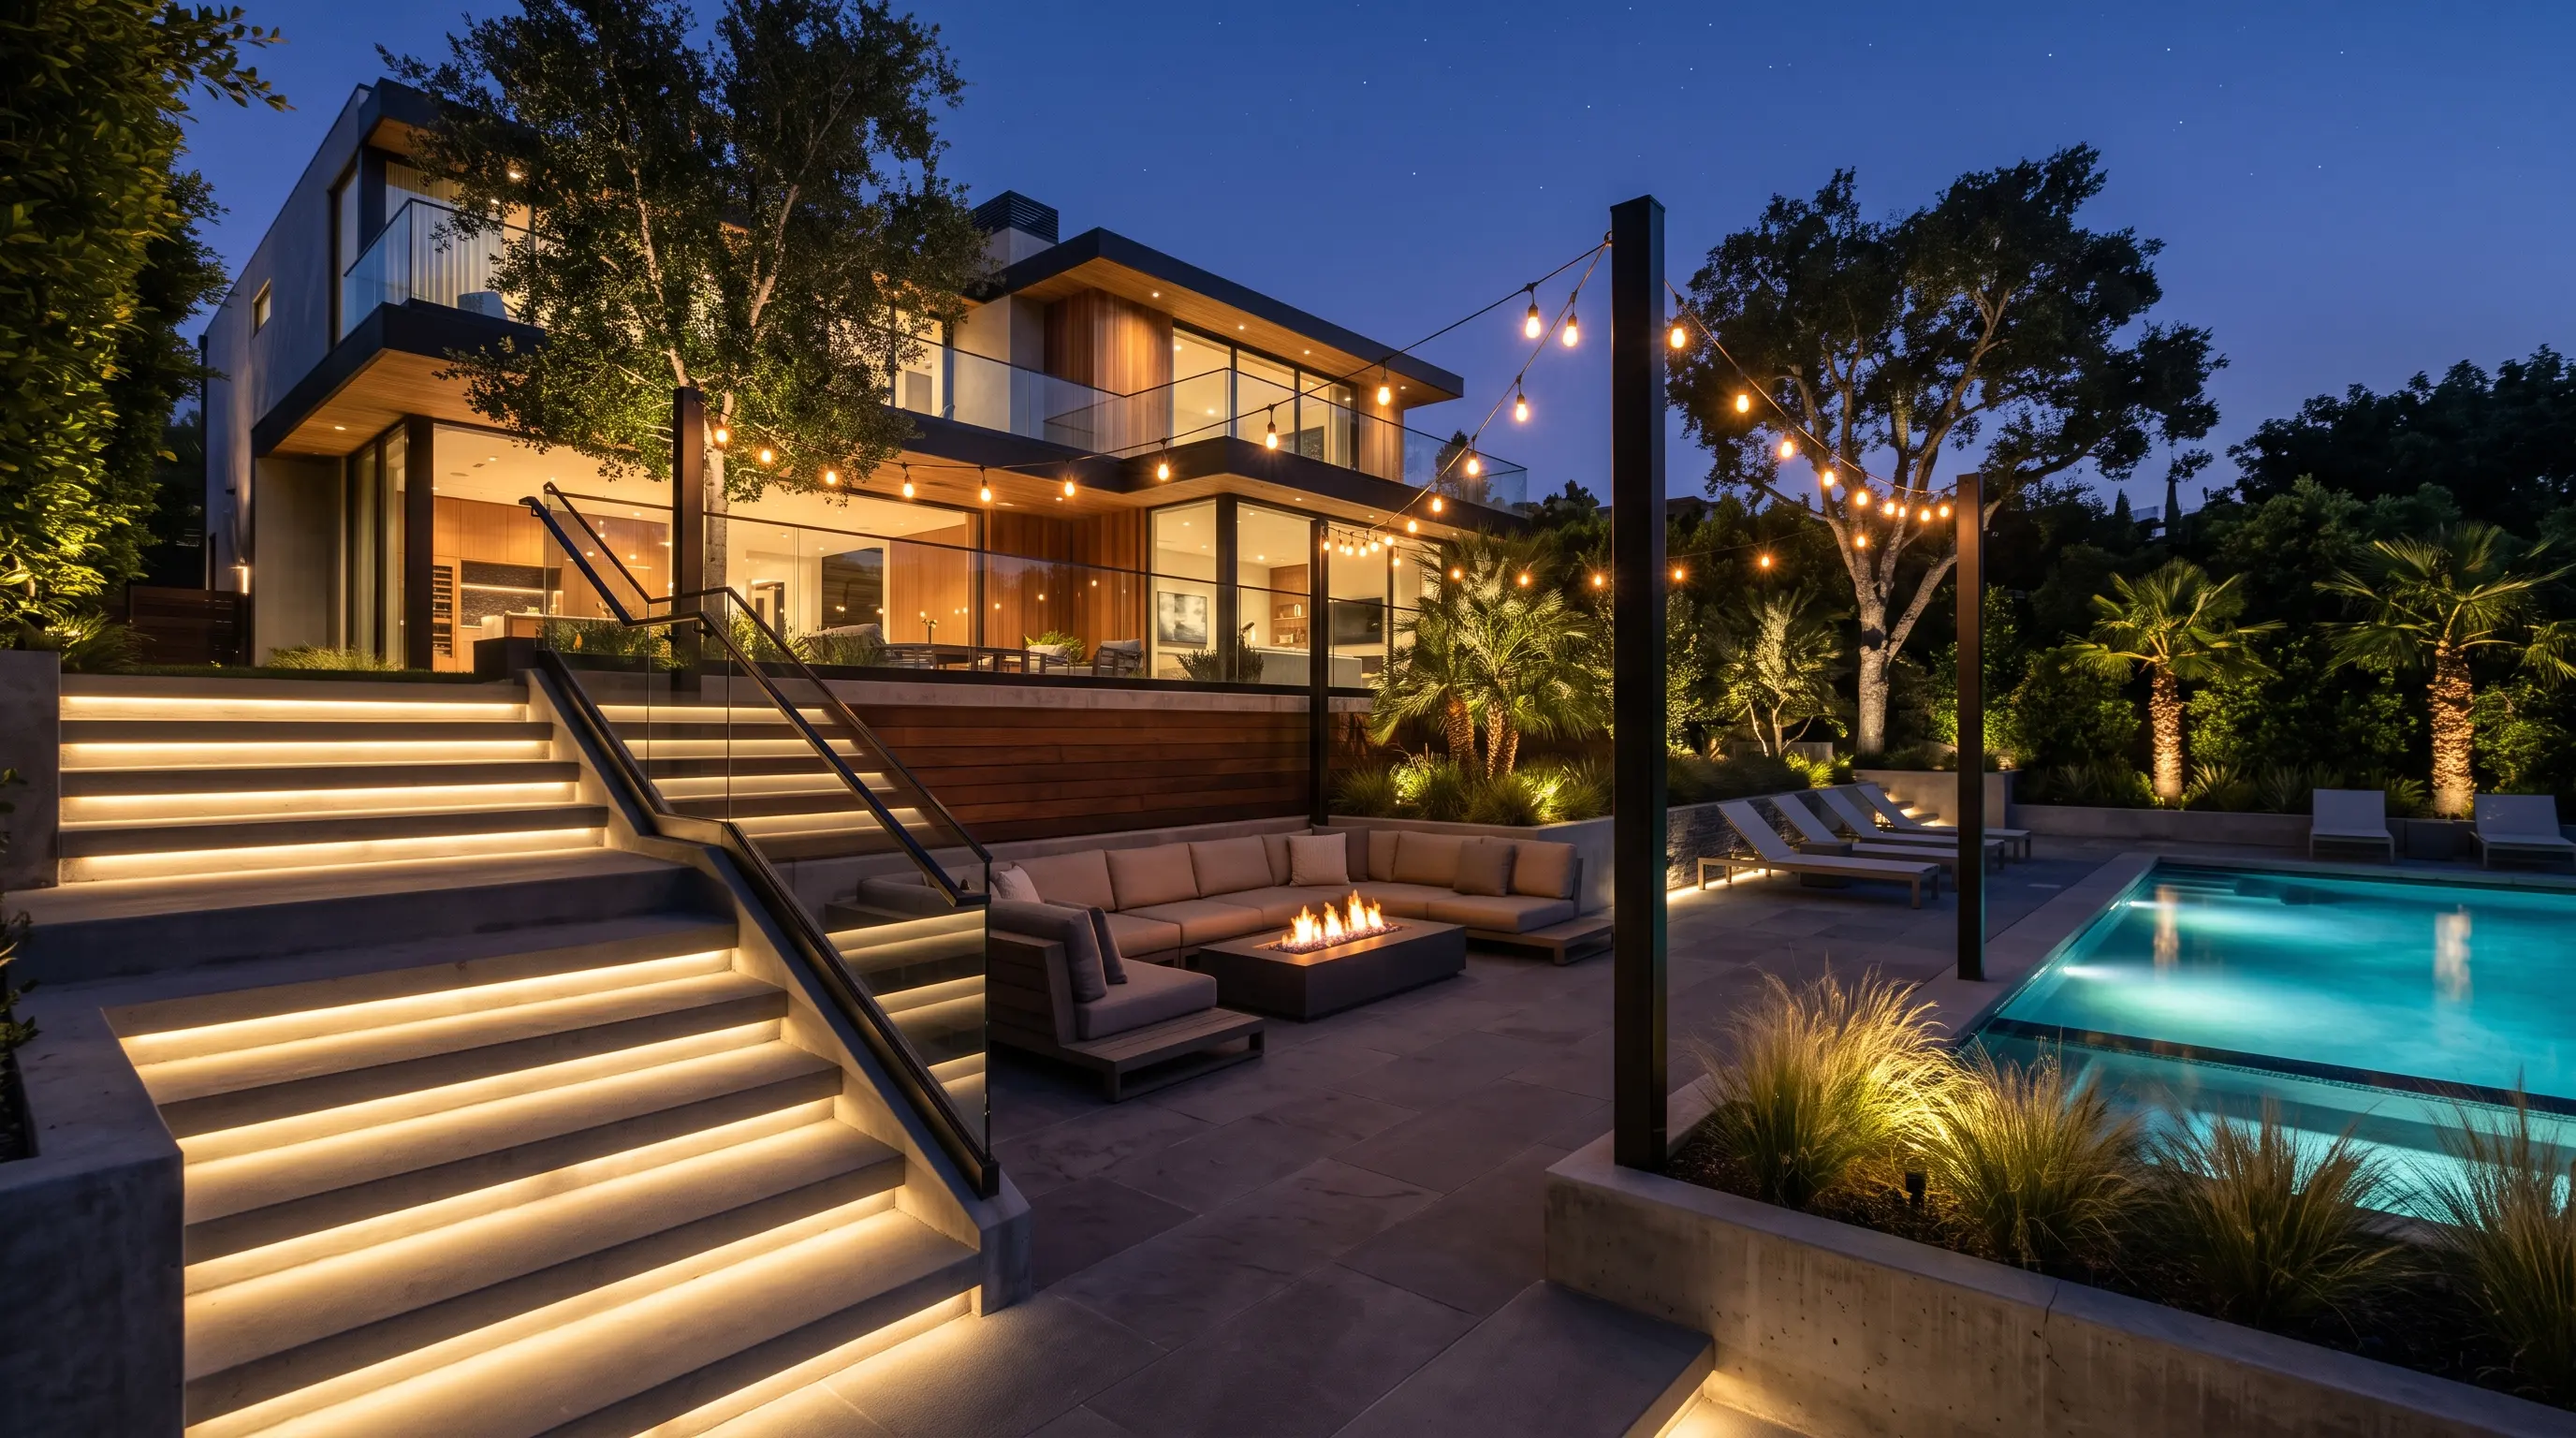
When it comes to garden lighting, most homeowners make the exact same mistake: they buy a dozen cheap solar path lights, stick them in the dirt in a straight line, and call it a day. While this provides basic safety, it completely destroys the ambiance of your yard. High-end landscape architects know a secret: luxury outdoor lighting is not about the light fixture itself; it is about what the light is doing to the environment around it.
Welcome to Vindy Space! Today, we are bringing luxury resort lighting techniques directly to your backyard. You do not need a multi-million-dollar budget or science-fiction technology to make your garden look breathtaking at night. By using readily available LEDs, spotlights, and string lights in highly creative ways, you can completely transform your outdoor space. From the natural magic of "moonlighting" to gravity-defying floating stairs, here are 9 stunning, practical garden lighting ideas that you can actually do!
Table of Contents
- 1. The 'Moonlighting' Technique
- 2. Laser-Cut Shadow Lanterns
- 3. Hidden 'Hovering' Step Lights
- 4. Dramatic Plant Silhouetting
- 5. Floating Glowing Water Spheres
- 6. Grazing Textured Stone Walls
- 7. Submerged Water-Feature Uplighting
- 8. Structured Bistro String Light Canopies
- 9. Illuminated Planter Boxes
1. The 'Moonlighting' Technique
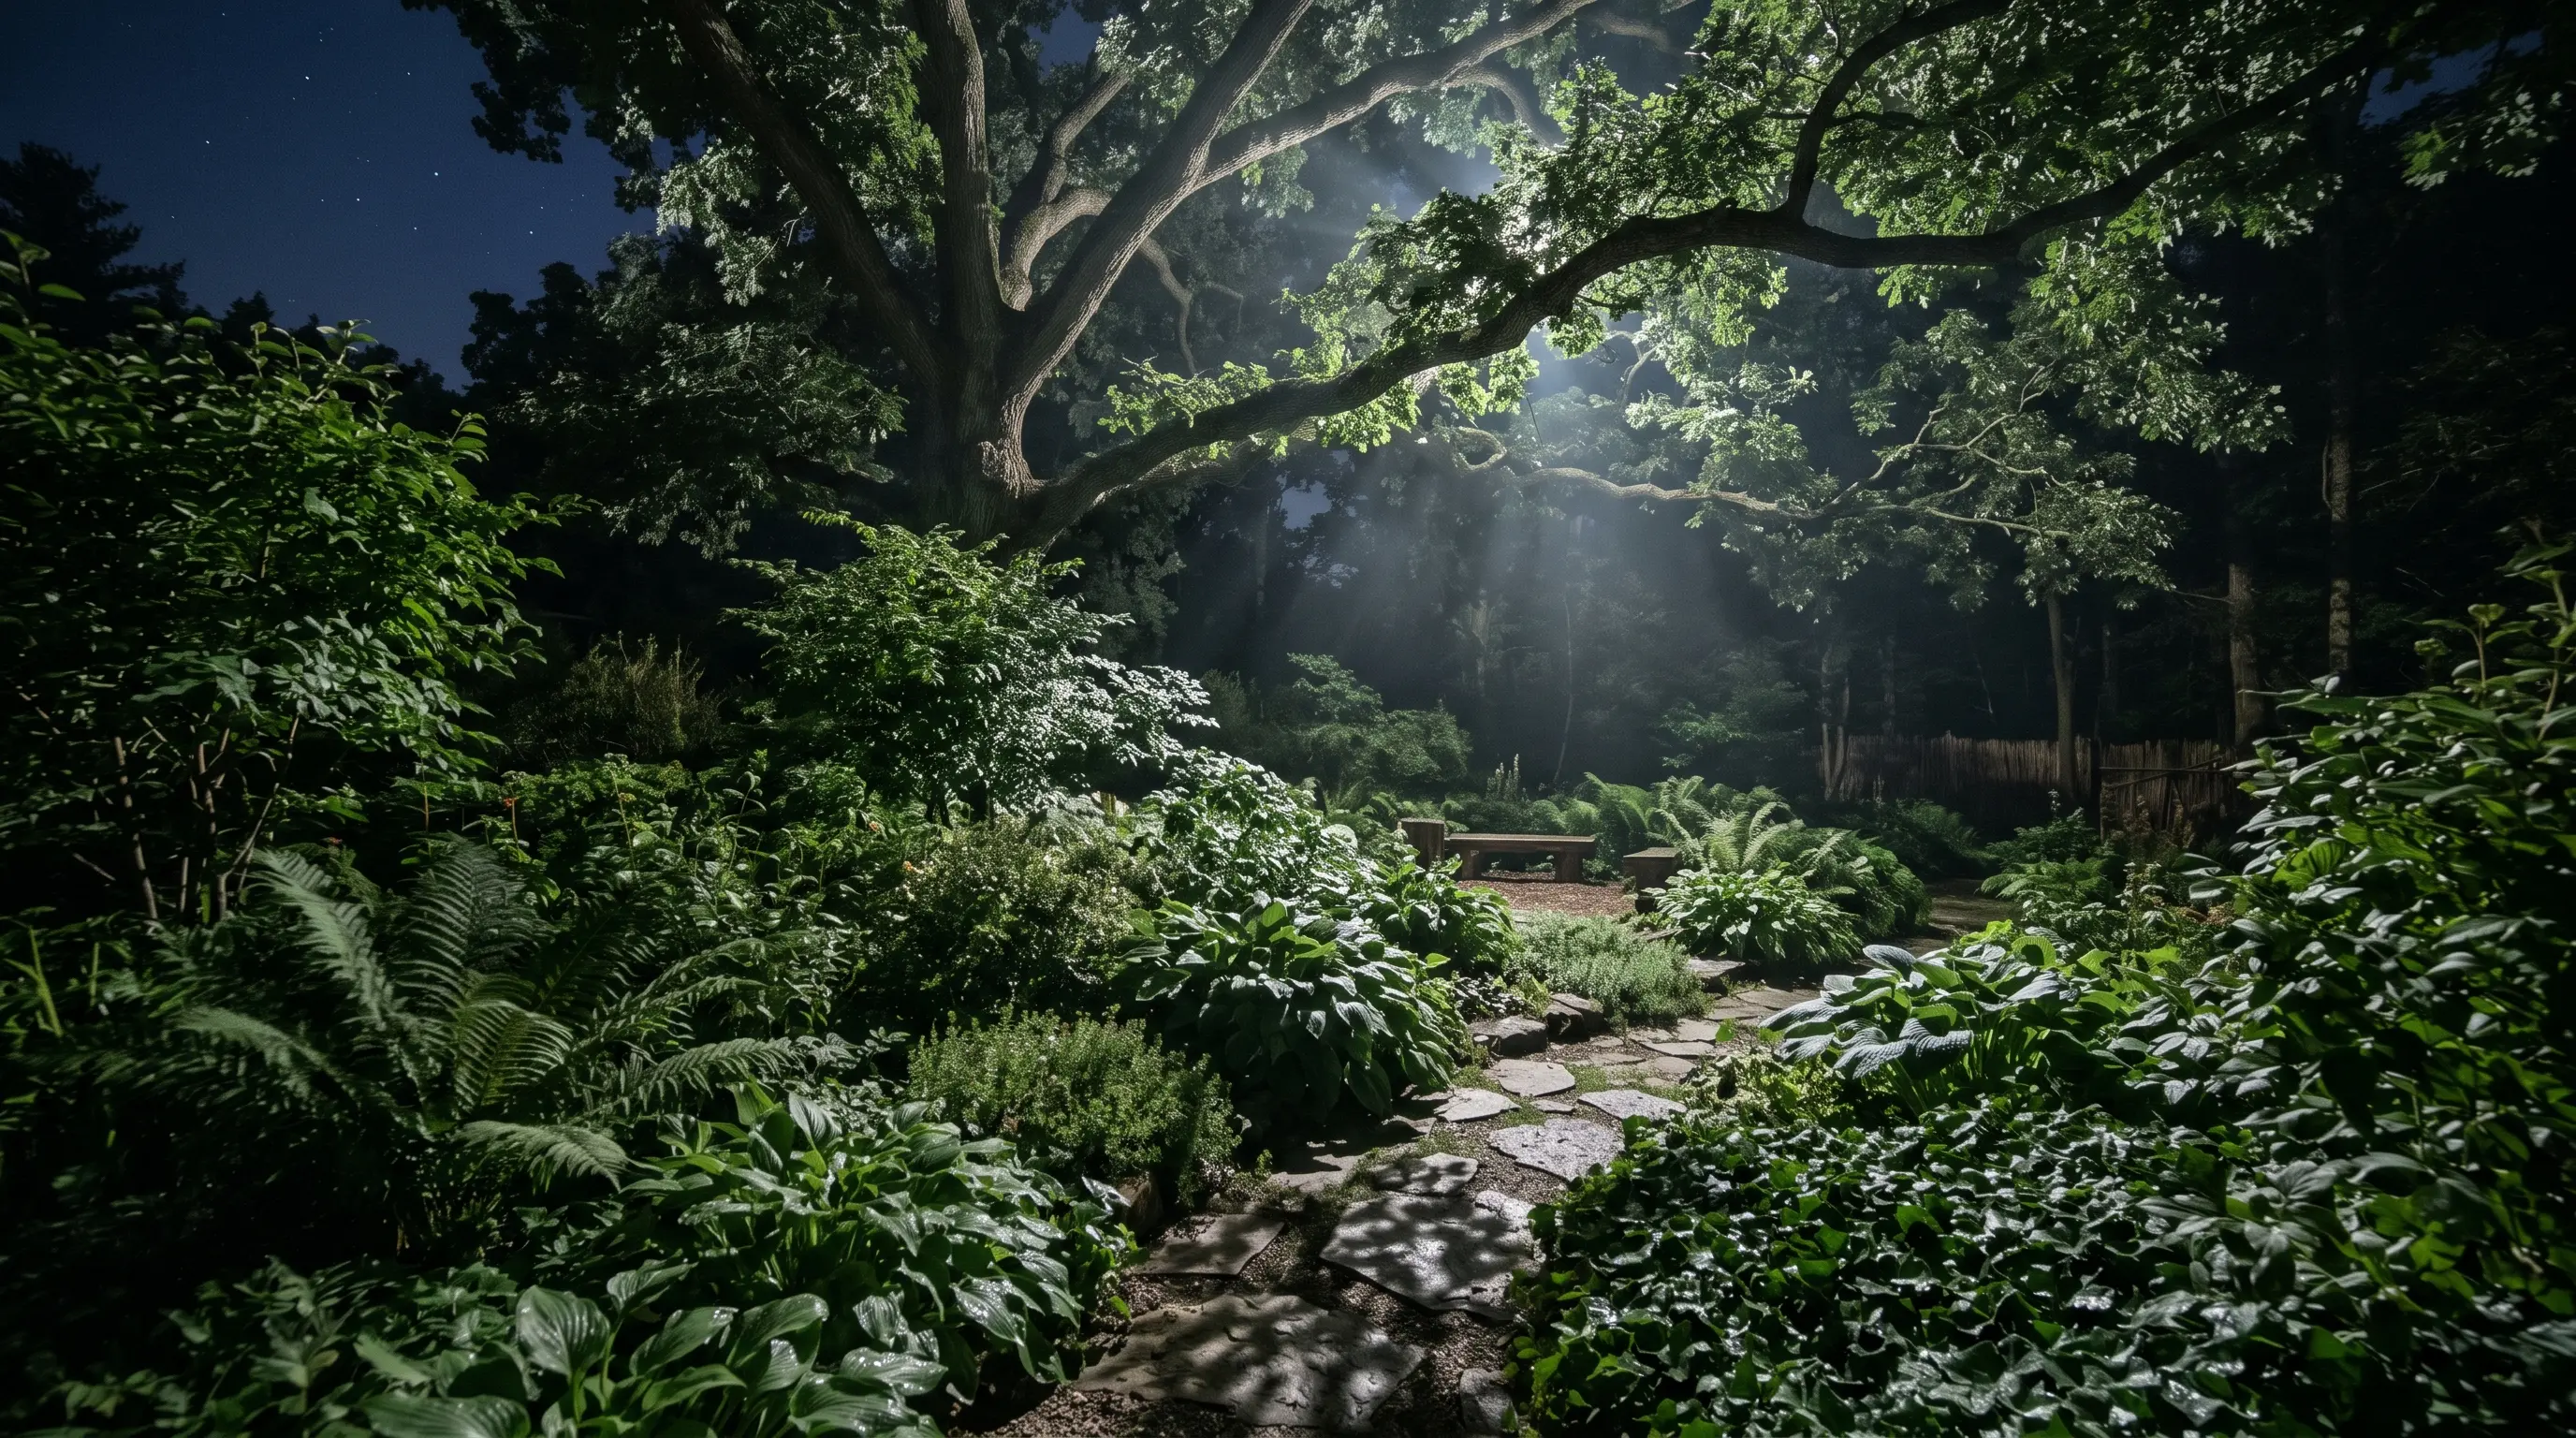
Most people put spotlights on the ground pointing up. To create true magic, you need to do the exact opposite.
- The Look: A soft, silvery light filtering down through the branches and leaves of a large tree, casting beautiful, natural moving shadows on the lawn below.
- Why it Works: It perfectly mimics the glow of a full moon on a clear night. Because the light source is hidden high up in the tree facing downwards, it creates zero harsh glare in your eyes when you walk through the garden.
- How to Style: Use cool-white (4000K) LED bulbs rather than warm yellow ones to accurately replicate the crisp, silvery color of actual moonlight.
🛠️ Tools & Materials: Cool-white (4000K) LED spotlights, ladder, outdoor wiring, tree-safe mounting straps.
🧽 Maintenance: Check the light fixtures annually to ensure tree growth hasn't snapped the wires or misaligned the beams.
⚠️ Mistakes & Safety Codes: You must mount the light fixture at least 20 feet high in the tree canopy! If you mount it too low, it will just look like a basic security floodlight.
2. Laser-Cut Shadow Lanterns

Light is beautiful, but the shadows it creates can be even more spectacular.
- The Look: Intricate, glowing mandala or geometric patterns painted entirely of light and shadow, resting beautifully on your patio floor or garden walls.
- Why it Works: Using metallic lanterns with complex laser-cut patterns transforms a single, boring light bulb into an interactive piece of art. It instantly adds a rich, bohemian or Moroccan luxury vibe to your space.
- How to Style: Place three different-sized shadow lanterns together in a dark corner of your outdoor seating area, or hang them from the lower branches of a tree over a wooden deck.
🛠️ Tools & Materials: Metallic lanterns with complex laser-cut patterns, clear-glass bulb with a single, highly visible filament (like an Edison bulb).
🧽 Maintenance: Wipe the metallic lanterns with a dry cloth to prevent rust buildup from morning dew.
⚠️ Mistakes & Safety Codes: Frosted bulbs will just create a blurry blob of light instead of crisp, sharp shadow patterns!
3. Hidden 'Hovering' Step Lights
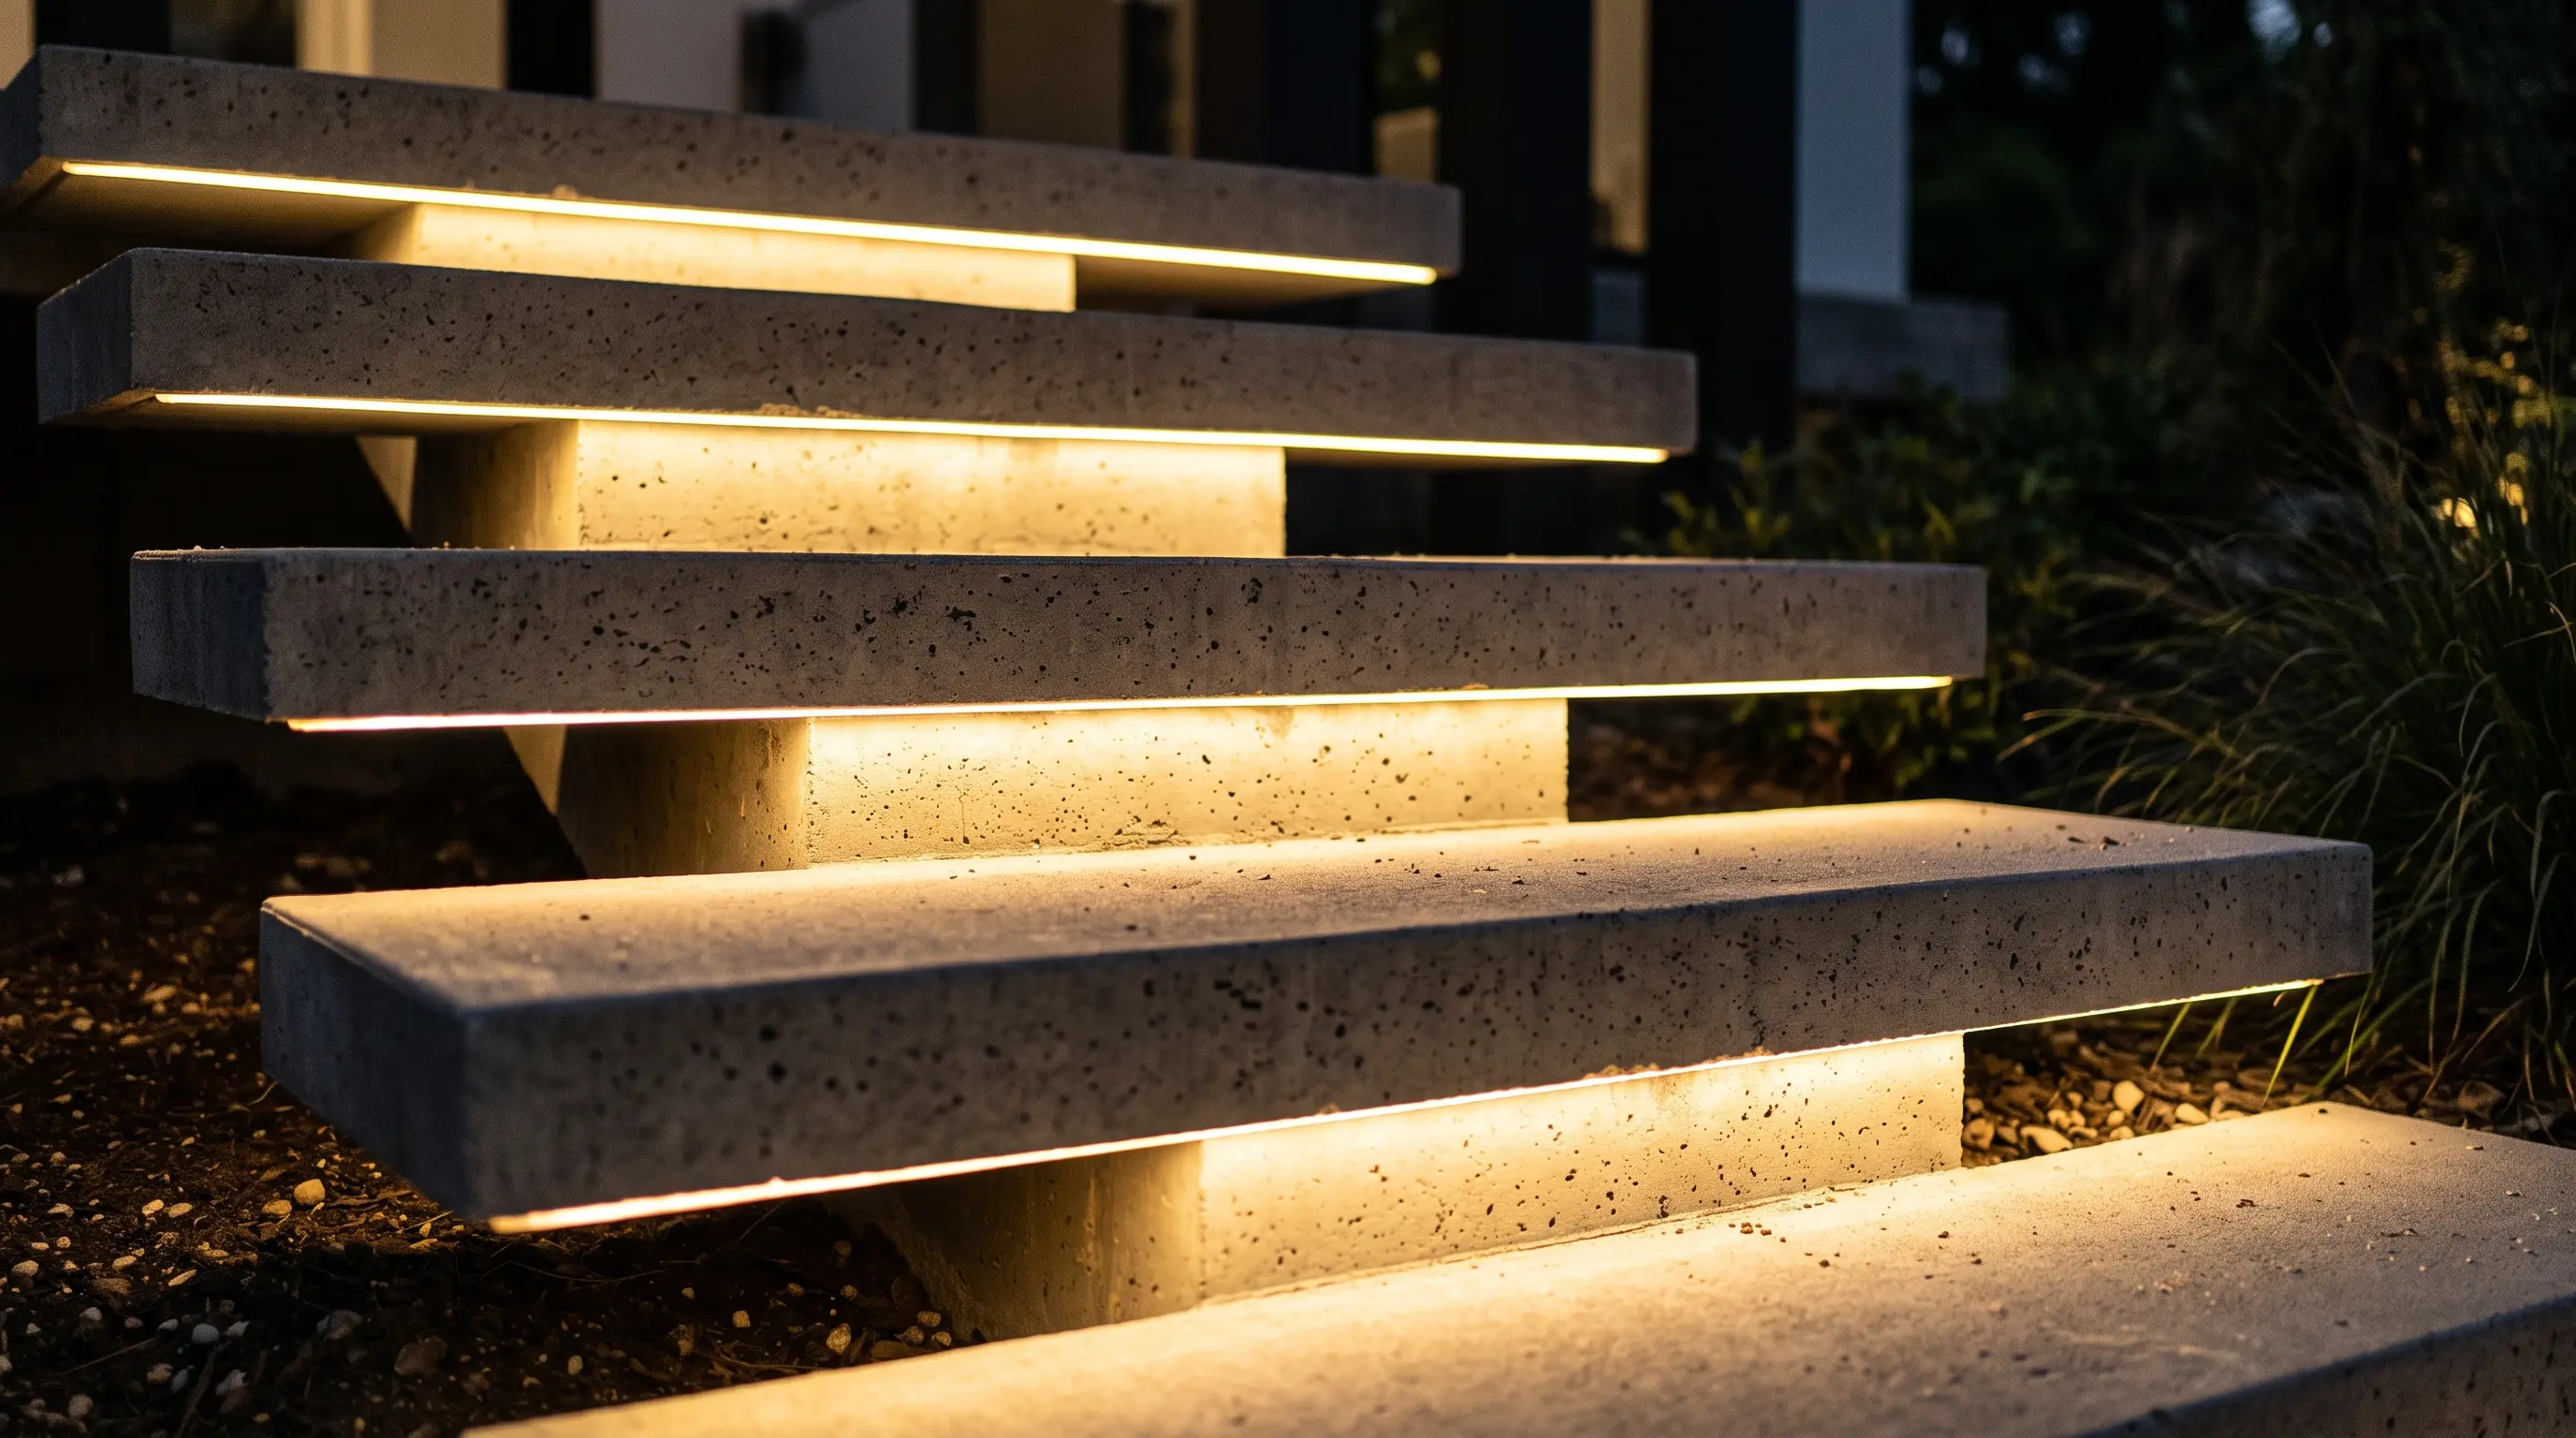
Standard brick or concrete outdoor stairs can look heavy, dark, and dangerous at night.
- The Look: Outdoor steps that appear to float weightlessly in the air, with a soft ribbon of light glowing out from directly underneath each tread.
- Why it Works: By hiding waterproof LED strip lights tightly under the overhanging lip (the nosing) of each step, the light source is completely invisible. It washes safely down onto the step below, creating a stunning optical illusion of floating architecture.
- How to Style: Keep the light color a warm, inviting white (2700K) to make the hard concrete or stone feel cozy and welcoming.
🛠️ Tools & Materials: IP65 Waterproof LED strip lights, aluminum mounting channels with frosted plastic covers, masonry drill.
🧽 Maintenance: Sweep spider webs out from under the stair treads to ensure the light ribbon remains unbroken and smooth.
⚠️ Mistakes & Safety Codes: Always install LED strips inside aluminum mounting channels. This diffuses the light perfectly so you don't see ugly, individual LED "dots" reflecting on the stairs.
4. Dramatic Plant Silhouetting
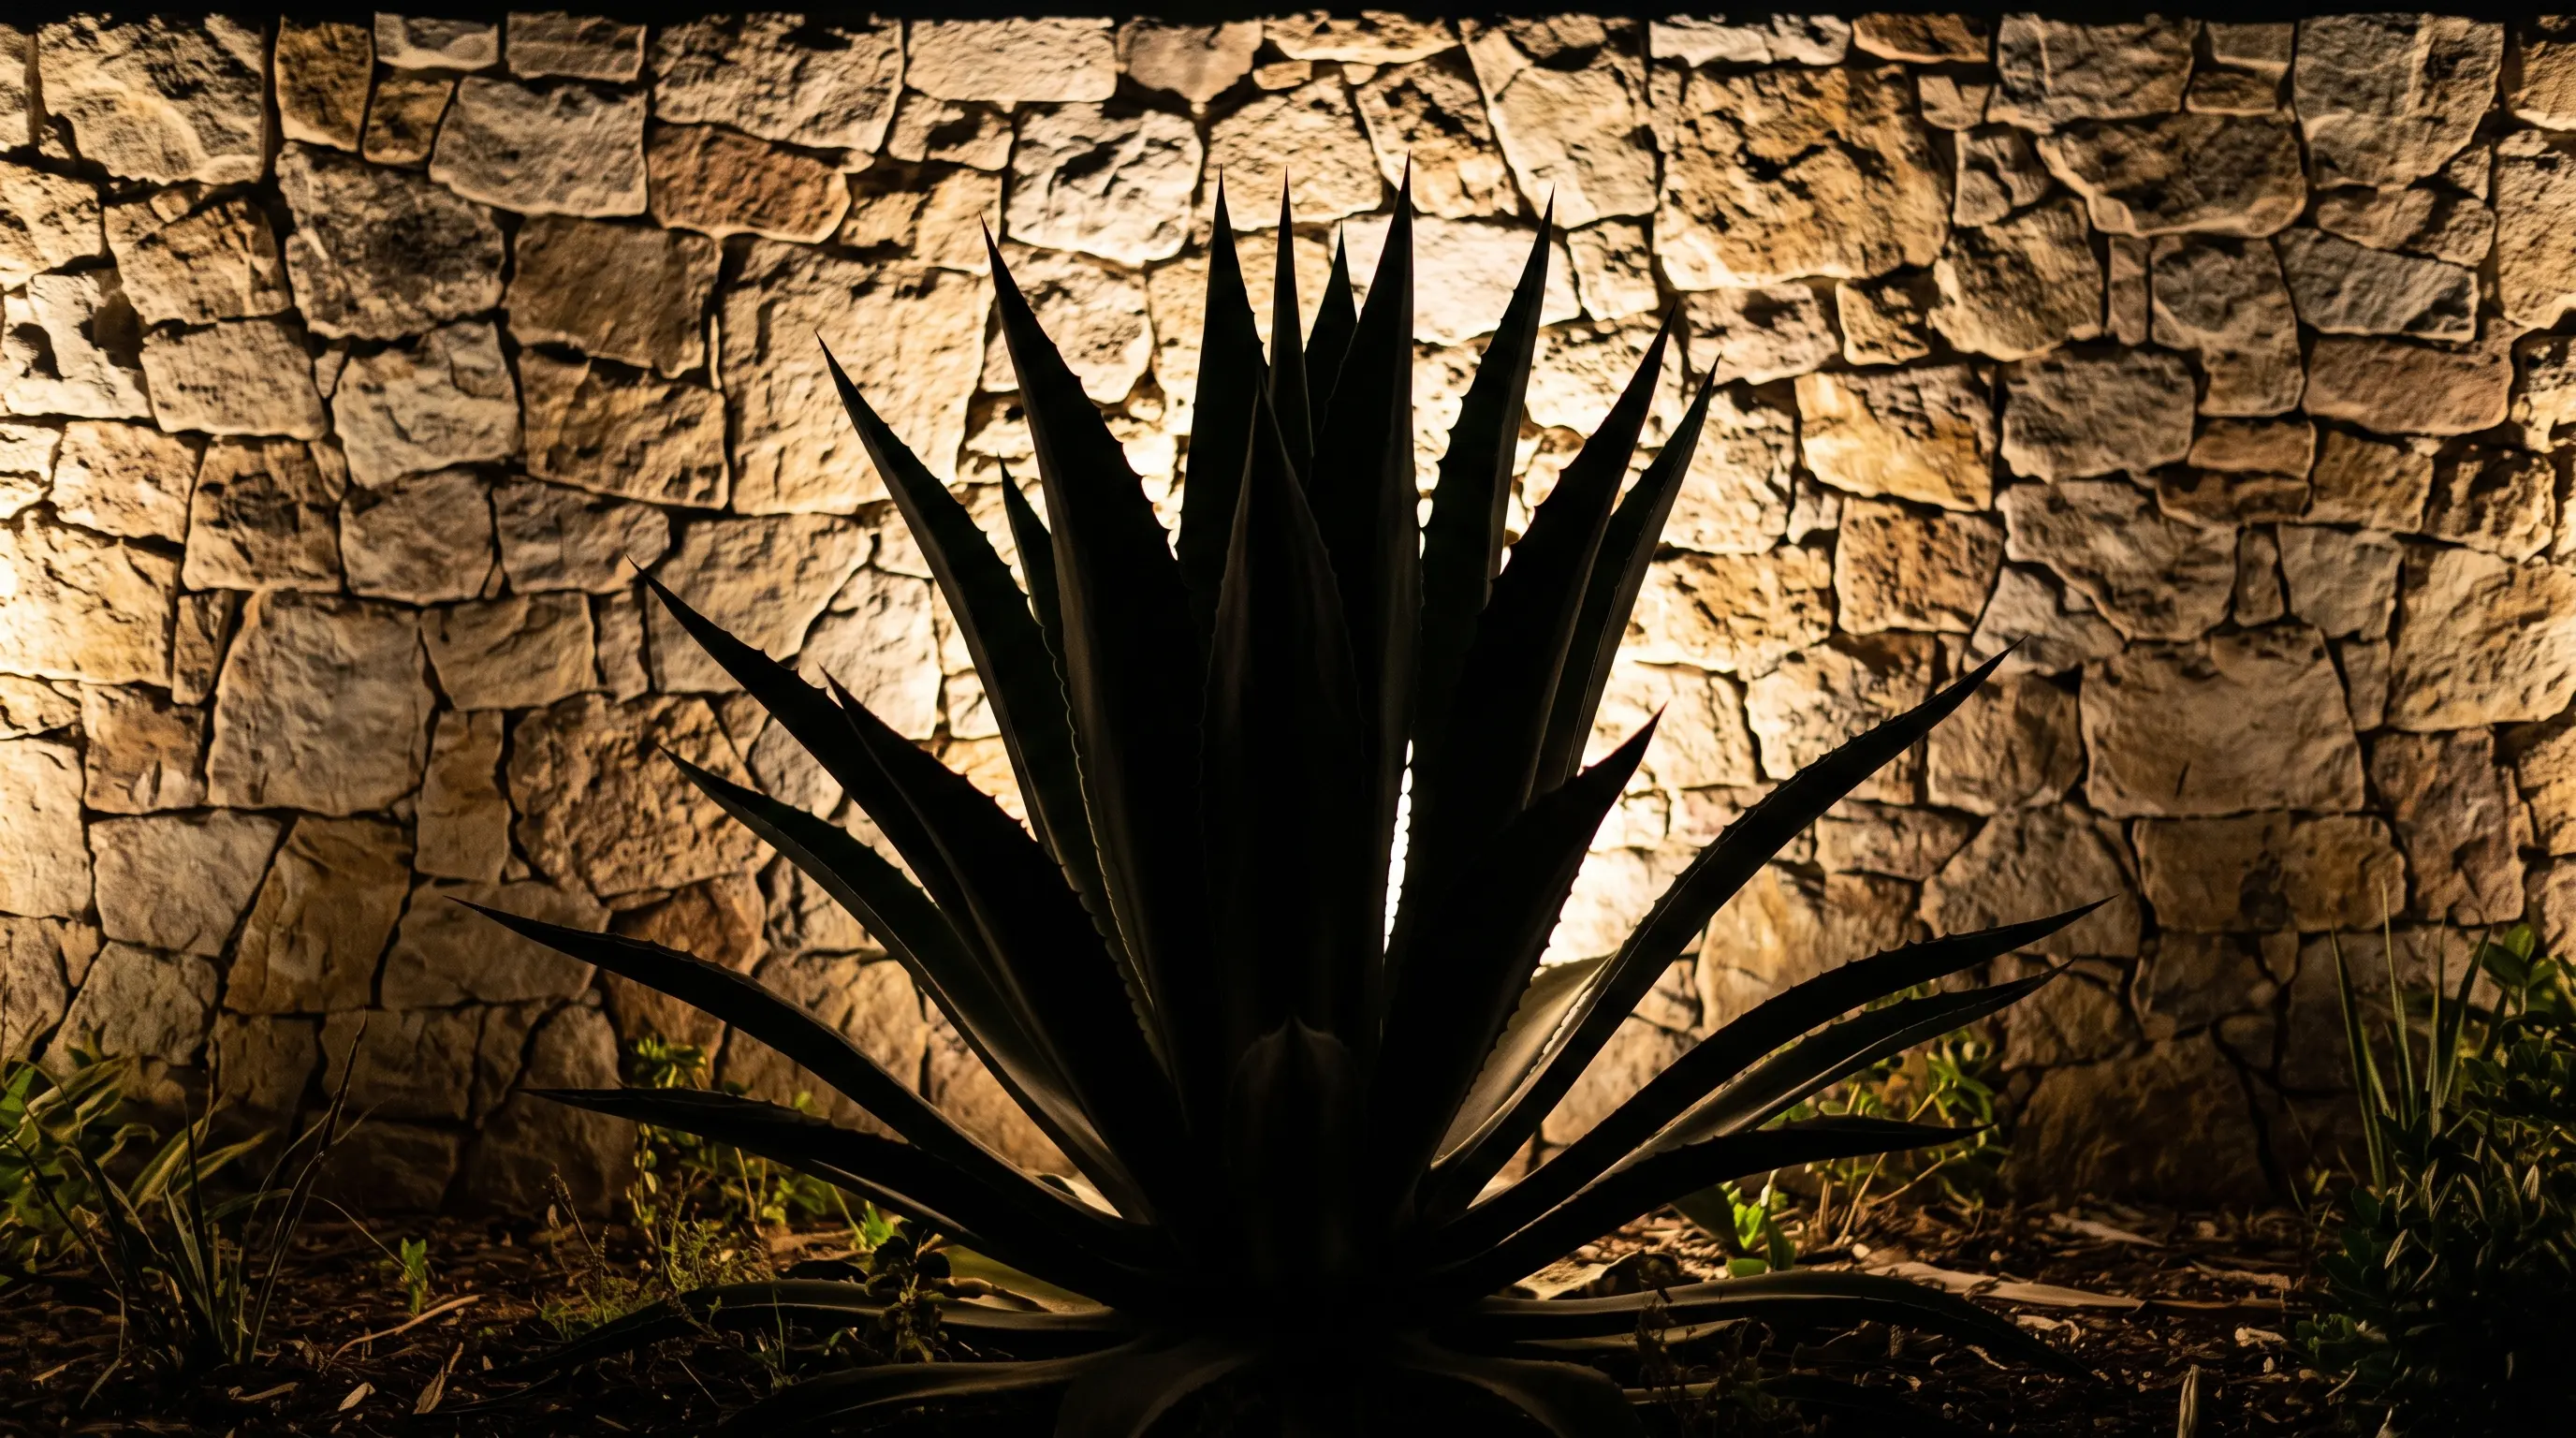
Sometimes, lighting a beautiful plant from the front actually ruins its texture.
- The Look: A striking, pitch-black shadow outline of a highly structural plant (like an Agave, Yucca, or Japanese Maple) glowing against a brightly lit wall behind it.
- Why it Works: Instead of pointing the spotlight at the plant, you place the spotlight behind the plant, pointing directly at the boundary wall. It completely removes the color of the plant, turning it into a dramatic, high-contrast piece of modern art.
- How to Style: This technique only works with plants that have strong, distinct architectural shapes. Do not use this on a messy, round bush, or it will just look like a dark, formless blob.
🛠️ Tools & Materials: Low-voltage outdoor ground spotlight, weatherproof extension cord.
🧽 Maintenance: Keep the plant properly pruned. Dead leaves or overgrown branches will ruin the sharp, distinct shadow outline.
⚠️ Mistakes & Safety Codes: Keep the spotlight close to the ground, angled upward at the wall. This will stretch the plant's shadow, making it look much larger and more imposing than it actually is!
5. Floating Glowing Water Spheres
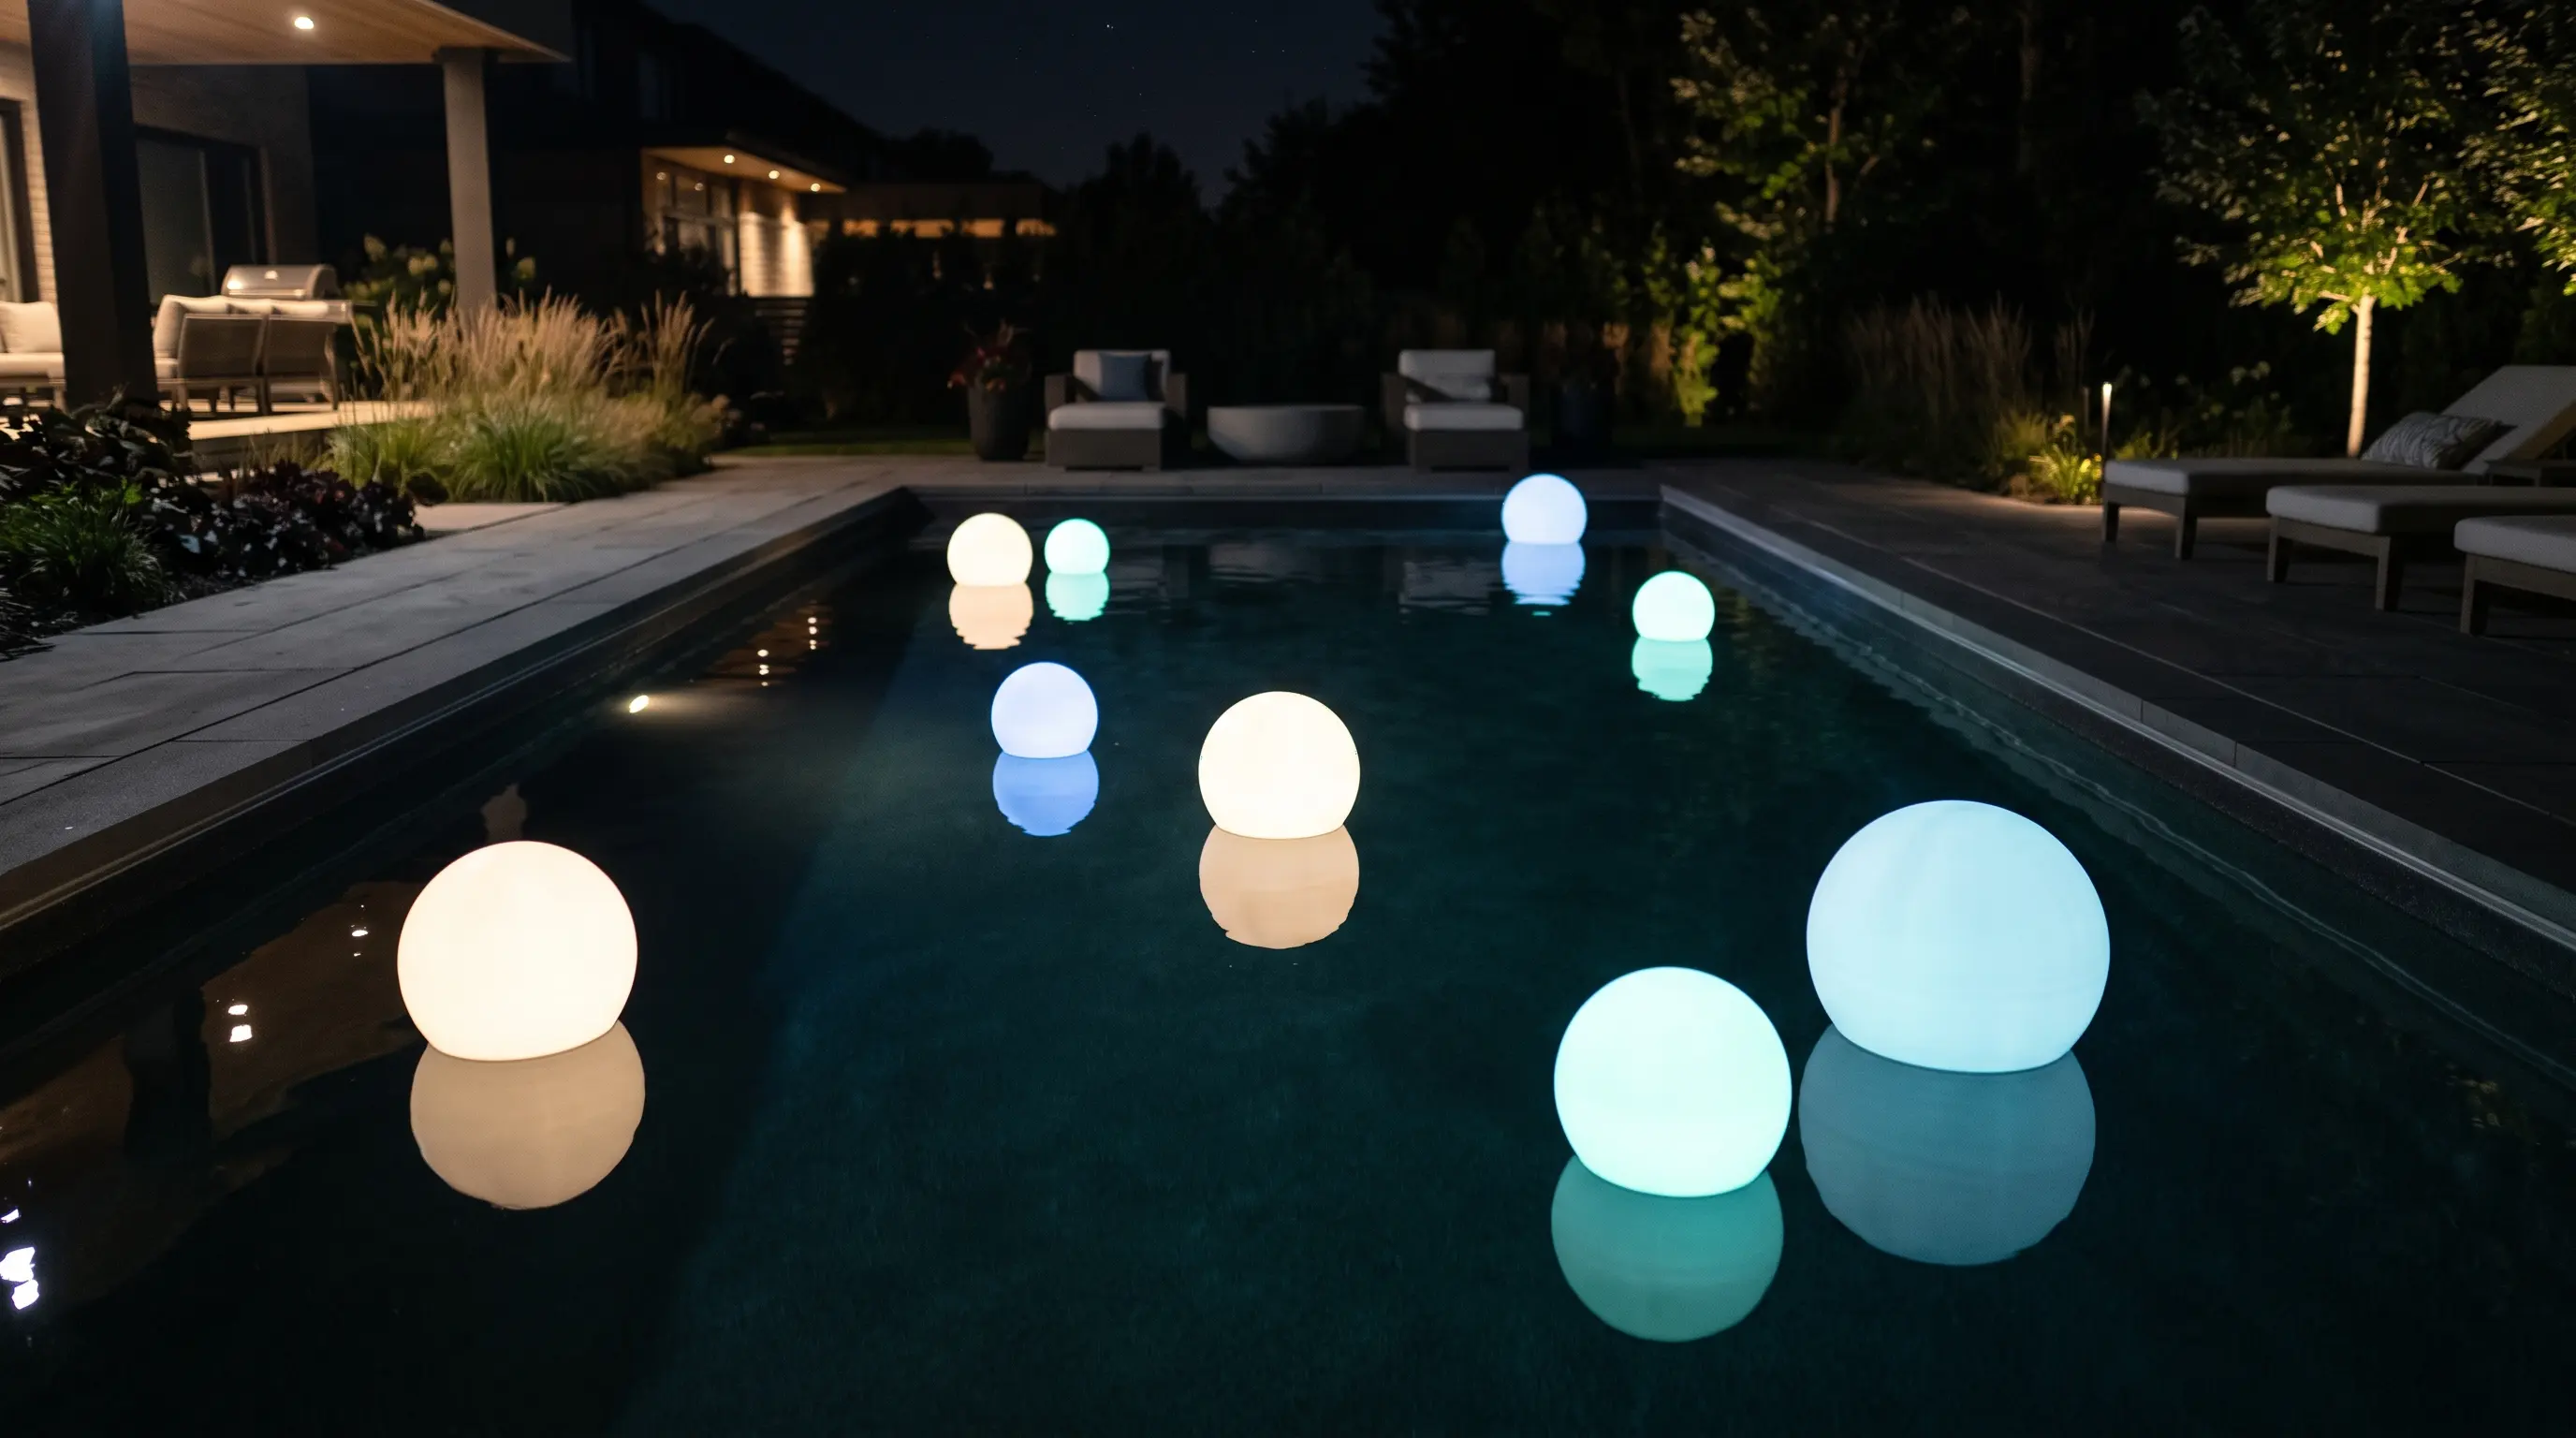
If you have a pool, a koi pond, or a water feature, you do not need expensive underwater wiring to light it up.
- The Look: Smooth, glowing orbs of light floating effortlessly on the surface of the water, gently drifting with the wind.
- Why it Works: These are 100% waterproof, rechargeable (or solar-powered) LED spheres. You simply toss them into the water. They require absolutely zero installation but instantly make your pool look like a luxury Ibiza dayclub.
- How to Style: Group them in odd numbers (3, 5, or 7) in varying sizes. You can use a remote control to set them to a crisp white for elegance, or a deep blue for a modern party vibe.
🛠️ Tools & Materials: Waterproof, rechargeable or solar-powered LED spheres, heavy fishing weight, clear fishing line.
🧽 Maintenance: Rinse the spheres with fresh water occasionally to prevent hard-water scale or chlorine buildup on the plastic.
⚠️ Mistakes & Safety Codes: If you live in a windy area and don't want them blowing to one side of the pool, tie a heavy fishing weight to a piece of clear fishing line and anchor the spheres to the bottom!
6. Grazing Textured Stone Walls
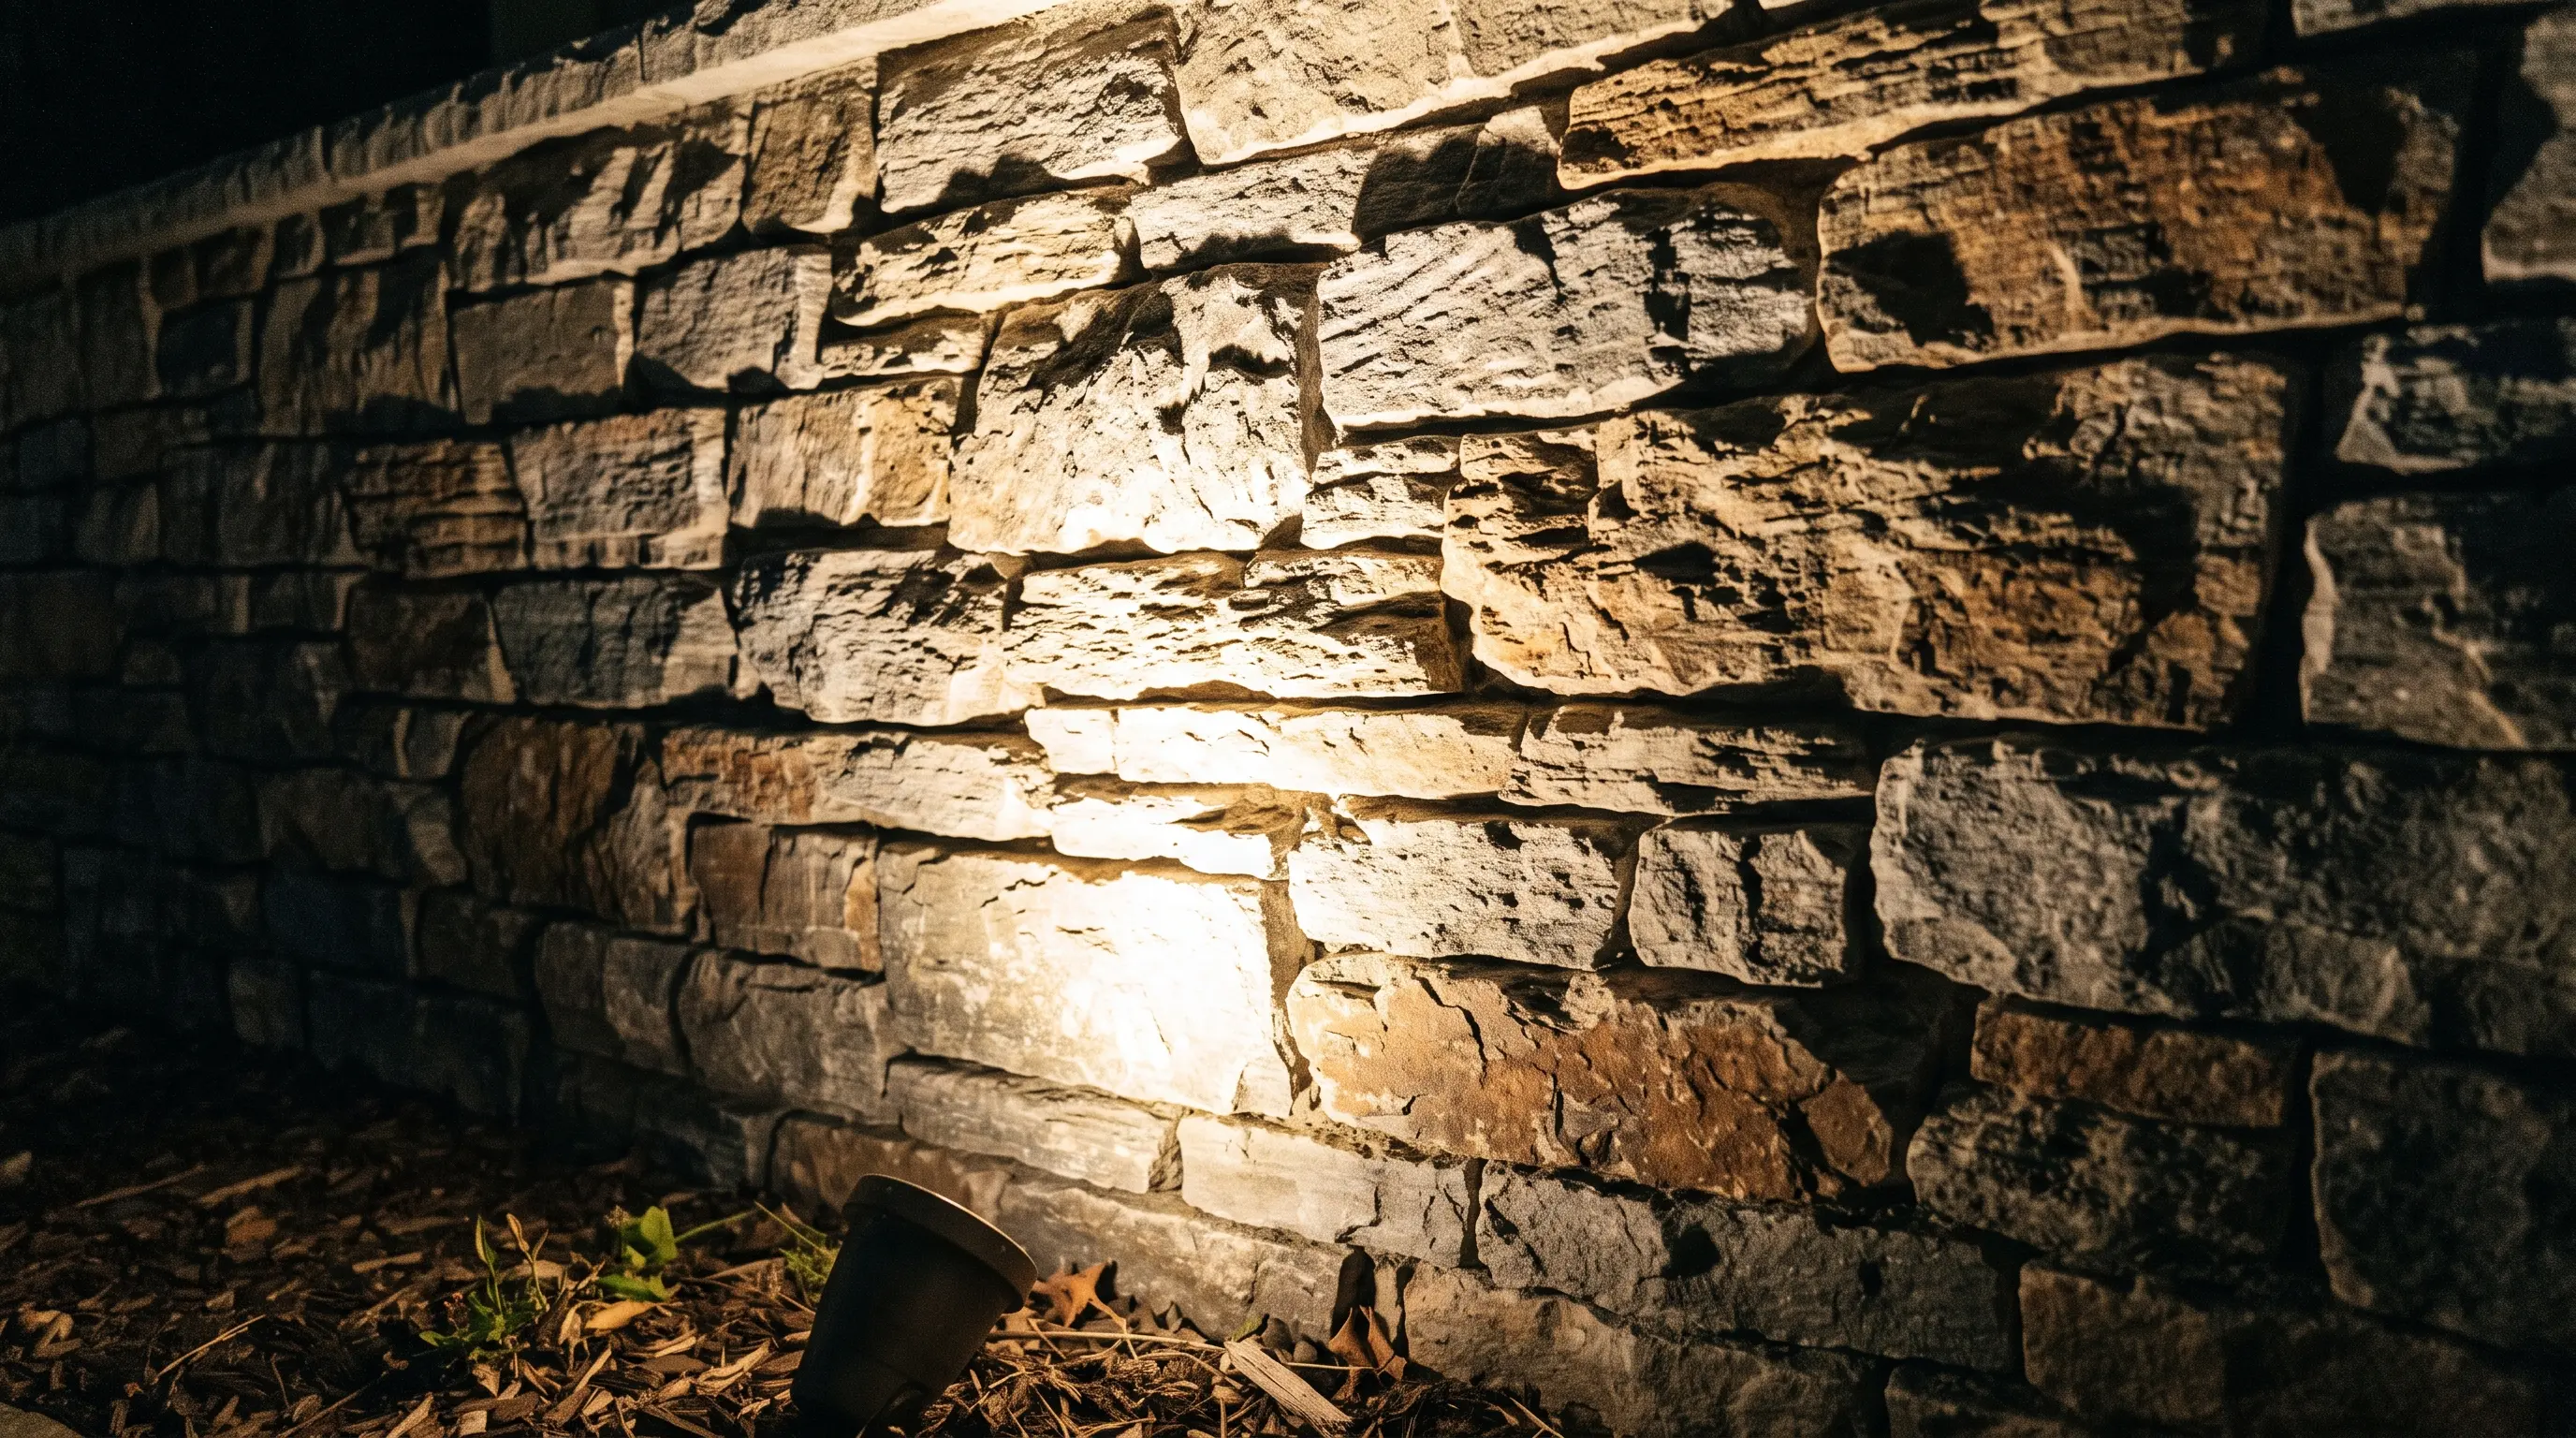
If your house or garden features a beautiful stone, brick, or timber wall, standard lighting will make it look completely flat.
- The Look: A wall where every single bump, crack, and groove is intensely highlighted by dramatic shadows, making the surface look incredibly 3D and rugged.
- Why it Works: This is called "Grazing." By placing a spotlight on the ground practically touching the wall (no more than 6 inches away) and pointing it straight up, the light heavily grazes the surface. It forces the texture of the stone to cast micro-shadows.
- How to Style: Use this technique on a stacked-stone retaining wall or a raw concrete boundary wall to instantly elevate its architectural value.
🛠️ Tools & Materials: High-intensity ground spotlight, landscape wire.
🧽 Maintenance: Clear fallen leaves and debris away from the base of the light to prevent fire hazards and blocked beams.
⚠️ Mistakes & Safety Codes: Never use the grazing technique on vinyl siding or a badly painted drywall! Grazing highlights every single flaw, so it will make cheap materials look terrible.
7. Submerged Water-Feature Uplighting
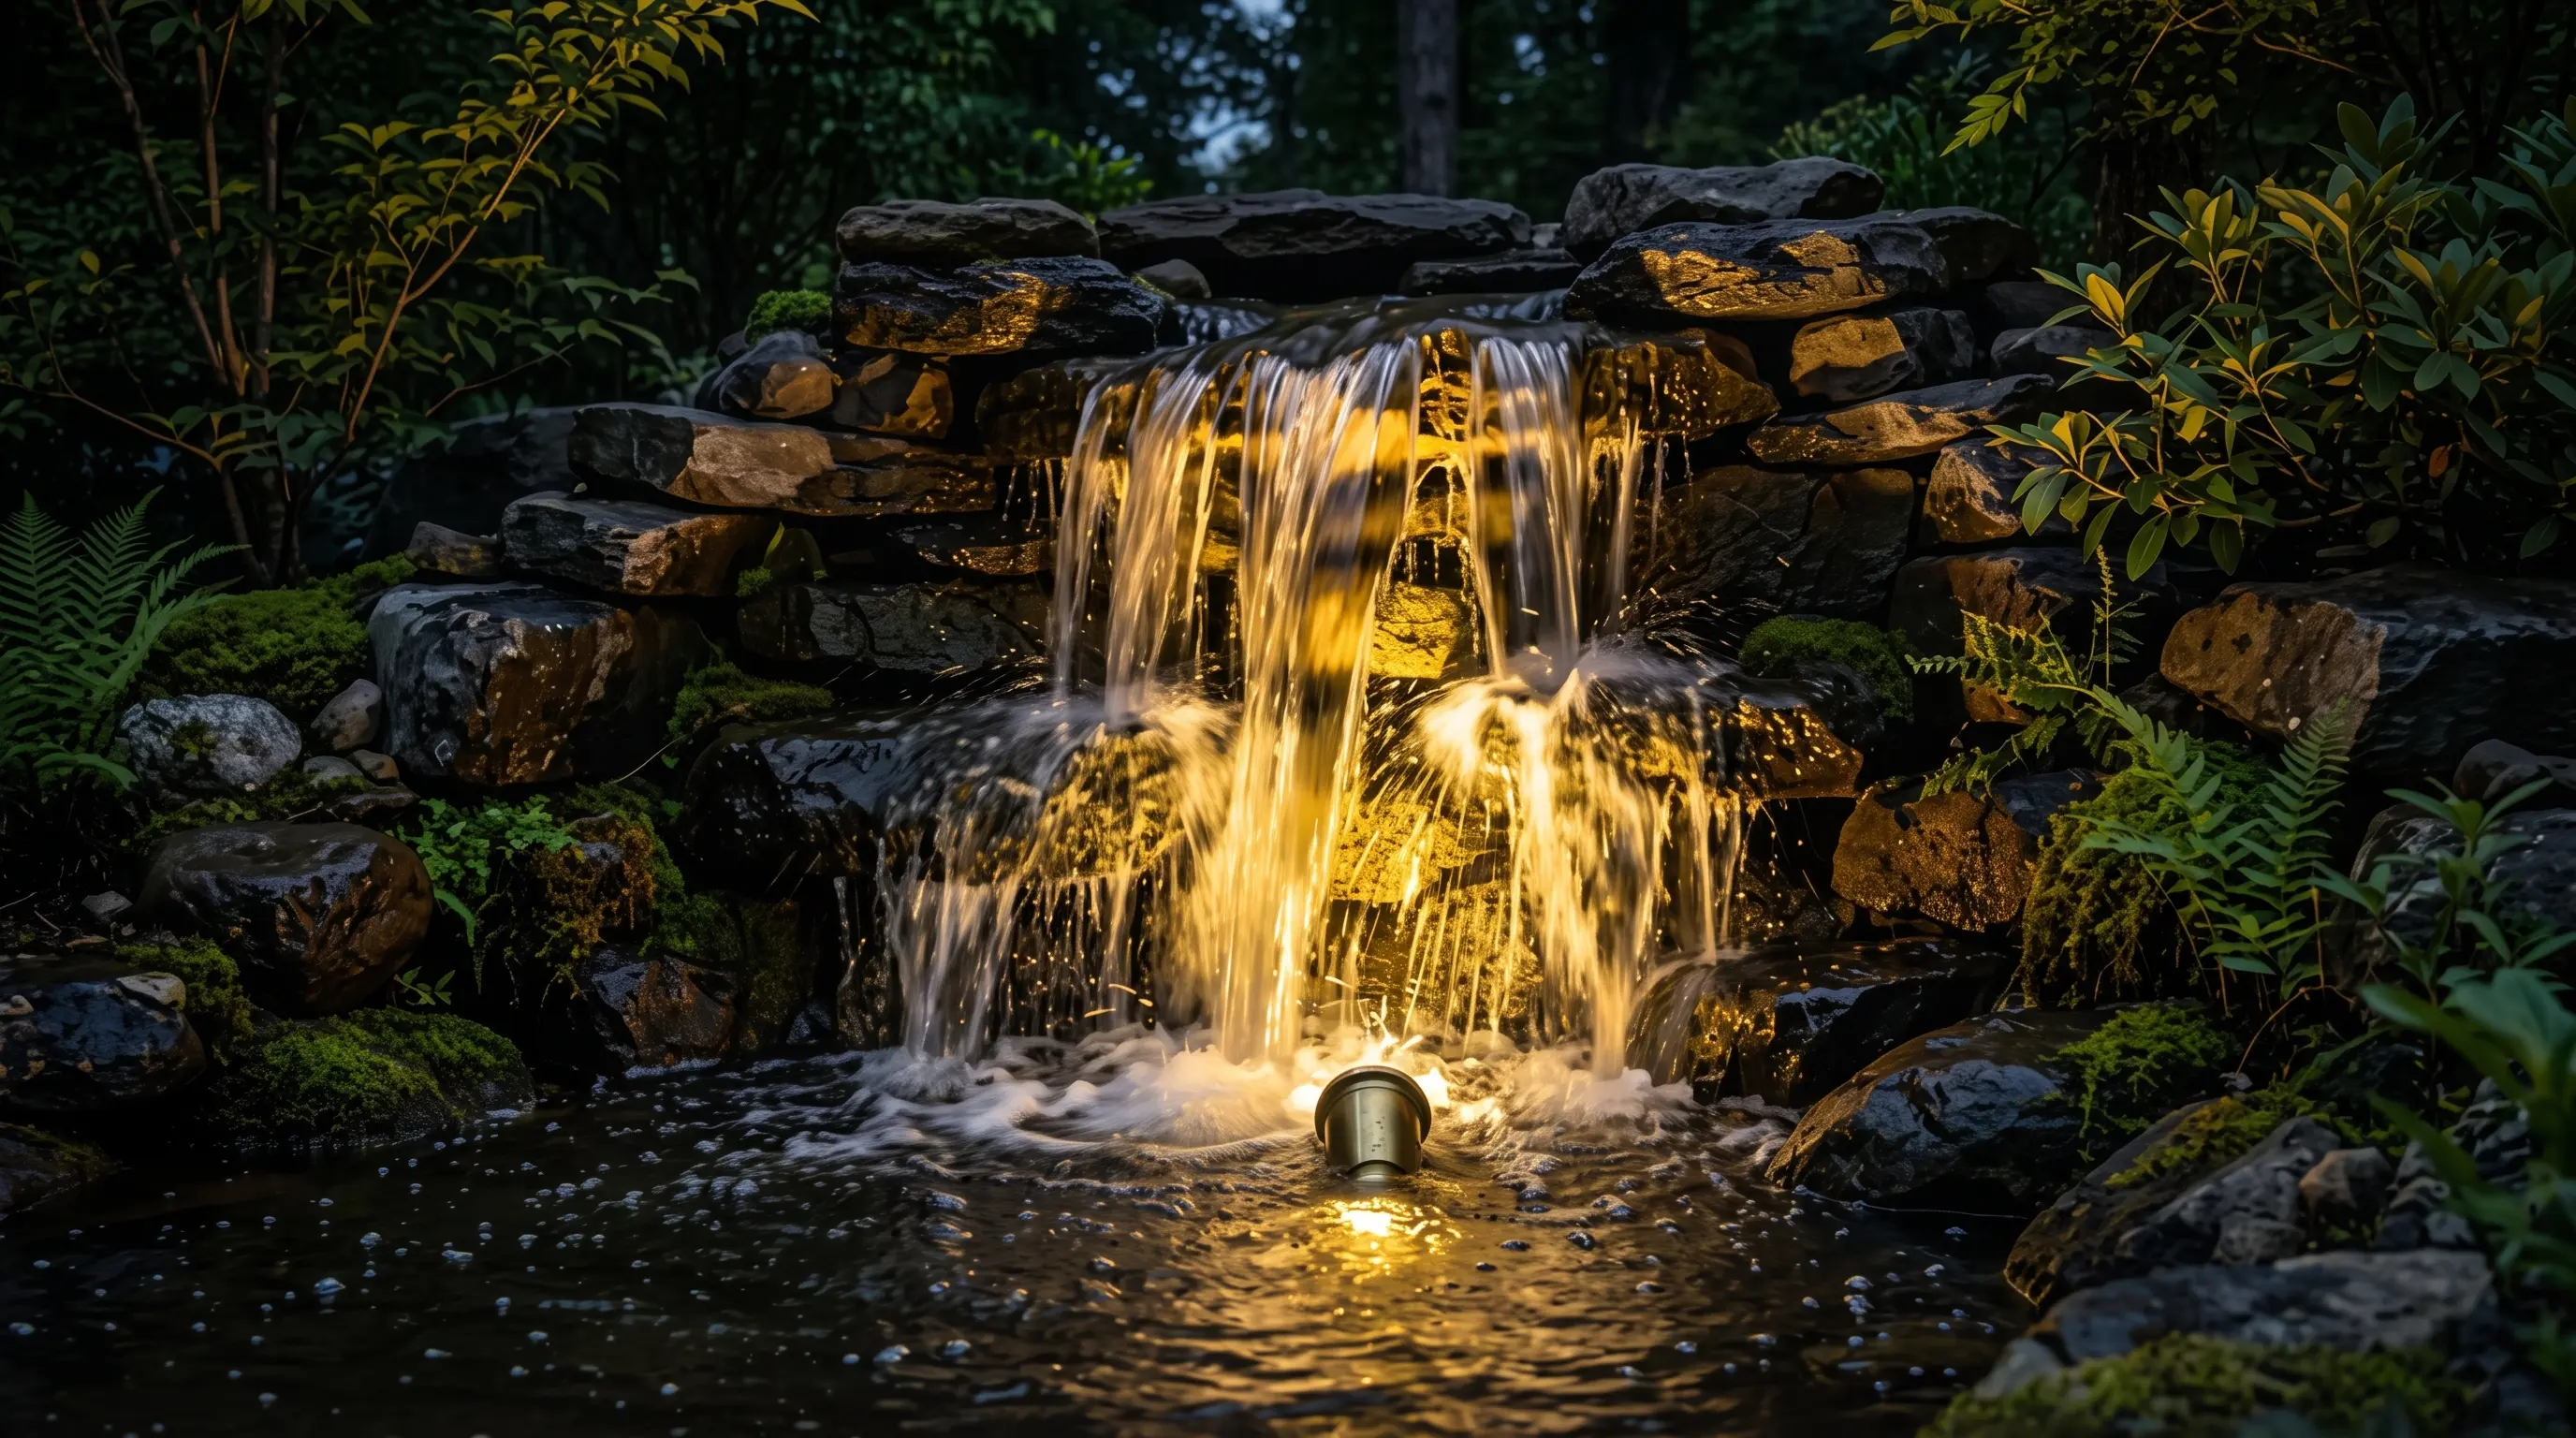
Water in motion is beautiful, but it completely disappears in the dark.
- The Look: A fountain or a small garden waterfall that looks like it is glowing from the inside out, with dancing, rippling light reflecting onto the surrounding walls.
- Why it Works: Instead of lighting the water from above, you place heavy-duty, waterproof cast-brass spotlights directly inside the bottom of the basin, pointing up through the falling water. The moving water acts as a natural lens, refracting the light beautifully.
- How to Style: Keep the light beam narrow (around 15 to 30 degrees) to focus the energy directly into the waterfall stream rather than flooding the entire pond.
🛠️ Tools & Materials: Heavy-duty, waterproof cast-brass or stainless steel spotlights, waterproof silicone wire connectors.
🧽 Maintenance: Scrub the glass lens of the submerged light monthly to remove algae, which drastically dims the light output.
⚠️ Mistakes & Safety Codes: Do not buy cheap plastic underwater lights! The chemicals in the water and the sun's UV rays will destroy plastic in a few months. Always invest in solid brass or stainless steel for submerged fixtures.
8. Structured Bistro String Light Canopies
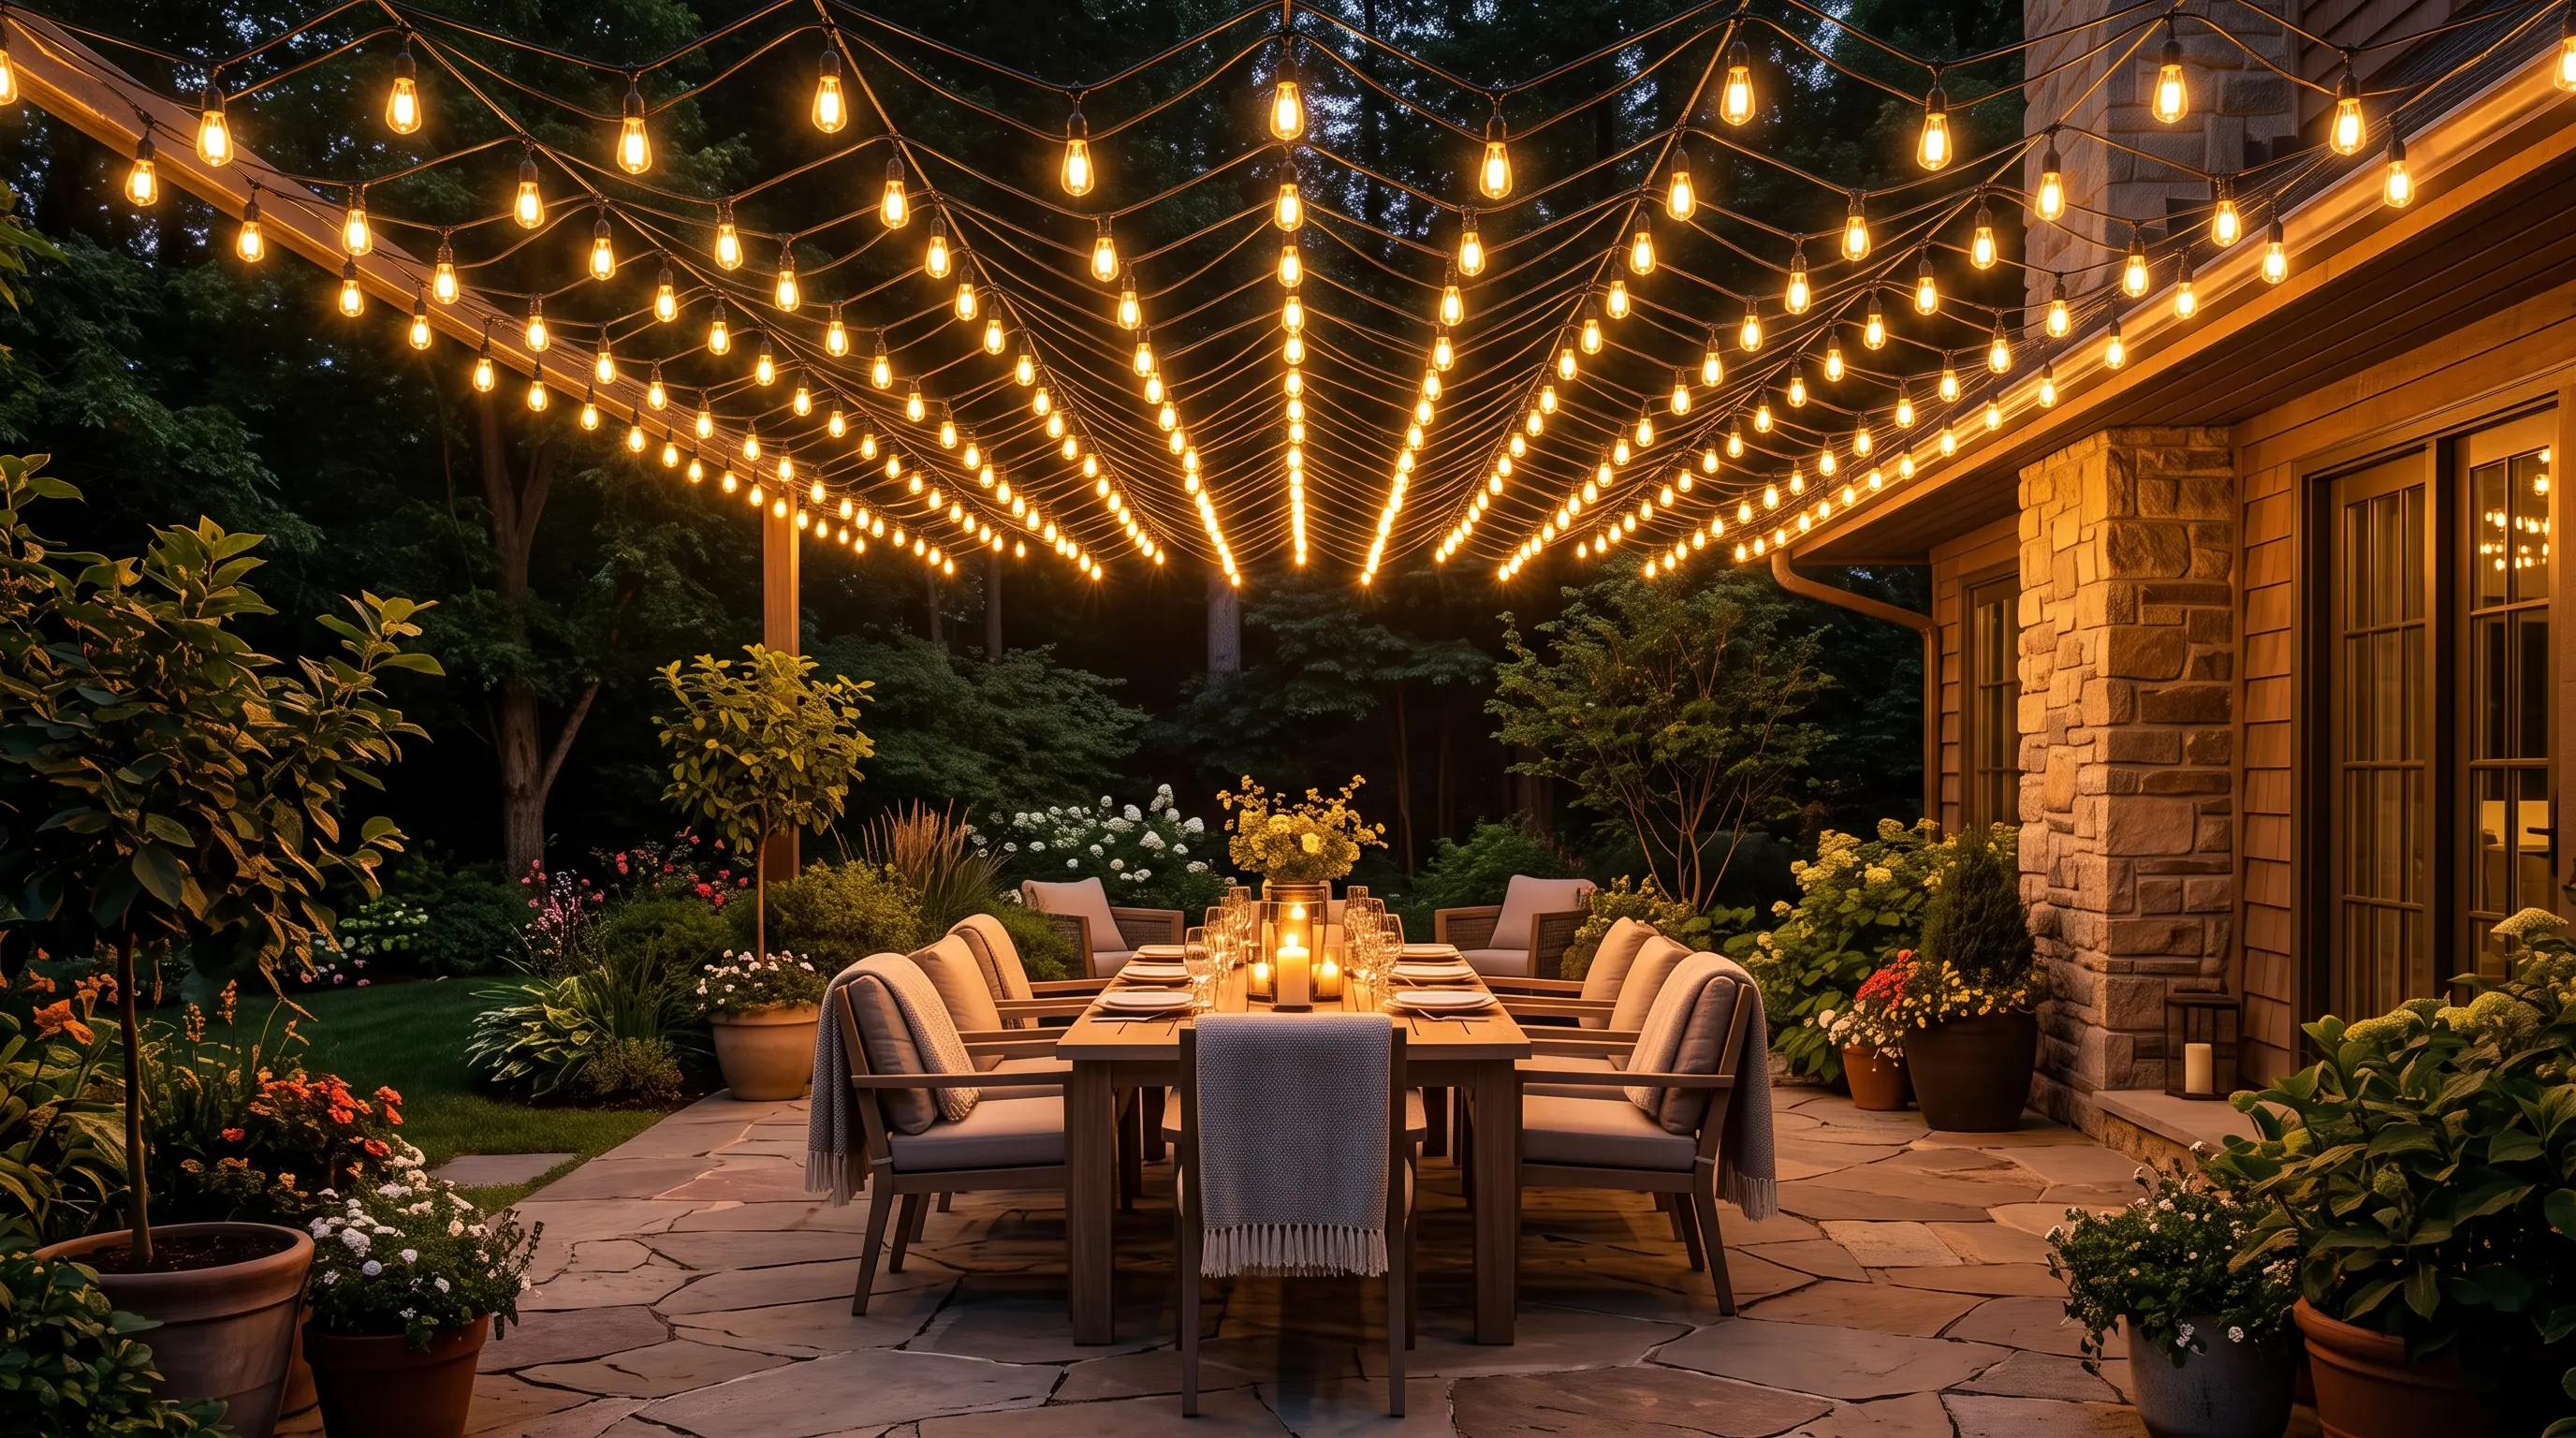
String lights are incredibly popular, but simply hanging them randomly from a tree to the roof looks messy and amateur.
- The Look: Heavy-duty, commercial-grade Edison bulb string lights hung in a strict, tight zigzag pattern to create a glowing "ceiling" over a patio.
- Why it Works: Pulling the string lights tight using a steel guide wire (rather than letting them droop lazily) creates a clean, architectural canopy. It visually lowers the ceiling outdoors, making the dining space feel incredibly intimate and cozy.
- How to Style: Install four tall wooden posts at the corners of your patio. Run a steel cable tight between them in a "W" or "Z" pattern, and zip-tie your string lights directly to the tight cable.
🛠️ Tools & Materials: Commercial-grade Edison bulb string lights, steel guide wire, tall wooden posts, zip-ties, exterior-rated dimmer switch.
🧽 Maintenance: Check the bulbs after major storms. Replace any dead bulbs immediately to maintain the seamless canopy look.
⚠️ Mistakes & Safety Codes: Always put your outdoor string lights on an exterior-rated dimmer switch! Full brightness is usually too harsh for a romantic dinner; you want to dim them down to a soft, warm glow.
9. Illuminated Planter Boxes

Lighting up the pathway is essential, but placing a light directly in the grass makes it hard to mow the lawn.
- The Look: Large, modern outdoor planter boxes that have a soft, seamless glow emanating from their bottom edges, washing light safely onto the pathway.
- Why it Works: By attaching waterproof LED strips to the underside of the lip or the bottom recessed toe-kick of a large planter, the planter itself becomes the light fixture. It provides excellent pathway lighting while showing off the beautiful pots.
- How to Style: Use large, matte black or concrete rectangular planters. The heavy, dark material contrasts beautifully against the bright, glowing light escaping from beneath it.
🛠️ Tools & Materials: Waterproof (IP65) LED strips, large planters, outdoor smart-plug.
🧽 Maintenance: Ensure the drainage holes of the planter are not dripping muddy water directly onto the LED strips.
⚠️ Mistakes & Safety Codes: Use an outdoor smart-plug to connect the LED strips. You can set a schedule on your phone so the planters automatically light up right at sunset every single day!
Quick Reference Cheat Sheet
- The Goal: Stop relying on cheap, straight-line solar spikes. Use light creatively to highlight textures, create shadows, and build atmosphere.
- The Techniques: Use "Moonlighting" (lighting from high above) for natural ambiance, and "Grazing" (lighting right against a wall) to show off heavy stone textures.
- The Illusions: Create floating stairs by hiding LED strips under the treads, or turn plants into modern art by silhouetting them against a lit wall.
- The Ease: You don't need a professional electrician for everything! Solar floating orbs, plug-in string lights, and low-voltage DIY lighting kits are incredibly easy to install yourself.
- The Rule: Always hide the light source! You should see the beautiful effect of the light, but you should never look directly into a glaring, exposed bulb.
Frequently Asked Questions (FAQ)
Q: Can I use indoor LED strips outside if I cover them in clear tape?
A: Absolutely not! Moisture in the air will quickly penetrate the tape, causing the lights to short out and potentially start a fire. You must buy LED strips explicitly rated "IP65" or "IP68" (silicone-coated) for outdoor use.
Q: Why do my outdoor solar lights stop working after one year?
A: Cheap solar lights use low-quality rechargeable AA batteries inside that lose their ability to hold a charge after a winter season. Simply open the casing and replace the internal rechargeable battery with a fresh, high-quality one, and they will work like new!
Q: Are low-voltage (12V) garden lighting systems safe to install myself?
A: Yes! Low-voltage systems step down your dangerous house power (120V/240V) into a harmless 12V current using a transformer. Even if you accidentally cut a low-voltage wire with a shovel while gardening, it will not shock you.
Final Thoughts
Creating a luxury garden at night is completely achievable, no matter your budget. The secret is simply changing your perspective. Instead of just trying to "light up the dark," think about how you can use light to paint shadows, highlight architectural textures, and mimic nature. By moving your spotlights behind your plants for silhouetting, hiding LED strips under your stairs, or hanging lights high in the trees for a moonlight effect, you can transform a standard backyard into a breathtaking, five-star resort. Grab a few low-voltage kits, wait for the sun to go down, and start experimenting with the shadows in your beautiful Vindy Space!